Easy 26" Crochet Braid Wig In Less Than 3 Hours! U-Part Install With Freetress Zoey Twist Braid
- Posted on 19 July, 2018
- Braids Hairstyles
- By Anonymous
Hey Fam! Today I am sharing how to achieve this super easy 26 inch crochet braid wig using Freetress Zoey Twist Braid! I achieved this style in less than 3 hours on my 4c natural hair. This U-part wig is super easy to do so it is perfect for beginners. The best part is that you can remove the wig at night! No more hair on your neck while you sleep. If you plan to give this style a try be sure to let me know down below in the comments. All products are listed here for your convenience. xo, Asea.
P R O D U C T S M E N T I O N E D:
Freetress Zoey Twist Braid 26" OT27 (7 packs)
Premium Oval Part Crochet Wig Cap
Latch Hook
On my channel, I create helpful tutorials that teach you how to accomplish a variety of beauty looks and even become a DIY handiwork pro. I encourage and empower through my weekly chats! Become a part of the positive ASEAMAE FAM by subscribing! NEW VIDEOS EVERY WEEK.
Mielle Organics Review:
The Mane Choice 4 Leaf Clover Review:
Protective Styles: https://www.youtube.com/playlist?list=...
Protective Styles: https://www.youtube.com/playlist?list=...
Connect With Me:
Instagram.com/aseamae
Facebook.com/aseamae
Twitter.com/aseamae_
Blog: aseamae.com
Save While You Shop:
-------------
Shop Irresistible Me | irresistibleme.com
coupon code: IrresistibleAsea
Shop Madam Glam | madamglam.com
coupon code: Asea30
Shop Feshfen Hair | feshfen.com
coupon code: Aseamae
Free products to review with Octoly:
https://www.octoly.com/creators?cref=h...
Camera:
Sony A5100: http://amzn.to/2ejoFk7
Nikon D5300: http://amzn.to/2dMxDB2
Editing Software: Final Cut Pro X
For business Inquires and Collaborations:
https://famebit.com/#/profile/AseaMae
FTC: NOT SPONSORED. I was not paid to create this video. Hair was sent by Shake N Go for my honest review and demonstration. All thoughts and opinions are my own. Affiliate links are used in the description box which means if you purchase a small percentage will support my channel. Your price is not impacted at all. xoxo, Asea.
#shakengo #freetresszoeybraid #freetressovalpartcrochetwigcap
https://www.youtube.com/shakengo
https://www.instagram.com/shakengo_hai...
https://www.facebook.com/snghair/
https://www.pinterest.com/ShakeNGo/
MUSIC:
Song Ikson: Last Summer
Music by https://www.soundcloud.com/ikson
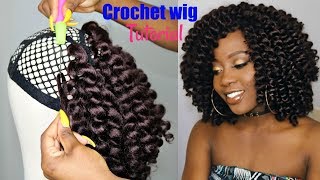
To achieve this, now I'm going to be using a 22 inch, brick block and the shake-and-go oval part crochet wig cap. This cap is designed with three combs two in the new part and one in the back, and it also has two strings which hold the? U part together as you construct the wig, so I'm going to start by putting this directly onto the wig block for my hair, I'm going to be using the free, Tris Zoe braid in 26 inches. I have a total of seven packs in the color ot 27. As you can see, these are wavy and they are twists. They also have loose hair at the bottom. Each pack comes with a total of 24 twists and the loop is pretty small. So I'm going to start by installing these on the back of the wig cap. Now the main thing that you want to make sure is that you don't overdo it in the back. You want to make sure that you have these spaced out really nicely. So what I did was I only used about five on the very last row and then I started doing Windows as you can see here, I'm applying the crochet braids in between where the gap is so that way when the braid Falls, it will actually cover up The blank spaces - and I just continue to do this window type of an install throughout the duration of the wig. So on the side here you see, I have five braids on the actual elastic band. There is a crochet type of a netting there, so you don't go through the elastic or anything. And now I'm going to fill in the little windows are the gaps in between the five twists, and I just continue to do that. As I work my way up, the way that I'm installing it is just making sure that the hair falls to cover up any gaps and also to cover up the actual wig cap, and I'm just continuing to use this method throughout the entire install. It'S very easy to do all you're gon na do is just you know, use the typical crochet method until you get to the top. That'S when you want to start to gather more hair in between your stitches and I'm gon na show you guys that in a second, so here I am I'm at the top, I'm actually making sure to get directly on top of the you. There is crochet netting there, so this is what I was talking about, I'm going to go through four holes and then install the crochet braids and pull it tight and, as you can see, it actually tightens up the cap, and you want to do this in a Multitude of places just to make sure that it's nice and fitting. So I did this with like about seven braids, just to make sure that the back was nice and tight. I used a total of six packs for the actual wig and I saved one pack for my leave out. So now here is my hair, it's nice and clean and I'm gon na braid it into a total of six braids. Going to the back and I departed out my u-part section, which I will also cornrow into four braids, going straight to the back. So here is my braiding pattern and now I'm just going to pin up the actual braids in the back, just to make sure that nothing is hanging and I can get my wig on easy next, I'm going to go ahead and put on this wig. So, as I said, there's two combs on the: u part one in the back! Actually I was wrong. There'S three combs on the: u part: two on each side and one in the middle, so I'm gon na start by applying the it to the back and pull it forward. And then I'm gon na secure the combs on the side and then secure the comb in the back. I'M also gon na secure the comb in the middle which I'm gon na put that directly on my um the end of my four braids, then I went ahead and I cut off the clear string now once you do this, you will notice that it's a little Bit looser so you're gon na have to adjust the combs again, and I actually added in two bobby pins on the you just to make sure that it was nice and secure. And I also put two bobby pins on the side of my hair, which I did not show on camera. Next, I'm gon na start to install my last pack of hair onto my four braids. Now you just want to make sure that you are putting these close together, but not too close, you want to make sure that you have enough braids to get the spaces that actually matter, and I'm just going to continue to put this one. The remainder of my hair and when I got to the end, I also put some braids right before the: u part, so that way they would lie over the wig, and this is the completed result. Es are not heavy. I love that it's on a wig. You can take it off when you go to sleep and just only have to sleep with your leaving VIN, it's our extremely long girl but they're very cute. I like them a lot. So let me know if you guys are gon na give this a try and I will catch you up in my next video. Don'T forget to Like share comment and subscribe.


Comments
AseaMae: Hey Fam! Back with a new new video! Would you rock 26”?! My hubby wasn’t feeling it .
Brenda Pearson: I love it and seems really simple to do. I'll be trying this really soon.
Tanisha Stevenson: Thank you so much for sharing this video. I have the same wig cap. I was waiting for someone to do a review on the cap. Beautiful job, just from watching your video I am ready to install my box braids. Thanks again
Joyce Clark: Great job I love it!! Thank you.
Kay Jones: This was really pretty I love the twist I never saw that style . Your natural hair is also beautiful. 1st time here great job.
Nysheka Martin: Thank you for this video! I will be making one of these with box braids
alicia s: New subscriber. Thanks so much for this. One of the easiest Ive seen so far.
Qiana Jenkins: I lovedddddd this. Looks super easy!!!
Misty Misty: Thank You For Sharing This Was Amazing In Creative ❤️
Joyce Clark: Great job. It is soooo beautiful on you.
charlie Remi: Wow looks so beautiful your talented will try this out
ms.chelle: Love this, knew there had to be a easier way.
N Max: So talented,it looks great
The Nose Ring Queen: thank u so much for being detailed
Felicia Cat: A much needed video!
Destinee Griffin: Love it ❤
lady Gore: This saves alot of time. Nice
Monique Wright: I love it.,! I actually thought you were going to add the lace to the front and sew it on there
Freely KeetWeet: Absolutely love your vid! I got a question, do the have a full crochet wig cap? Because I can't braid down on my scalp to save my life lol.
HollywoodCharityAuction.com: Very cute.
JASMINEology: Yessssss I’m going to try
ALL Elev8in' Vlogs: That's pretty neat
Cajun Bay: ❤️❤️❤️
P Compton: Looked like a lot of extra work to me, but you did a good job. I just prefer the regular crochet♀️
Mckayla Dudley: Was it lightweight?
Miko Dorsey: #longhairdontcare
Danelza Eteuati: Hey how are you. Sorry if I am asking a silly question, where do you purchase these online?
Ekwughaa Cynthia: how many pack did u use
Lekha D. V.: What if Im not african american and I want to wear this? I wanna hear opinions on this. I ask in a very respectful manner.
a Leonard: Long ...and Very heavy.