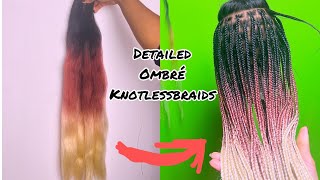
Large Knotless Braids W/ Heart Design
- Posted on 11 May, 2022
- Braids Hairstyles
- By Anonymous
Knotless W/ heart design
Products used:
1.Edge control, oil, mouse
Touchedbytiny.com
2. 3packs of expression pre stretched hair
3.shine n jam gel
How to achieve the perfect heart shape design::
SOCIAL LINKS
-Facebook: https://www.facebook.com/orlandobraide...
-Instagram: https://www.instagram.com/_touchedbyti...
Tiktok: Touched By Tiny
For all business inquires
Email: TouchedByTiny@icloud.
Thank you for watching
Yes, so you know we got the hearts or whatever and like you know what i'm saying the cola raised at the end, you know what i'm saying you see that not list chris. Can you do? That is your brain. Doing that i don't know, but mine is so book with tiny, just like a girl always period, hey everyone. Welcome back to my channel. It is your girl touched by tiny. Yes, we are always having a good time. That'S my girl, chantelle and we are doing her hair, a very, very cute hairstyle for her birthday. So what we doing you guys we're doing a large knot list with a nice cute heart on the side and to achieve that look you guys what i always find super easy for me. I like to section the hair in four parts, which is straight down the middle, and then i create my other part diagonal and then i create the rest of my parts. Y'All know i'm a huge advocate for pre-partying the hair before you actually get started. So i will have another video for you guys on how to achieve the perfect knot list. Um sections partings, however, you will whatever so right now you guys we are going to do the heart and if you need help or if you need step by step on how to create this heart, i will drop the link down below, to my other, step-by-step heart, Tutorial for knotless box braids, no matter the size, i always pre-section the hair into three parts and i immediately start to feed in the hair in small pieces. The reason for that is because i don't want to start naturally braiding the hair by itself. First, because i feel like that creates a weak foundation, so i automatically go straight into feeding it in, and this is how your knot, this box race, should look, and we also want curly ends you guys. So i did rubber bands the ends and just left a little piece of hair out, but now it is time for the nail cam y'all always talking about my nails, so i wanted to show y'all the new look once again you guys to achieve the perfect knotless. Look i like to section the hair in three parts and immediately i'm going to start to add the pieces of braiding hair and before i took the second part of the hair, i'm going to add the second piece. So, in total for her head, i use a total of five braiding pieces. I started off with three pieces first and then the other two is honestly is just for length do so far so good. This is how we look in this is how it's going. Okay and now it's time for me to slay this heart, you guys i'm leaving just a little bit of her baby hair out because, as you can see, um, naturally her baby hair are going to come out regardless. So i'm not going to od i'm going gon na just leave a little bit and i'm going to swoop the rest in and for my heart, i'm just going to part down the middle directly down the middle of the heart and section it kind of like diagonally And then all you have to do with the heart, you guys is follow. The pattern do do now. This is the cool part, so we have two dangling braids just hanging around. So all you're doing is you're going to take one piece at a time feeding it into the rest of your braids. You guys that's how you create or that's how you connect your heart at the end um now you can also have them with just two braids hanging and then connect them at the end. But this is the look that we're going for. She just wanted one braid to in at that side period. Now it's time to slay those edges, you guys, of course, i'm using that edge grip. Please visit touch by tiny.com, you guys and we are going to keep her edges super simple, i'm just going to give her a few little swoops, because baby girl do not want to deal with her edges. So look at that. Look at that now we are going to use some of the mousse. You guys visit touch by tiny.com and that's for the ends right now, because we want to make sure that the mousse is going to keep the hair intact of the curly rods. Because we are going to have the curly end, look and then dipping it in hot water, now we're using the hair almost all over the hair for those crazy, flyaways. Okay, we want to make sure everything is intact and everything is looking good now it's time. For that hair oil, okay visit touchmytiny.com, you guys this look is so fire. I just love it so much. Thank you guys so very much for watching. Please don't forget to like subscribe and hit that bell button until next time peace and love yeah. So you know we got the hearts or whatever and like you know what i'm saying the cola radius at the end. You know what i'm saying you see that not list chris. Can you do? That is your brain. Doing that i don't know, but mine is so book with tiny, just like a girl always period

Comments
Racquel Brown: Nice so loving this. so so neat n pretty
Shaunette Davis: Love it
Merline Duffus: So lovely Tiny
Lisa Jones: Beautiful
prophetess kaaliyah elias: omg so cute getting it done rn
DYMAND TROPHY: I love it
Tracy Kennedy: The braids look good and God bless your hands
Erin Barrow: Very pretty tiny
denden cutie_23: Nice love it
TaKari Bre'Shae: If your clients not promoting you like this WHAT ARE THEY DOINGGGG? so pretty & neat!
Nicole C: Fabulous
no bye: I wish you were my braider smm ur so talented! <3
luxbxddie_Shire: Can yu please do a video of how you can style these type braids please
DYMAND TROPHY: Nice
Dayjah Kernahan: Did you put a rubber band or elastic to the end
Hunni and J TakeOva: How much would you charge for this kinda style with hair included
Alina Parker: The background music reminds me of a simpler time❤️