The Best & Easiest Hairstyle: 2 Knotless Braids! *Detailed Instructions
- Posted on 12 August, 2022
- Braids Hairstyles
- By Anonymous
This is THE best and easiest hairstyle! You can dress it up or dress it down. When you try it, share and tag me on IG!
@MsHairandHumor
If you want to know what hair I use, please download my Beauty supply cheat sheet:
https://mshairandhumor.samcart.com/pro...-
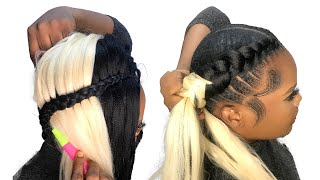
Now y'all know i love some big hair, but this summer i spent it in two braids. This is by far one of my favorite summer hairstyles and because i keep getting so many questions about how to achieve it, i decided to record a tutorial hope you enjoy. So the tools that you will need felicia leatherwood brush. This is my absolute favorite brush. This is what i used to detangle. This is what i use to re-establish and reposition the braid into place once i'm ready to braid a regular old bristle brush right, i'm not going to zoom in too close y'all know what a regular brush is an edge control brush. So this brush is my baby dress. Now this edge brush is 15 and before you protest, let me just tell you: this edge brush is really the best edge brush in the universe. It'S not a toothbrush, it is an actual brush. It'S bristles on one side and a um, like you know, a comb on the other side best brush best investment spend the fifteen dollars. All you need is one you don't get anything else, get these two things regardless right this product. So i was saying in my stories this product is my product of choice. I don't sleep with the braids, i take the braids out every night and i crisscross my natural hair and pin it up in the morning. I re-brush it like i said so. I don't want a product, that's going to be heavy and stuck to my scalp. I don't need it to stick, because a part of the beauty of the braid is the fact that it looks so natural um, and so i like to use a product that is i'll put it on my hand. It'S like butter, it's lotiony, it's soft, it's brushable! Um - and so this is i'm going to preface this by saying - i am not paid to promote this product. It'S just my product of choice. You can use what you want. Um, the green eco styler gel is also a product that i have used, but i tend to like this pure o. It is premium butter, neat braid, it's a conditioning shining cream. Again this is not a promo. This is just a fact. This is what i use the last thing that you need and, of course the most important is the hair. I use regular braiding hair. There'S nothing fancy, i'm not about to see him promote a specific braiding hair brand use, a braiding hair that you are familiar with that you like um. If you really really need suggestions, i actually have a cheat sheet that i sell that talks about exactly the type of braiding hair i use, but this is literally just braiding hair kanekalon, nothing, fancy um, but the hack, because you are here you're gon na get the T the hack about the two braids style that i personally do, that gives a more realistic look. Let me show you, let me show you you mix textures, so what i do is i buy a braid, a pack of braiding hair. That'S regular, like i said, brushable braided kanekalon here and then i buy a second type of hair. That is a different texture reason being if you are natural like i am, and you see from all the brushing you can see my waves. You know you get a little sea sick, you see all the sea sickness having the two textures is. What will um make the braid also look realistic. So, like i said, i start on clean hair right, i establish my middle part is: have your hair set up right? I already have my hair pre-sectioned into three sections, just three strands to a braid, so i use three sections. It'S my favorite hairstyle. I don't know roxy might not be out for a while y'all last thing i want to say i establish the size of the braid. I want based on my hair right. That'S another hack, a hack to it. Looking realistic, it's not a hack in the in the way. You know like it's a secret, it's just when you match the thickness of the braid to the thickness of your hair. It makes it look more realistic. You see all these puffy ends. I know it's gon na i'm gon na need more hair to cover my hair, so my braid is gon na, be just like what i showed you in that picture. I rather have a um a thick juicy braid. Does that make sense, so the size of that braid is not just because i wanted a big braid, even though i like fat braids, but it's also because it blends best with my hair. So keep that in mind when you're trying to create this look on yourself. You want it, the point of the style is for it to look realistic so that it so that people are confused, make sense cool all right so that boom so like, i said i predetermined the size of the braid, and i have three strands bro, i'm just Resting it on my lap, even though i already put product i'll just go over that real quick with you. So all i do is brush come on y'all! Don'T talk about me, i'm showing y'all my secret! Don'T y'all talk about me after this i just reinforced where i want the hair to be with that uh creamy product that i mentioned, then i go over it with the bristle brush and i do that for the smoothness again, it's not for slickness and to stick On my head, but just to control the hair and let the hair know that i want it to be in this position makes sense cool y'all got ta. Let me know if this is making sense so far. Now that my hair is in position for the braid, i'm going to split my hair into three all you all know how to braid right, because this is not a braiding clasp. This is just to show y'all how to create this braid. So now that the hair is split into three, usually for knotless, we up here with it right can y'all see that - and it's like that, so the curvature is on top the middle strand. Um goes over and it creates this lump right here. That'S not how i do this braid, how i do this braid, the middle strand i put in the middle, and so you see that hump is gone. Y'All see that y'all see the difference, so the middle goes in and that makes this flat, which is what makes the braid rest like this. Does that make sense, but did i lose you all? The hair is in position. I take the middle strand right and i put that in the middle. So now i'm sorry now this middle strand is here, i'm already ready to pick up the first piece of hair. So now that this piece is down here, i'm picking up the first strand this first strand, i take the loop and i put one leg on the hair: that's down and one leg to this back piece with where my thumb is, then i do the first crossover Right so every time my right hand becomes free. That'S when i add the next piece right, and so this area right here is where again put it like this. The piece closest to my neck is where one of the legs will lay and then the other leg goes to the back piece. Does that make sense? Maybe you'll see this better now that i have one stitch in right, so the next loop is going to go here and here i'm going to pick up that loop right now. This next piece i'm putting it here so that my index finger can grab it. The index finger grabs it, and it goes here on the on the leg closest to my neck. Once that's in place, i fold over and do the next stitch right boom. My right hand is free again, so an important thing to keep in mind right here now that two pieces are in the synthetic hair is now enough that i can start manipulating it to cover my puffy hair. If i wait to do that, my ends will just be sticking out and it'll look sloppy, but because i'm already in position i could start turning the hair to hide. My hair make sense. So now i have one piece left: y'all can kind of see it coming alive right here i have one piece left and so the last piece again my index finger is ready to receive. One leg will lay here. The other leg will get grabbed up in the back right. This is the last piece index finger ready to receive, got it here. The other side lays against this grab it all together do the stitch. So now i don't just start braiding recklessly again. I make sure the synthetic hair is covering my puffy hair, and this does not stop until i go down. The braid makes sense so now this and this i'm not just going to continue to braid i'm going to position first, so i take a little hair position. It there and cover it continue. The braid y'all see it y'all get a it puff. Hair move the synthetic to cover it up. This is tucking y'all. This is tucking just so. You know when your braider is braiding your hair, and this happens, and they continue to braid they're, not tucking. Tucking is literally simply taking the hair and positioning it to cover the hair. You see the difference now my hair is tucked away now. I can continue to braid make sense. So now you remember that big old puff that i had here sticking out where that, where that, though, where that, though, is gone again, this little piece - your braider, might continue to braid this, and then she cuts this off. At the end, we ain't doing that. We ain't doing that. This gets what covered tucked twisted turned look at that it's gone right now, i'm continuing to braid are y'all. Seeing it come alive, got it right all right cool! My tension in my hands is strong strongest at the top. Why is that anyone? Anyone it's because my hair is hair, and so i cannot have a loose tension at the top. I need it tight and so by holding this hair tightly, i am ensuring that that puffiness, that we saw y'all just saw it happen, is not going to poke out. When i get right below my hair, i loosen my grip i'll show you why real quickly, i hope y'all are getting something out of this right here. Let me show you what would happen if i did this. The way i'm holding the top is, if i continue do, y'all see how it jumps in size. Y'All see that y'all see that i don't need to grip it as tight once my hair is tucked in so once the braid is in, and i have it where i wanted. I loosen how i braid, because now that same here is the same size now that we get to the bottom, here's something i forgot to add here's another hack. I have a third texture. My hair does not look like this. However, with this third texture i brush it out, y'all got ta not be afraid to brush this hair and fondle it. It'S not. Yours forget the idea of pretty curls and oh. I need it to be pretty f that i take a third texture brush it out. This look like my hair. This looked like the hair that was just sticking out right there literally. This is for my ends, so i don't want my ends to be like this. I know that as i'm braiding as i get to the ends - and let's say i'm right here, i can feel braiding is a feeling. Y'All braiding is not just technical skills, it is a feeling so a lot of times when i'm doing my knotless nation trainings. I retrain people to understand that braiding is a feeling you should close your eyes and know the size of the hair. In your hand, you should know when it needs extra hair. You should know when it's too big when you're separating the hair to braid. You should know these things by feeling right, and so, when i get to this point, i just know the size to put in based on what i feel. I hope that makes sense. The virgo in you is overthinking it so now that i'm at the end i am going to now, you know how, usually you pick up hair and you add it in the middle. So it's balanced. Here'S another hack, y'all hope you're, paying attention. When you pick up off balance, that's how you get more length without adding more hair, so i will add it like this. Do the same thing we've been doing before same exact thing, my index finger is free. I put it in place, put one to the back. One to the leg closest to my neck and i continue to braid and now i have a little curly and vibration going on, i'm still holding it loosely and then i just continue to braid. There is no dipping involved, so when i get to the end, what i'm left with is something that looks kind of natural. I usually use a rat tail comb, but i'm just going to use this, so i don't got to get up. I literally tease the end backward see what i'm saying so that is now locking it into place, and then i do a palm roll, as this is a dreadlock, and this is it that's braid number one does that make sense so again, y'all from the top start At the very beginning, a very good place to start you look at the but y'all, seeing the waves you'll see in the way, don't get seasick. Okay, you see it. You see it so now we on the other side, all right. Once i detangle with the felicia brush, i take the bristle brush brush it all together. Three pieces remember for a regular braid. The middle piece will come up here and then over there we're not doing that. We have the three pieces and the middle piece drops down to the middle same situation. You can't see it though, but my index finger is ready to receive and hold on before. I say it out loud: let me do it this piece. This leg is still going to rest on my shoulder. You won't see it right now, but that's what's happening the other leg. This is where the hair is attaching y'all see that this is my hair. This is the other leg got it cool make the first stitch once that first stitch is done the next time. Your right hand is free. If you are right-handed the next time. Your right hand is free is when you add the second piece right. My right hand is free. My index is pointing to the wall ready to receive. I take the second piece right ready to receive closing my my index with my thumb. Can y'all see that because i can't see you respond so now that that's in place and the piece furthest from my neck has the other leg of the braid? I do the next stitch. I hope y'all could see this on this side. It'S a little more difficult again now that two of the legs have extension, i can start manipulating the hair. Well, this is a tiny piece, but y'all get the point. I start manipulating the hair to cover my hair. Can'T really do it on this side, because this leg is smaller, but right away, i'm adding that third piece index finger ready to receive right here. You see it, you see it it's right here. All i did was take it and do that y'all see that i catch it. I catch it, you got it, i catch it. The other leg goes to this back piece stitch you got, it did y'all see the catch because i couldn't see if y'all could see so now that the three pieces are in again, we are manipulating the fake hair to do what tuck we're not leaving our hair Poking out continue to braid now that all three pieces are in everything else is manipulation. Look at this. We not we not. What are we doing? We ain't leaving that like that this is what y'all braids be doing and then cut it off. Then you wonder why you got a new haircut when you take your braids out, god, damn i'm sweating. This is for y'all man. This is love. Y'All, see that we are going to tuck. Tucking is literally covering the hair got it. I mean i want to see these two braids in your head later. Take the synthetic hair open it up, manipulate it. Don'T forget the grip got to keep the tension intact so that the synthetic hair covers your natural hair, see that covered. It was like this. Some of y'all would just continue to braid and then be like. Oh my god, it's a mess there. It is we're not doing that we're taking the synthetic hair and we are winding now it's gone, see that hold in your grip hold the grip. Remember i don't let go of the tension that i have until my hair is completely safely tucked away right, boom, bop y'all see it y'all see it. Tension is still the same. All my hair is gone right. Tension is the same. This last stitch. All my hair is gone so now, when i come down now, i can loosen the braid grip, but i'm still holding it secure. This is how some of y'all braids be sticking up and then y'all like it don't look. The same tension affects the braid. I also do this squeeze it to make sure it stays the same size. Y'All, see it coming to life. So now that i'm here, what did i do? Last time i got a third texture again index is ready to receive nothing new, i'm adding it to the end. So now that i have it here - oh sorry, let me get up now that i added a little y'all used to jump double dutch there's a titty in the rope we don't got. Ta worry about that y'all also see. I don't worry about it. Being neat and perfect, because that's not what makes it look realistic, what makes it look realistic is the fact that there's a bunch of tangles and loops and hoops and add that last piece right make sure it's the same length which it is just about. Y'All see it y'all see it y'all see it. I have it here when i get to the end the way i lock it is, i tease the hair backwards. I create a mess right. I basically create a knot, teasing it backwards. Then i take the end and i roll it. It is not the same length. So what i do then i slide cut. I just slide cut. I just get a scissor, i don't do it blunt, but i do a slide. Rough cut. Make sure that it looks the same y'all see it three palm roll mess it up, and now i have two realistic, looking natural braids and yes now. You also use this to refine the hairline. If, like i'm going to, you know something more upscale i'll. Take my time and do more of a neat edge or i'll, take a eco styler, the green gel - and i might you know i might take out this little piece right here. Well. Well, there you go. You know i might take this out, i'm so cute um! You know i just it just depends on my mood ever i'll go out. People are they're a little confused, they'll walk all like your braids, but then they like but wait, i'm not sure and that's the goal. Thank you so much for watching. I have not been live in a while. If i had any more questions, let me know otherwise.


Comments
Nadine Johnson: Thank you for the tutorial! This is amazing! I have to try it!
Sireeia E.: Feeding the bird is essential!!! Such a good technique. Definitely elevated my tucking skills.
Natural Libra 64: Very Nice. I have to try this. Thank you for the tip
Lynsey Buckelew: The using all these different textures is brilliant!
daaa greatest ☥: I love it. Can you us tutorial how to make all your braids the same size please? a video please? I’m a beginner like with weave and natural hair?