Tribal Braids With Knotless Braids At The Back | All About Natural Hair | By Reel Women
- Posted on 29 August, 2021
- Braids Hairstyles
- By Anonymous
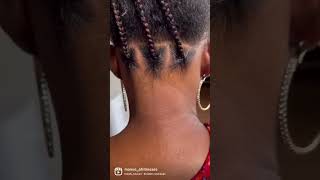
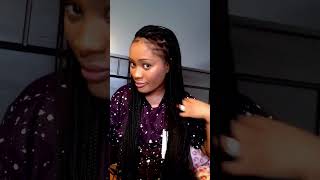
In this episode, I'll be doing a DIY Tribal Braid hairstyle that also has some knotless braids mixed in.
0:00 - Introduction
0:12 - Preparation
0:36 - Getting my Hair Ready
2:35 - Braiding the Back (knotless braids)
6:44 - Braiding the Front
10:24 - Final Look
MORE HAIRSTYLE VIDEOS:
https://youtube.com/playlist?list=PLyD...
MORE HAIR CARE VIDEOS:
https://youtube.com/playlist?list=PLyD...
Hey Loves,
Do you use the knotless braiding style?
I thought I'd give my natural hair a little break by rocking some tribal braids for a bit. Now normally I'm more of a locs girl when it comes to protective styles so tribal braids are completely new to me. But this time I thought I'd give the tribal braids a try because the faux locs just feel so regular now lol.
You'll first get a look at the braids I'll be using. After that, I'll tell you all about what I do to get my hair ready for braiding.
Once everything is prepped and ready, it's time for braiding. I'll start at the back first (the hardest part, I kid you not!!). For this part, I used a knotless braiding method. To me, it looks more natural and isn't as tense on your hair.
From there, I'll do the front part of my hair.
I'll finish off with a quick reveal and my final thoughts
Thank you again guys for tuning in. The Phoenix family is growing more and more each week. The 1000 subscriber mark is just over the horizon and I'm thankful to every one of you who hit that subscribe button.
I enjoy getting feedback from you all so don't be shy. Leave a comment below and let's share our hair journey together
And remember to tune in every Sunday for more videos with your girl, The Natural Phoenix
PRODUCTS
Queen B Pre Stretched Braids
-Total Packs: 3
-Colour: 1B
CONNECT WITH ME
Instagram: @the_natural_phoenix
Facebook: The Natural Phoenix
YouTube: The Natural Phoenix
FOR COLLABORATIONS: [email protected]
#hairstyles #knotlessbraids #tribalbraids #naturalhair #hairbraids #caribbeanyoutuber #caribbean
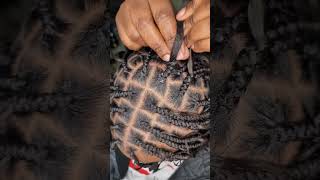
Hey guys so i've been wanting to give myself a little break from my natural hair for a minute now, so i tried doing this tribal braided style and i wanted to take you guys along with me now. My hair is freshly washed and deep conditioned, and i also blow-dried it just to help make this process as easy as possible. Guys, let me tell you pre-stretched, hair is a game changer. I can never go back to having to stretch my braided hair for myself. Ever again in life, i purchased two packs of this hair and each pack had about three of these bundles in them. But in my hair for this style was the most challenging part simply because i feel like if your lines aren't straight, it kind of makes your hair look or your style looks as though an amateur did it. So i took extra time just to ensure that i got these spots as straight as i could have, while looking in a small hand, mirror. I just decided to use my woogies to just hold my hair back. So i can focus on the pattern because having to navigate the two was becoming very difficult and i couldn't really see how well i was spotting. So that's a good tip for you guys. You can actually use just two woogies to separate the sections, the front section. I'M actually going to be carrying it, whereas the back section i'm going to be doing knotless box braid. So i worked on the back section first, seeing that that would take the longest time and yeah. That'S me again, using my hand, mirror to try and see what the part was. Looking like then going back in with my rat tail comb to correct any errors that i would have seen. I also use my fingers to feel along the part just to guide my comb where um, where i think it should go based on what i feel from my scalp and then i'm just twisting and parting the mini sections away. Just so that i wouldn't keep going back and forth between parting and braiding all the time i like to just pre-part. This is the first time i'm using this diamond braiding pattern, and i think it was a bit of a challenge to get the part straight. But i mean it worked out in the end guys these first few braids, oh my gosh, i wish i could have made this video as long as i really wanted it to be just so. I can show you guys how many times i had to braid and undo this sections because, like the first, let's say: first four braids, oh my gosh, because i've never attempted this before it was so hard and i was frustrated. It took me like 10 minutes on each braid. That'S how long it took me. But after i realized that i wasn't really getting the hang of it. I just decided to practice a few of them off camera so that you know i'll be able to explain to you guys better how to do it and, as you can see here by the tiered braid, i was sort of getting the hang of it. But not really so i just practiced a little bit some more and then i came back on camera when i caught like about halfway through the back, and i think i got the hang of it then - and this is what that is looking like so now i Can finally get into what i actually did and kinda correct the mistakes that i did from before, just so that you guys don't make that same mistake. So the first thing is, you want to try to make sure that all of your parts have about the same size, and then you detangle your hair fully just so that you don't bounce up any snugs while trying to braid and then have to struggle to do That i'm separating my hair into three sections here and then adding the braiding hair from the root braid about three times down and then add another piece for each of these braids. I use three pieces of braided hair. Now the amount of hair that you use will vary depending on how fat you want your braids to be so. What i did is every time i make a new part. I would pre-separate all of the braiding hair that i would use for that section, just to ensure that all of my braids are about the same size, and so when it's time to braid, it's just to take three pieces and continue braiding. That'S a good step to take as well for you guys so that it will just speed up your process so so much and yeah for the ends i braid all the way down and then for the ones that i didn't. I just come back in after and braid them down. This will just give you a neater finish again, i'm repeating the same steps separating my hair into three sections, adding my first piece of braiding hair braid just about twice and then adding the second piece. Do the same thing and then add the third piece of hair, i'm just feeling with my fingers just to ensure that my roots are laying nice and flat and, as you guys can see, the braids look like it's actually coming out of my scalp and not like. I added braid in here, so that's what your hair should look like if you're attempting to do these not less braids and yeah. I just repeat that same process throughout the rest of the pack, and this is the final result of the back and now it's on to the front of my hair for the corner, design um, i'm more or less just freelancing it to be quite honest, um, but For you guys, if this is your first time braiding, i would definitely suggest that you get some sort of a design to follow. It makes this process a lot easier, but for me i just eyeballed it and kind of just looked at it and decided how fat or how skinny i wanted each of the parts to be, and then i went back in with the comb end of my edge Control brush just to clean up those parts and try to make it as neat as possible, and then i am adding a little bit of edge control just to smooth down any flyaways on my baby hairs and then i'm going to start braiding for this process. It'S the same exact thing like back where you just braid like three times and then you add a small piece of hair um. I added about four pieces of hair per cornrow um. But again this will vary based on how fat you want your cornrows to be. I just made these pieces a lot smaller than the pieces at the back, because i didn't want it to be too bulky, and i didn't want to plant this too tight as well to pull too much on my edges. When i get to the end of the cornrow, i just spray, just as i did back straight down to the ends and that's it, i think you should definitely practice this style a little bit, though, before trying it, because i braided and undid those braids about five Times just to get it correct, i didn't include it on camera, obviously, but this took me quite some time to do this style. I believe i started at like around 11am and i never finished until after 12 in the morning, so it took me about 13 hours, so i'm just going to be repeating the same steps as i did with the other cornrows by adding some edge control, then adding The braiding hair as i go along so yeah i'll. Let you guys look at that just for a little bit more and then i will come back and show you the final results. I'M really impressed with myself with the way this turned out, especially given the fact that i am a newbie at this. This is my first time attempting this style. I think it looked really neat because this is actually two days later and it still looks good. Let me know what you guys think in the comment section down below i'd love to hear from you. Thank you as always for checking this video out and for supporting my channel. I will see you in the next one bye, guys


Comments
By Reel Women: Thank you again guys for tuning in. The Phoenix family is growing more and more each week. The 1000 subscriber mark is just over the horizon and I'm thankful to every one of you who hit that subscribe button. I enjoy getting feedback from you all so don't be shy. Leave a comment below and let's share our hair journey together
Ali A: This braid style have me wanting to go buy braids and try it now. Thanks for this vid. Braiding alone is time consuming and frustrating and to add to it you video record it well done and keep them coming.
Tenacia Canterbury: This looks amazing! I'm inspired even though I know I can't braid to save my life
West Indian Kay: THIS IS FIREE you gave me inspiration to do box braids on myself but I can’t even braid
Kadesia Halls: It looks sooo good I love it ..
Lili Casablanca: 1st time seeing seeing this style of parting. Will definitely try try it next time I braid my hair. Never tried the knotless.
Naturally Nishy: Girl you did that yes. It came out really good
Phone Signup: Yu go siSTAR Yu did an amazing job. Especially the widows peak, I have one and if that part is not right, it throws off the whole style. But yu ️➕ The braids lay so nice❕❕Salon quality results. Yu have inspired me❣️ Side note: I ended your video saying, I think I canI think I can I think I can ...........
cutietifftiff: Looking good ma, results are gorgeous
Lili Casablanca: Definitely give us feedback on how the style held up.
Lili Casablanca: 13 hrs!!!!!! I could never be so dedicated. I think I would cry from frustration.
Sydney Wilson: results !!
sweetyellable: