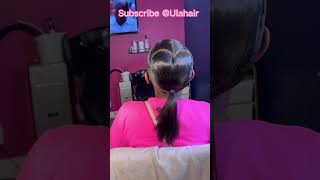
Two Tone Braided Mohawk With Kanekalon Hair (Jumbo Braid)
- Posted on 28 May, 2019
- Braids Hairstyles
- By Anonymous
This braided mohawk is such an easy style. A quick twisted mohawk with braiding hair with no leave out which is why it is so easy to do. This big braid mohawk is the perfect protective style and the two tone, makes the style a lot funkier. Mohawk ponytail
Product used (affiliate links)
Braiding hair used (xpression braiding hair) 1b mixed with 350: https://amzn.to/2Sml8S2
Satin Cap to keep your style safe at night: https://amzn.to/2lkAxpi
About Me.
Education: I have a master’s in marriage and family therapy and a Ph.D. in Human Behavior.
Certification: I am a nationally certified counselor certified by the national board of certified counselors (https://www.nbcc.org/certification/ncc...)
My free ebook with these pieces and more that will teach you how to make a capsule wardrobe you can wear year round: http://eepurl.com/gSn_a5
Shop All My Products:https://sophie-sticatedmom.myshopify.c...
Shop my style https://www.amazon.com/shop/sophie_sti...
Follow me on Instagram: IG sophie_sticatedmom
Blog: https://sophie-sticatedmom.com
YouTube Channel: https://www.youtube.com/user/TheSlreed...
Podcast: https://sophie-sticatedmom.buzzsprout....
Want to Donate? paypal.me/sophiesticatedmom
Cashapp $drsophiareed
My hair type is 4c and this is a great 4c protective hairstyles. Subscribe to my channel is you are looking for 4c hair YouTube channels that will show you easy styles for natural hair for beginners. I specialize in natural hairstyles for black women with weave, 4c hair care, easy styles for natural hair for beginners, and 4c hair type.
What is up ties back today with some big, her or or big her? I am back with some on some Johnny. Bravo yeah. I remember that cartoon, or am I am i showing my age, the Johnny Bravo hair is a big, it is cute and it is super simple and it is 100 % protective style, meaning that none of your real hair is going to be out. So if you want to know how to get this tutorial, then go ahead and stay tuned and keep watching and I'll show you how the first thing I'm gon na be doing. It is parting across at the bottom portion of my head, not quite in the middle but more of the bottom portion hey. So once your hair who's, the once your hair is parted you're, just going to UM, put it in a bun, basically, okay and then you are going to get your other part, and maybe I might have put mine too far back. I should punish it. A part of me with you um and then you're, just gon na part at the front of the head going across and then you're just gon na, follow this same exact process and put this in a bun and put this in a bun. So before I started even shooting this video, I made three braids and I didn't do it on camera because I feel, like I mean it's not like it's really easy like. I don't know that you need a tutorial for that, but I just got um the braiding hair and um and braided it, and then I just mix some color into it and that was it. I'M gon na start with one and really what I will show you is that you need for these to be very big, and so I braided them very loose so that I can stretch them out because it's just gon na look better when you put it on Your head, and so since I'm not braiding this into my hair. You want this to look realistic as possible. So you're, not just gon na, like put it right here, because that's gon na look crazy, put like that and then um fold it back. And then this will be like a pompadour situation, starting here and don't put it too close, because you don't want to hang it on your edge and then fold it back, and this can be as big or as whatever as you want it to be. As you see, our first bun is here, so you want to make sure to go over that, which is why, when you braid this needs to be loose and then your pin it into place, and then I'm actually doing this tucking this over. My second bun, if you can see, there's a second fun - and I have just like what like this - would help volume here. What like this placed it over my second bun and then I'm going to pin it into place, and so now we have this little thing and we're just gon na wrap this around here, just so that it has somewhere to go, and it's not just sticking out. Okay, so we're our second bun is. I am actually going to overlap this over the second button, even though we already put hair over the second bun, but I just want it to be bigger, so you just want to really make sure that this is stretched out. Just because you want it to fit over on this one so remember this is where the second one is and then you're just going to my place it over like this pin the top. You want to make sure you don't see it, so you don't want like the piece of hair sticking out and then once that is secure, you just kind of pull over and then you sleep. So this hair is gon na, be big y'all, so you're gon na have this leftover things and then you are going to want to roll it because we're gon na roll it under just to make it bigger. But you don't want to see like. Is it that part that looks that will look weird so like roll it and then tuck it under my third bun? Is here tuck it right under the third bun and then bobby? Pin that into place just make sure that none of that is showing we still are going to add a third grade, but um just yeah. You don't want like a whole bunch of stuff happening back there. Then we have our last and final braid and then really you are gon na have to win this, like. I don't know how to explain it. I am putting mine like over here, just because that's where you can kind of see things and then and then it's gon na come around, but I'm going to pin it in place and so like we did with the front. I'M gon na lay do this. Pin this under and then umm so that the brain isn't showing, and then I am actually going to pin all of this, so the braid is going to permanently. Now that we have everything attend in place. You want to do what I like to call. The logistic just sticks are really just looking at your head and make sure it looks right like I can talk for me to explain every little thing that you need to do um just because after you pin this in your head, it might look different and so, But afterwards just don't be like oh, it's kind of sort of it just make sure do it. You know you just fix stuff go is to look cute not to have a hairstyle that could have look cute. If only you know you, would've did XYZ. So just make sure your hairstyles all the way, q, don't let it be a potential hairstyle like it had a potential to be cute. What another logistic is that I'm going to add some string just to the ponytail part? Okay, so that is about it. It was super easy like I know it looks complicated, but literally this is just you know, putting fake hair on your head and your hair is like, underneath these edges will calm down, make sure y'all put on a scarf because Miami's is starting to pop up. Thank you guys so much for watching and if you like, this video give me a like a heart a thumbs up depending on which platform you are watching this on, and I will see you guys another day. Another time I know


Comments
Stroller In The City: Your videos are always awesome and unique! I love your styles!
The Black Witch: I'm crazy about hair tutorials and this is linked to something I always wanted to try to do to me!
Stacie Haight Connerty: You do the most amazing things with your hair! I love your videos. LOVE!
Life with Messi: I love this I'm going to try it with my hair I hope it works as well on wavy hair.
SoniaChic TV: Wow great idea sister, I will definitely try this hair style!
Alicia Brownell: Cute! Nice and easy for fun on the run.
Jasmine Hewitt: this is so pretty! you wear it well
Disabled DISVentures: It’s so pretty but my hair doesn’t cooperate.. so I’ll just keep watching you!
Kara Guppy: That is such a pretty hairstyle
Irina Vakulchik: Big hair. :) love your hair. Beautiful
Gracelike rain: I LOVE IT!!++
Gym Breaks: Whoa I can’t believe you did that yourself!