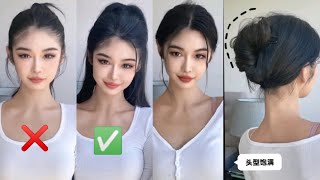
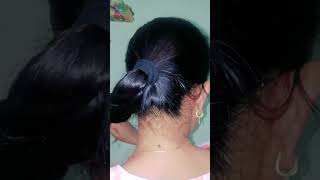
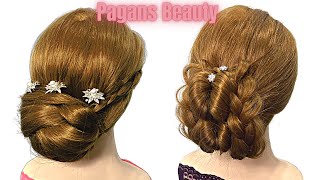
Crochet Bun Tutorial Using Kanekalon Braiding Hair
- Posted on 08 November, 2017
- Braids Hairstyles
- By Anonymous
Hey CREW i'm back with another video... But first let me thank you guys for all the love that I've been receiving on my previous video "you the one" In my Martin voice LOL.
In this video i will be showing you how to create two simple very cute Buns that you can wear day or night., the great thing about this tutorial is you can use braiding hair that you have lying around the house..
SN: my hair is not dirty in this video its just product residue from a previously recorded video.. So please don't come for me in the comments
I N S T A G R A M
IN_BETWEEN_THIRTIES
S N A P C H A T
tenese59
G M A I L
Don't forget to check out my t-shirt line
https://teespring.com/stores/in-betwee...
Hi everybody welcome back to my channel. Thank you guys for stopping by so, if you're a choice and seeing how I was able to create these two cute, simple, crochet buns, then please just keep on watching for everybody. Okay. So, let's get started so here's bun number one. So the first thing you want to do is to take your braiding hair and feather the end so that you can get rid of that front. Cut that you created when you cut your hair in half and all you do - is just simply pull small strands of hair out to create those feather in so now, I'm taking a comb, and I'm gon na pull me through to take care of the tangles that We have created so now. What you're going to do is take a small section of your hair and put it into a ponytail, and this is the only section on right here that we will be crocheting. So I'm what you got such ponies, no taken care of we're just going to twist the hair all the way down or you can braid it up to see you and then we're just going to wrap it around into a little knot and secure this section of Hair with a rubber band, you can use a bobby pin it's up to you. Whatever you have a line around the house is fine, so what we're going to do after we have secured this section of hair, we are going to take our crochet needle and begin crocheting, the braiding hair into our hair. Alright, so you'll get your crochet needle and your braiding hair and we're going to start crocheting just this small patch of hair here. So what you want to do is you're going to take your crochet needle and you're, going to tear the base of this ponytail and then once you do that you're going to add the braiding hair to the hook of the crochet needle and then you're going to Pull it, it's gon na create a loop, and you only take one strand of hair. Pull it through that loop loop, one more time, pull both strands to secure it. So that's pretty much what you do throughout this entire little section of hair. So I'm just explaining again, you just take the crochet needle prepares the face of the ponytail there's the loop. So you pull one strand of hair through look at one more time and pull both strands of hair to secure it, and you can make it a tool or as thin as you want. It depends on how full you want your bun to be so yeah once you're done with that. I'M just combing it through, so that there's no tangles and then I'm going to add some gel to my hair. You can use whatever product that you normally use to create your funny joke. For me, a polygamy is an eco styler gel in this tutorial. You'Ll. Just make sure that everything is a nice and neat add as much product as we need to to secure this nice ponytail that you're trying to create here. So, as you can see, I'm just adding a bunch of gels, whoo my hair and then I'm just gon na brush everything in to place. I wanted this ponytail so sit. I think like right in the center of my hair. So that's pretty much. What I'm going to do a now, I'm just going to position everything correctly and you can use a scrunchie or a hair tie or a rubberband. Whatever you have a line around to create your ponytail, and I recommend that you don't follow the nest I decided. So now that you've done with all of that, we're just going to feather all of the hair out and then we're going to separate the hair right down the middle and the begin to just wrap everything around our hair, as well as the chrome Shay hair hair. So once you do that, you see that a little bun that we created as of earlier is hidden behind all of our hair. So you just continue to just a rapid thin hair around and if you wanted to at this point, you can take some bobby pins to secure it. If the fun is the way that you want it. But for me some services of satori, I'm not going to secure anything with a bobby pin, but you can feel free to do that would like to especially if you plan on wearing it Cora a couple of days. I would definitely take some bobby pins in security, so, as you can see right now, I'm just taking care of all of these flyaways. If you guys there is anything like mine, it always crawl. So here I'm just pulling the bun out a little bit to make it a big figure or fuller looking and then I'm still taking care of my edges sesame important to me. So I'm just gon na get the images up away around with it. Super essence. Take care of this edges, you know how we are y'all so once I am done with that, our boys take a silk scarf and I'm sorry I am talking so much in this video. I had a company this night, so we're just having a conversation about. I don't even remember and so about three or I am going up voice. Okay, so yeah once we're done we're just gon na take our scarf and we're going to high. This will help with the flyaways as well. Yes, in the 15 minutes, you're good to go here in Los Lobos for this one and number one, and I actually is very old school pilot and it's very cool for in between those protective styles. You can just do this and inexpensive and simple. So now we are going to move on to burn up number two, which popular button that everybody sort minutes more pop now. So what we're going to do is the same thing that we did before we're just going to create a nice creamy and smooth ponytail using the same products that we use c4. So yes, since I had gel in my hair already, I didn't really need to add that much foot so we're just going to take another hair tie I'm going to place this. I tried to place this particular bun closer to the front of my head and not necessarily in the center, if that makes sense. So once I'm done in making this ponytail I'm going to make sure that everything is secure and then I'm going to take my handy, dandy, super brush yet again and I'm going to write all of my edges so for this particular. But I'm going to scoop out my edges just a little bit more to give it that old, school baby hair, look that everybody is kind of rocking alright and you never neglect the back of your head. Make sure that everything is always nice in me. So now I'm just wanting to brush everything together and a foreign suteki gel and blend up my hair and with a video, braiding hair, and once I'm done with that, I'm just going to twist everything together and literally just wrap it around and create a nice super. Superduper simple: you guys, you can actually create this bun within, like 10 minutes. Put you on some old play hoops and you are good to go so that's it. I hope you guys enjoyed this tutorial. Thank you guys again for stopping by and I'll see you in the next video get inside other. Do they the crochet needles we are ironing on this here. Is this right?


Comments
Sylvie On The Go: I actually like it too when you had it just up before you put it in the bun..yes 90s inspired