Diy|| How To Make Distressed Ombre Locs Crochet With Kanekalon Braiding Hair
- Posted on 16 December, 2020
- Braids Hairstyles
- By Anonymous
Hey loves, I’m back with a new video tutorial on how to make distressed ombré locs crochet with kanekalon braiding hair.
Items used:
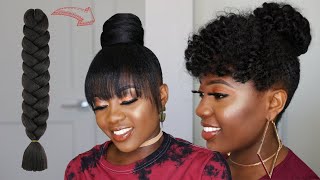
Lush kanekalon braiding hair (color 1)
X-pression kanekalon braiding hair( color 30)
Straws
A rope
Social media
IG and Twitter @_esiroh
Snapchat @esi_roh
#crochetbraids #trendinghairstyles2020 #distressedlocs
Hey loves: welcome back to my youtube channel in this tutorial. I'M going to be showing you guys how to make your very own distressed umbrella locks, crochet with braiding hair. You don't have to worry about getting spring twists for this hairstyle i'll be. Making use of in this tutorial is our kanekalon braiding hair, i'm making use of the brand lush hair and color one. I'M also going to be making use of my straws for this hairstyle. It'S really to achieve the spring crawls. This is really necessary and i got it packed for it. So i don't run out of strokes, i'm also making use of my comb and my scissors, so i could cut this attachment feather it out and comb it up. So i had some leftovers of expression, kind of clone breeding, hair and color 30. So i'm going to make use of that to create ombre look. So i just divided the hair into three parts. I feathered it out and i then combed it to prep for the next step, which is creating our spring twist. So in this step, i'm just going to be creating the spring curls by rolling the braiding hair on the straw. Now, in order to secure your nuts, you can either do it this way or make use of a bobby pin by doing it. This way, that is placing your knot on the straw and rolling the hair on the knot to be able to secure it. This works very fine or you could also use your bobby pin by securing the top knot and down and the bottom notes right there. So what i'm just going to do is i'm going to repeat this process over and over again say i'm able to achieve like a certain amount of road attachment they will move to the next step. The next step is very easy. All i did was just to soak my breathing hair, which i wrote it in hot water and leave it for like a while, let's see like 15-20 minutes, and then i try to take it out and dry it now, the next step is just to take out Your breathing hair, which you wrote to get your spring face now it's very easy. When the hair is dry, all you just need to just push it out and it just comes out and relax. Your skin twist is ready for your hairstyle, so guys this is really nice and just like you got it from an online store or you got the actual spring to it. So we're just going to move on to the next step, which is crazy, which is creating our distress, ombre, lock, crochet. So what i'm just going to do now is that i'm just going to tweak this not fully just partially, so i could get like enough. That would be neat, so i just twisted it and then i unraveled the whole the screen twist, which we just created and i'm just going to be using it to wrap the kind of kind of clown braiding hair. I just keep it so i'm just going to be wrapping it and i'm going to show you guys how to get that puffy, butterfly and look kind of so if you're rolling your hair, or rather, if you're wrapping the hair and it seems to be coming out Of me, all you just need to do is either pinch it out or take some on your finger. Take some on your finger and then roll the hair on top that one, but not swirly, so you can just give that look. I don't know if i explained it well, all you just need to do is take some on your finger right. Take some out on your finger, roll, the hair, leave that part that you took on your finger and continue the process. If you don't understand, you can just watch the video and follow what i'm doing after i was done. Wrapping the hair with the black spring curls. To achieve that umbrella, look i started start wrapping the hair with the gold spring curls another together look. So i just repeated the same process and i started wrapping this gold string curls, starting from where the black guys when we get to the end, you just keep holding it and keep rolling and keep pulling till you get to the very end and paint it really. Small, so normally it's either. I take the attachment up and then i roll it on top. I try to try something different and this works too. So what i basically did was that i just rolled it and rolled it and rolled it till i kind of like secured the notes in between the head, just exactly how i did for the tree when i was trying to start when i was trying to create The spring twist: that's what i used so i just decided to get rid of you know sticking out. So i'm just going to show you that same method, because i think in that first one. It wasn't so explanatory. So when i'm done with this hair, this part, i'm just going to show you the last part and explain it better for you, so so so guys we're at the end, so i decided to knock the hair. As you can see, i noticed it's very tight and then i just rolled it back into the main head, like i said so that you could just get lost inside. If that didn't make sense, it just gets locked inside. So that's what i just need to just secure that not so yeah and basically what i didn't do was i just cut off the many parts that we didn't need. Then i just kind of like pressed out like i don't know so you get so this is the last part i'm using see. So there you have it. Your very own, distressed umbrella, locks, crochet. I hope you found this video helpful. Don'T forget to share subscribe like and give me a thumbs up. Love you all bye, guys.

Comments
Jaiyeola Ademuyiwa: So much information in one video,well done girlll
Ochigbo Eucharia: Nice one girl Keep it up♥️♥️
SkibbyFresh: I made it here in time ....First comment . Nice video as always .