(Very Detailed) Diy Hair Bundle Diy Weft Using Xpression Braiding Hair | Belle_Graciaz
- Posted on 14 May, 2021
- Braids Hairstyles
- By Anonymous
(VERY DETAILED) DIY HAIR BUNDLE DIY WEFT USING XPRESSION BRAIDING HAIR | BELLE_GRACIAZ
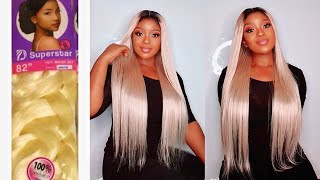
Hey guys I'm Belle_graciaz and in today's video, I'll be showing you how I achieved this easy diy hair bundle/weft using expression braiding hair. This was acheived with an xpression braiding hair and very detailed and I hope you find it helpful
Thank you for watching and I hope you enjoyed watching it. please do not forget to subscribe, like, share this video and also leave your comments down below
My filming equipments
Yongnuo 300 III
WAYS TO SUPPORT MY WORK
paypal.me/bellegraciaz
Sign up for tubebuddy
https://www.tubebuddy.com/Bellegraciaz...
*******************************************************
connect with me
Shop from my website
https://bellegraciazcollectionstore.co...
Buy my accessories from my page
https://www.instagram.com/bellegraciaz...
https://www.instagram.com/belle_gracia...
Facebook pages
https://www.facebook.com/bellegraciaz/...
https://www.facebook.com/Bellegraciaz1...
https://www.pinterest.co.uk/belle_grac...
my website
https://bellegraciaz.wixsite.com/mysit...
***************************************
Subscriber milestones
290 subscribers 12 June 2020
1840 subscribers 13 Feb 2021
2000 subscribers 4 March 2021
**********************************************
ABOUT
Hey guys, my name is Grace and my brand name is BELLE_GRACIAZ and this channel was created to make fun and engaging and informative videos for you surrounding the things I love to do most which are DIYs, sewing, making wigs and caring for my natural hair, lifestyle videos and vlogs and I also have a passion for diy home decors which you would start seeing on my channel or are already seeing. All these things interest me and I find it as a great medium to also document my growth because I am self taught on every single thing I do on my channel. I get to show you my wins, flaws and much more. so I hope you stick with me and join this amazing family and watch how I grow. I deeply appreciate your support because I would not be here without it. Love Grace xoxo.
#crochetwig #diycrochetwig #diycrochet #braidinghair #xpression #xpressionbraidinghair #kanekalon #kanekalonhair
Hey guys welcome and welcome back again to my channel, i am bella graciaz and in today's video i'm going to be showing you how to create your own diy, hair bundle or diy wefts. It is very, very, very easy and i feel like it's straightforward. So if it's something you'd like to see, then please stay and watch without any further ado. Let'S just jump right into the video okay guys. So for this i'm going to be showing you two ways: you could actually do this, so the first one is what i'm showing you right now. So you want to make sure that you feather your attachment. If it's the case that you want it to have the um feather effect, but if you want it blunt, then that's totally fine, so after you're done feathering it you're going to start by taking these few strands, like you saw me, do make sure you comb it. Well to detangle it um fold it into two, and so you could determine where the middle is at. Then you spread that needle on top of your sewing machine, like you can see me do when you spread it sparsely then you start sewing so when you're sewing you're, making sure that you're swinging with a zigzag stitch um that way it helps in gripping the strands Properly and making sure that they do not um shed and when you're sewing. This you'd want to sew about six to eight times. Yes guys. In order for this not to shed, you have to sew this, a lot make sure you are using a zigzag stitch and not a straight stitch and make sure you sew about six to eight times. Okay, in this manner, oh okay, after you're done sewing it. This is what it should look like, as you can see, and the reason why i'm using a black thread is so that you can see um it's if i was using the same color of thread as the attachment you wouldn't see this properly. Okay, so after doing that, you would want to fold it like this, then you're going to go back again to so, and this time around you just do about two to three times and you're good, because you sewed the you basically did the foundation at the beginning. So it's it's solid in a way um, so just doing it, this way is also it's one. It'S going to help in preventing it from shedding. If it is the case that it was going to shed and two, it just makes it straight at that, stop there. So when you are doing this, you want to make sure that you are pulling the attachment away from the um foot, so the presser foot, so that you don't have your hair tangled up in there. You just want the edge. So, as you could see, once i was done sewing the first one. I went back again just so i i did this about two to three times and i was basically good to go okay, so this is going to be like a second way of doing this, and what you need for this is your paper tape, your comb and The attachment, so what you do is that you just um place a paper tape on your table like so having the edges um bend so that they can stick to the table so you're going to do this for the top and do this on the bottom. So you would want to leave a space in between this piece, doesn't necessarily have to be too big, but it shouldn't be too too small. So you don't end up sewing um the paper tape with the attachments if it is too close, okay, um. So, after doing that, what you'd want to do is you're going to want to spread these very sparsely on top of the paper tape like so so. This method is probably for people who feel like the first method is a bit um tricky or they feel like they just wouldn't be able to spread as they go. So you could actually do this, so you have it in a row then just so as long as you go, but i personally prefer the first method because it was 10 times easier. It was um less time consuming because you did not really have to do all this um before sewing. So you just basically sewed as you as you were going right. So i personally prefer the first method, but if you do want to make sure that it's properly secured before you sew, then this method is for you. So after you're done putting the amount of attachments you want, on top of the paper tape, make sure that it is properly laid flat on knees. They are going to use another paper tip on top and, as you can see after doing that, i'm just using my finger to slightly press on it making sure that um all the attachments are going to stick on it. So, if you're going to do this method, you make sure that the attachments are very, very thin, because if you make them full, they wouldn't stick so well on the paper shape and after doing they are basically going to do the same method. You do for um step one. So that's why i didn't show that again. Okay, so after doing that, this is what you should look like, then you cannot take the paper tape off. As you can see, there is little to no shedding because you sewed it properly. If it was the case that this wasn't sewn properly, you'll be seeing so much hair coming off with the paper tape, okay, after you're done doing that as you. The next thing you'd want to do if it is the case that um you're not going to cut these attachments, you could just use your nail polish to secure the edges so that they don't end up um shedding or coming off. But if it is the case that you feel like you're going to cut the attachment into two or whatever parts, i would advise, you use the um nail polish all over and you know because the reason why you use nail polish is because it is water resistant. So, even if it's the case, you do wash the hair, it's still not going to affect it in any way, so i'm just showing you that it had little to no shedding whatsoever, and this is what it's this is what it looks like. I really really love this method because one it is easy to it is um. It is quite economical and affordable when you are in the mood for making a weft. So yes guys, that's basically it for this video. Thank you so much, and i will see you all in the next video bye


Comments
simplydemi: This is creative and can easily be followed through, even someone that has no idea before could watch and recreate easily by the way you showed us , thanks for sharing gorgeous, job well done ❤️❤️
Glitterspolish Nails: This is interesting, thanks for sharing. This looks so good.
Niella Obijiaku: This is such a creative way to create a weft, if you have a sewing machine, instead of using and needle and thread. The paper tape issa wow!! But I’ll take the sewing machine way . I agree with you, it may be time consuming sha. But great for beginners
PerfectMachForever TV: Wow! You are so creative
The Every Girl Fancy: I sure prefer the first method, it will save more time, the outcome is beautiful
Ruthy IZ: Nice one boo..I got something new to try out now
Mary Moe: Waaàaw, this is very very creative
Mary Moe: This is very creative
Falasha GODSQB Reaves: Hey Sweety the 1st method are sewing all.the snitches on top of each other or are moving under each switch we sew.
Mary Moe: I prefer the first method