☏ How To: The Perfect High Ponytail Sew In Weave
- Posted on 23 July, 2011
- Braids Hairstyles
- By Anonymous
http://www.stylesealt.com/bossybeautyl...
In this video learn how to create the perfect high ponytail sew in. You will learn:
How to section your leave out and perimeter
Braid pattern and how to achieve it
How to fold wefts
How to sew around wefts
How to sew under the braid
Track Placement
Disclaimer: All hair and products contained within the video were purchased by me. I was not paid nor given any discounts or other incentives to post this video. I do videos for fun and to help others. Enjoy.
To order a BOSSY Wig™ or book and appointment for a sew-in or eyelash extensions visit www.styleseat.com/bossybeautylounge
or email [email protected]
Twitter http://www.twitter.com/MissBossyLIVE
Instagram @missbossylive
Facebook http://www.facebook.com/missbossy.live...
BOSSY Wigs Facebook http://www.facebook.com/BOSSYWigs
Keek @missbossylive
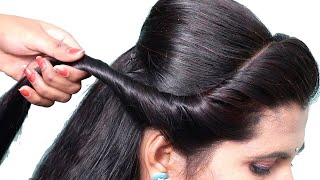
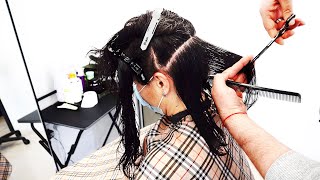
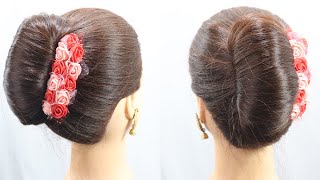
Your very first step for creating a high ponytail is going to be to section off the perimeter of your hair. You want to section off enough hair around your entire head to make sure that you're able to cover your tracks that will be around the perimeter. This is about an inch to an inch and a half in the back that I've left out to cover the perimeter track of the hair, and this is very, very important because, in order to have a perfect high ponytail, that's flat with no track showing you have To leave out enough hair to cover the tracks, and I'm also leaving out three fingers with of leave out because we're going to do a side part for this particular install, and you can see this area. That'S braided around the perimeter is the hair that I'm leaving out for the ponytail and the hair. That'S left out on top is, what's going to be left out to cover the tracks around the part now on to the braid pattern. So for the braid pattern, I'm doing perimeter braids the first braid is going to start on one side and I'm braiding around the back and then I'm going to end the braid at the back of the head on the opposite side. Now I'm starting a braid on the other side of the head right next to the leave out and what I'm going to do at this point right behind the ear I'm going to grab the tail end of the first braid that I did and I'm going to Pull it taut and add it to the braid that I'm currently working on and I'm going to go ahead and continue this braid holding the tail of that other braid in and I'm going to braid around to the opposite side of the head and stop. At that point, and then braid it all the way down and leave that tail hanging as well, and you can see where I'm braiding now that the portion of that braid that I pulled into the tail is absolutely flat. You don't want to pull it too tight, but you do want to pull it tight enough so that you're not getting any lift and it's not loose you now, I'm gon na start doing my braids straight back, I'm moving back on to the other side of the Head and I'm going to start from the front of the head and begin another break going straight back and once I get about halfway down with this braid, I'm going to go ahead and take the tail end of the second braid. That I did that's hanging and I'm gon na pull that on the inside of the break that I'm currently working on and I'm going to go ahead and pull it tight and add it to the hair and the braid that I'm currently working on. And then I'm gon na go ahead and continue braiding that braid all the way down and leave the tail of that braid hanging and I'm going to go ahead and continue in this manner doing the braids straight back. But this time, instead of switching from side to side, I'm going to stay on the same side and just continue working towards the opposite direction, taking the tail of each braid and adding it into the next braid. And you can see the pattern that I used here. This pattern is actually a little different than the pattern. You should probably use you're going to want to make your braids a little thinner and smaller and, of course, a little neater. The person I'm working on here her hair has actually been out a little bit due to other styling methods, so I had to do the braids a little different and once you're all done. You'Ll have one tail one braid left and what I do is I wrap that in-between the last perimeter braid that I have and then the other break that are going straight back and just sew it in and the first track that I'm gon na sew on is The perimeter track, I'm sewing this weft under the first perimeter, braid that goes around and I'm braiding and sewing it in from Temple to Temple. So what I do I push the track underneath the braid and then I take my needle and I insert it under the braid. I want it all the way around the braid and then I bring it underneath the track, while I'm holding the track under the braid. Hopefully that will make sense for you guys, but I'm trying to show you the I can sew again, I'm pushing the track or the weft, underneath the braid and holding it in place under the braid. While I sew the weft on to the Ray and I'm sewing through the braid, I'm sorry all the way around the raid and, as you can see, I do this for the first row as well as for the second row, they're both sewn under the braid and The second row I actually once I get to the front - I do not sew under the braid only in the back, because this is the part we're most concerned about in the case of a high ponytail, and you can see that I bring the tracks all the Way up to the temple on both sides, and now I'm going to show you how I fold the wefts, because from the point of the second row I go ahead and start going horizontally and I fold the wefts. You want to tack down the end of your row, the end of the weft, at least with two stitches at the very end, and you want to make those stitches very, very secure, and your next step is going to be to fold the left over you're. Going to fold it over so that the left sits where you want your next row to start so it should be above the last row that you sold and then I'm gon na go ahead and I'm holding this left in place at the fold. While I get ready to stitch and I'm going to stitch at the fold, but I'm not just stitching the top of the weft, I'm stitching through I'm stitching through both layers. So, where the fold is I'm stitching through the top of the fold and the bottom of the fold, and I'm going to make at least two or three very secure stitches right there on the edge of that fold to hold it in place and once those stitches Are in place that fold should actually lay very very flat and I'm sewing around the weft. Never through it. Once I get the edge of the edge of the fold reinforced, then I'm going to go ahead and start stitching the rest of the the rest of the track and I'm going to stitch it in the direction that I would normally stitch, because now I'm starting my Next role in here, which I'm going horizontally and I'm going to go ahead and repeat the same process on the other side for folding the weft. Do it the same way you're going to do at least two stitches at the edge of your fold to reinforce before you fold over and that's just to hold the weft in place so that the fold lays flat and then I'm going to go ahead and fold. The left over and so that the weft sits above the row that I just finished sewing I'm holding the weft in place at the fold. While I stitch and I'm going to do at least two stitches around the top and bottom of the fold sewing around the weft, I'm going to make sure that these stitches are very, very secure so that the weft lays flat and I'm also ensuring to sew completely Around the braid and not through the brain so that the strands of hair don't break while I'm sewing and it doesn't cause too much tension. Once I have the edge of the fold reinforced, then I'm going to go ahead and continue sewing my track in on my next row, and here are some pictures of the track placement. The first two rows that I sew on are the perimeter rows that goes from Temple to Temple under the braid and the rest of my rows are actually going to go horizontally from side to side folding the wefts whenever possible. Once I make it to the top, I usually measure by my fingers, I'll usually have about three finger spaces on each side of the leave out I'll sew horizontally. Until I have three finger spaces on the back of the leave out and then I start to sew in a u-shape all the way up into the edge of the horseshoe, the second track that I sew in I sew under the braid and the last track. I sew on top of the braid so that there's no brain showing which makes the track a lot easier to cover with the leave out, and you can see the back track. How once you flip it up, it lays flat once I finish, sewing everything in I'll. Go back in and add wefts in any spaces that need to be filled in where I feel that the gaps are too large or the tracks aren't covered as well as I would like them to be. And now here is our finished product and I'm going to go ahead and show you guys how flat our high ponytail is, go ahead and just brush it up, and you see there are no bumps in the back. There are no bumps on the side. There is enough hair that was left out to cover the tracks, and so now here we have a perfect high, ponytail install and I'm going to go ahead and leave you all with some photos of this lovely high ponytail install. We get a fabulous high ponytail, as well as a beautiful outcome when you heck, wear the hair down as well, and you have tons of styling options with this braid pattern, as well as with this track close knit.

Comments
Tracy Webster: As a white woman, I just want to say I am in awe of your talent and how much time it takes to get that perfect look. You can tell you really spend time making it look perfect. I had no idea this is what a black woman had to go through if they want this look. Thanks for the education. How many years did it take you to learn this talent?
Flora Ofori: I love this!! This is what I've been looking for someone to do it looks so natural like there's no weave fixed in! Great job!
C Mac: I followed your instructions and OMG, I did it! This was only my second time ever sewing a weave in my daughter's hair and I did a marvelous job, thanks to your excellent instructions!
Chelisa Wilkins: Just a little constructive criticism, I've been a stylist for over 20 years, 1 major thing that you have to remember is neatness with the braids, parts and patterns of the braids. Those things alone can cause your clients hair to break, not only that it is very important that you oil your clients hair as this is vital in any style that will be kept in a clients head over a period of time.
Kelz Diamond Touch: I did my first sew in with leave out. And it was awesome. Thank you so much for the tutorial.
Travel With Vonda: Wonderful! That was seamless and fairly easy. Thanks again MissBossy!
tigners4: Loved this video!! Your instructions are very clear & precise. I'm going to try this on my daughter's hair today. I will let you know how it turns out! Great video! Keep up the great work!
Dani: As a beautician, I must say, you did a damn good job!! You, clearly, stated in the title your intentions of the video. Any negative comments are from individuals who obviously can't read. Everyone knows that no one would walk around with a "finished product" like that! Again, you did great. Continue to do hair and don't let the any negativity discourage you.
EdithWivine: This is the most detailed tutorial of weaves I have seen, thank you so much. it is exactly what im looking for
jaadams1979: I just want to say thank you so much for this tutorial. It was explained very well and my hair is flawless on my first time trying this tutorial. when Im wearing weaves, I get a lot of breakout because I am forced to constantly wear my hair down. this tutorial saved my skin and its beautiful and natural looking. Again, I just want to say THANK YOU!!!
roxylovingly: Just finished doing my hair it was a bit confusing at times since I was doing it myself but it looks amazing thanks to your tutorial!!! <3
Pvt Pepper and Sgt Sugar: absolutely wonderful! Thank you for sharing. I will be doing this TODAY!
atldiva63: Great tutorial! One of the very best that I have seen. Very clear and to the point.
Beu Tay: I love how detailed this video is. Thanks !
Krïśtïë Płãÿž: Imma ask my mom to do this when my hair grows out ! Her hair looks soo natural !!
two angry twins: Your instructions were great!!! I've been doing my own sew-ins for a while now and you just showed me a better way to improve my techniques. Thanks very much for that. I do have a question though, I always section enough hair out to do a middle part and side part, so how would I go about braiding the outermost braid?
Melanie Carter: I love this! Thanks for sharing! Beautiful style.
JessPretti: Thanks You SOOO much for this video.! I've been tryna find a tutorial for this style & yours helped alot.! You were very detailed with your instructions so now I can get mines right next time. Thanks =) BeautyCrave xoxo
QueenCoCoaMocha: the explanation of sewing underneath the braid, perfect!
MsLookBusy: Helped me so much tonight when I did my sew in alone! Thanks
Brown skin Bella: Doing my hair like this!!! Love the side bang!
Crowned&Brown: LOVE this tutorial! Definitely helped!
Simply Aprel: this is a good video but the effects makes the quality look horrible.
xklusivekween: Thank you sooooo much for this video! I've been wondering how to do this but now I have a step-by-step vid on it :)
Keyana Mcdougald: , your tutorial was very informative ... best one I've seen thus far . Step by step really will help me do my sew in . Thank you so much .
Autumn Arnold: So, ive never done a sew-in before and after watching this video, I feel confident enough to do my own! Thanks!!!!! :D
sateenma1: just tried this and it was extremely easy..my first time too!!!!!! Great tutorial...about to subscribe. Good work ..keep it up.
Adonica Blevins: Nice instructions but horrible effects. You can't see it clearly. Would love to see a cleaner video..:-)
RiantBeauty: I love this. I will Definitely try this soon! Thanks a lot for this Video.
p bass: This was helpful. Especially about seeing under the braid! Thank you!
Tenisha Albino: Thank you! Exactly what I'm looking for. Very nice job also!!!
Only1 Smoot: why the tracks look like that did they have glue on them
Meme Murphey: Very well put! Very informative and explained very well! Thanks
Christchosenone: You did an awesome job with is tutorial! I sewed my own hair in last week and it didn't come out quite right, so when I so it again in a few weeks I will use this method! :-)
afrikahchick: i mean this from the depth of soul, thank you for this detailed tutorial video. i learned so much in ten plus minutes than you can ever imagine. the braiding pattern makes perfect sense. i now know that i dont have sew the ends of my braids, i can just attach the previous braid with the next braid. wow. thank you so much. can you make the photos of this hairstyle a photo album on facebook? this vid was informative. please keep up the good work. i'm learning so much from you.
rache6375: I loved how detailed and professional this video was. thank you for sharing.
TeandriaBabii27: I think u explained it very well but y would u sew in hair that already has been glued before?
Monica Wright: Great video an very detailed love it did mine it looks great actually made a lot of money doing my friends hair like this thank you
Christy Fulton: Very helpful I have to do a sew in tomorrow and was looking for a technique you did a great job :)
Coolie Cíta: WOW Ma'am thank you, this was very good! Learned a lot!
Raina Turner: This was very informative! Thank you for taking the time to post this video!
Tylesha Gibson: Why does her wefts look like they've been bonded in before?
S. Renee: Thank you!! you explained everything well. very simple and point blank period like lol. It looked great!! Thanks again I can't thank you enough.
Ms.Parker Is Here: Great job. I like that you're very clear and to the point. I am going to try doing this style
Life Made Fierce: Yet again, you are amazing because i didnt know how to fold the wefts. I am about to start using virgin hair so i didnt want to be cutting it up so this video was PERFECT!
fabunny: I absolutely LOVE this video Miss Bossy. You are truly talented.
Tabitha Brown: not clear at all, wish I could see whats going on
MiracleinStars: this is the best sew in I've ever seen! Totally subscribing off of one video :)
Sydney DaJuice B: OMG...thank you so much for explaining to push the weft under the braid, that helped so much.
LaDawn Russell: Great Job.....you make it look so easy!
tigners4: Thanks for asking! It turned out great!!! I need to practice on the sides but the back is great!! Thanks again!!
Ingrid Medel: Damn thats a good weave
Moments With Marge: Omg...took forever to find but this is exactly what I was looking for...thanks so much...a bit confusing but I will watch a couple more times and figure it out...thanks a million!
NiNi Brown: Rarely am I impressed with the weave how-to videos on You Tube, but you did a really good job! Beautiful!
Keeshler Pittman: As my grandmother says, "The spectator always sees more than the player." Great work.
LTETobago: I used this last night and it worked so well.. step by step, thnks!!!!
Emmon woods: u need a better quality camera.... your videos will look so much better
makeupbyaida: This was very good. I have two clients who requested this and thanks to your tut I have a head start on how to do it.
Shatoya Wright: Very helpful! Great technique
quirkychic1984: You did an excellent job in this video! You were very clear and concise and demonstrated what you were stating clearly. Thanks for the video now I can be specific "interviewing" my future stylist.
Nika Norwood: I do my own hair but with your technique under the braid will make my way EVEN BETTER. Thanks sooo much!
SugaDaisy: Eww are you kidding?
S L: Nice!!!! This is a great tutorial and I love how you zoomed in! If possible, can you do a video showing how to knot the end of the thread? Mine always seems to come out and unravel.
Shuntaya Rogers: Great job!! U explained it so well...
MissBossyLIVE: Wonderful! I'm so glad it worked for you
Ebb: Such a great tutorial.. thank you!
ashley rocks: total mess
J Renee: One of the best high ponytail sew in tutorials ive seen great job
Kay.Chambers: Awesome video came out perfect. Very detailed!
Penelope Ray: You did such a great job, and she looks so pretty!
Kaylaa Jaee: I have been searching for a video like this that was easy enough for my mom to follow. This is my sophomore year of hS and I wanted to have a versatile hairstyle that was easy and quick to do. But I am also a cheerleader so my hair has to be in a high ponytail at the top of my head for games and practice camps an competition!! God bless and keep doing what you do p.s I love the color choice for that girls skin tone :)
Johanna Salon: Nice work. I will be trying the sewing under technique :)
MissBossyLIVE: @MsIslandsweet I definitely will. I think just using really small braids with either something like this or a beehive will be best, but I’ll keep my eyes peeled for some other patterns as well :)
Anneis4: Obsessed with this weave! I love it!
tictac620: Great job! Very easy to understand
Chauntress: All I have to say in my "Tasha voice from Why did I get married" Dang, Girl you are good! And it actually looks natural not to thin or thick. It is an undetectable weave the kind that people need to rock. Loving this video thanks so much for sharing this technique such a blessing!
Gemz & Pearlz: wow! thats amazing...it looks so natural!
Jeri Michelle Cowan: GREAT job! thanks for the tips!
NW4Mattie: Great video & very informative, but I just learned a few minutes ago about a hair loss condition knowned as traction alopecia: This is a small or localized hair loss area caused by repetitive or persistent pulling or force on hair roots. Tight braids and ponytails can pull hard enough on hairs to make them fall out. If this happens, it's best to choose hairstyles that put less pressure on hair roots. The sooner this is done the better to avoid permanent damage. I completed Chemo therapy a couple years ago, and my hair never came back to its normal thickness or fullness; instead my hair came back fine and thin. So, I may still try your special technique for a special occasion, but I'll make sure the hairdresser keeps a good measure and focus on keeping it on the 'loosened side' of thight. Thanks again!
DIVESTED ISRAEL: Excellent video very good teacher I'm going to do this same style in my hair my first attempt wish me luck!
Yilooksofly: By the way MissBossy i really LOVE your work. Keep it up, and Thanks for keeping my pockets full, LOL!! My penny saver is what you are.
Carmelroadriesling: Just use this technique on myself!!! It came out soo pretty.... Never paying someone to do my sew in again
physique20: Very VERY informative. You did a very good job my girl. Keep up the great work. I like ppl who take the time to make a very proper detailed video. With nice pics and camera angles. (only I didnt get to see the first perimeter braid on the left side (front) of her hair, u only shwed the right but thats ok, i'll use my imagination.)Great work, I cant wait to try it tomorrow. :)
JNO91: This looks really good! It's like BAM, high ponytail :D
Ariel Love: This video is awesome, it helped me alot! Thank You!!!
T T: How very generous of you to create this wonderful production for fellow diy-ers. Thank you!
Alama Ramadhani: This video helped out a lot. Thank you!!
MissBossyLIVE: @love020799 Thanks. It should last as long as any other sew in weave. This will depend on how well it is stitched and how fast the braids grown out, but I wouldn't go over 2-3 months
MissBossyLIVE: Thanks for subscribing :) Unfortunately, I do not manipulate my edges much so I don't really have a method for getting them really flat. I generally just twist mine or let them do their thing
Cherron Thomas: This is what I needed and want to do...going to try it on myself hopefully I'll find someone to at least do the braids for me.
damien daniel: that looks amazing. good job!
Debbie Stoughton: Goodness! That's a lot of work and you did an outstanding job. It was almost like you were making a wig. I hope you are paid well.
MissBossyLIVE: I always sew around the braid. When sewing across vertical braids I take the needle all the way under the braid, sometimes in the crease of the braid. You can also use a net for vertical braids
Chauntress: All I have to saw in my "Tasha voice from Why did I get married" Dang, Girl you are good! And it actually looks natural not to thin or thick. It is an undetectable weave the kind that people need to rock. Loving this video thanks so much for sharing this technique such a blessing!
Jackey HM: I just saw your video and it was pretty awesome. I wish I had enough hair to get my hair done like that. I love wearing updos and high pony tails but can't anymore.
cloudyjazz2011: This is truly helpful! I was wondering how many tracks did u use to make sure it looks and not thin? I have fine hair
cwilli620: Your tutorials are so informative. I was wondering what brand of flat iron you used on your meodel. I would love to get one like that. It looks like just the size I need. Keep doing what your doing girl!
SZFBeauty: this video is amazingggg! thank you, i've been searching all day for a video like this.
Ayana Angelique: Girl YES! I try to show people But they don't know Lol perfect tutorial! Simply perfect. Unlike these other unexplainable females "tutorials"
Laid by Lisa channel: I am soooo glad I found this video. Great work!