Low Curly Bun Hairstyle - Easy Low Bun Hair Tutorial
- Posted on 22 July, 2022
- Curly Hairstyles
- By Anonymous
Low curly bun hairstyle - easy low bun hair tutorial. Follow my step by step instructions to recreate this easy, low curly bun updo. A lovely low curly bun hairstyle with simple, clear instructions. Only takes a few minutes from start to finish, so perfect to do on yourself. Ideal for every day, or perfect for bridal or bridesmaids hairstyles
Want to know what products i used? Then just click on the links below:
USA Viewers click here: https://www.amazon.com/shop/hairangels...
UK Viewers click here: https://www.amazon.co.uk/shop/hairange...
We are a participant in the Amazon Services LLC Associates Program, an affiliate program designed to provide a means for us to earn fees by linking to Amazon.co.uk and affiliated sites.
You will not pay anything extra by clicking on the link.
Business enquiries: [email protected]
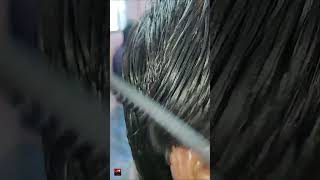
Hi guys today, i'm going to show you how to do this beautiful curly, bun, hairstyle to start you're going to curl all of the hair, and you don't have to be too particular with this. I'Ve just used my curling wand and done a loose wave once you've. Curled, all of the hair, we're going to section out the crown area and we're going to gently comb this back with our fingers and then just pop it into a little ponytail using a clear elastic band, apply some texture spray i'll pop the one i'm using in The description below and then gently pinch and pull at that crown area just to create a little bit more texture. Now we're going to take a small slice of hair as close to that crown area as possible and then just clip it out of the way. For later and then take the same size section on the other side, i bought a cheap hair vine again i'll link it below and i've just chopped it in half and i'm just going to bend one of the ends around to create a hook and all i'm Going to do on that left hand, side is twist the hair towards the head and then pop that hook into the hair and twist that hair vine and the hair towards the head, and then we're going to bring this around the back of the head and pin It just to the right hand side of that little ponytail apply some more texture spray along that twist and then we're going to use our fingers to gently pinch and pull for more volume and then we're just going to repeat the same steps on the right hand. Side so give that hair twist towards the head hook in your vine, wrap them around one another both towards the head and then we're going to bring this to the left hand side. Just under that previous twist and pin it to the head and then pinch and pull now we're going to divide the remaining hair in half and i'm just popping that right hand side into a low ponytail and i've left a little bit of hair out to frame The face and then just repeat this on the opposite side now taking that ponytail on the right hand, side we're going to do a loose twist, so just divide it in two wrap the sections around one another, and then all we're going to do is take out A very small slice of hair and let it drop down and then wrap the hair around one another again. So basically, you wrap the hair, take out a small slice of hair and let it fall down and then continue wrapping and pulling out hair until you get to the end of the hair and then secure it off with a clear elastic band. Then just do exactly the same. On the left hand, side create your loose twist pulling out hair as you go, don't forget to secure it off with an elastic band. Now take that right hand twist and we're going to bring it over to the left hand, side and use a couple of bobby pins to secure it to the head. Then we're going to angle it down, and so it's almost going around that left hand ponytail and use a couple more bobby pins to keep it nice and secure, lift the ponytail up and bring the ends of that twist. Underneath the ponytail and around to the right hand side of the head now we're just going to slip a couple of fingers behind that twist that we just pinned down pass the ends through and pull it through, and that will help cover the elastic band again. Secure to the head with a couple of bobby pins now, taking that other twist we're going to bring it to the right hand, side and secure to the head and then with the ends, we're going to bring them up and over the top of the bun. Then just secure it with as many bobby pins as needed all the way along that twist, as you can see, we've got quite a few curls hanging down. So i like to angle these towards the side of the bun and coming out of the bottom. So just pull each individual curl to the position you like it and then just pin it to the head with a bobby pin and then, if i've got one sticking out the middle. I like to pop my fingers through one of those twists and just pull that curl through, so it comes out of the bottom of the bun. Don'T forget to secure it, and it really is that easy? Here'S the finished! Look if you liked it. Please give it a thumbs up and don't forget to subscribe for more tutorials.


Comments
Mirela Maereanu: I enjoy watching your videos. I’ve learned so much. Easy to follow. Thank you.
Jabeen Khan: Wow ... its so beautiful loved it
Caitlin Lavery: Looks amazing!!
Alice Jenkins: Beautiful as a wedding hair too …x
Jessica Adame: I love it that is so inspiring.
sandeep dhatt: Great work ❤️❤️❤️
Toxicate: GREAT HAIRSTYLE!
Suzanne Lyle: Your model has stunning eyes