Thin Hair Video Series, Part I: Curly Updo
- Posted on 02 March, 2016
- Curly Hairstyles
- By Anonymous
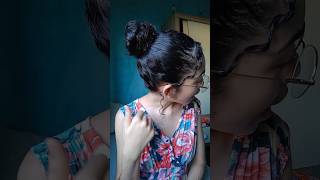
In this video I share a hairstyle that I find helpful in making my fine, thin, hair look thick and full! I hope you enjoy!
You will need:
-small curling iron
-heat protectant hairspray
-firm hold hairspray
-bobby pins
Hi, so does what I'm going to show you today is my method for making my hair look thicker by making some curls and then brushing them out, and these ways are all very practical. This isn't going to take a ton of time, I'm a kind of not show you, the entire I'll, show you how I curl a few pieces, and then I will kind of speed it up or skip over some of it. You know once you get the idea to make these videos a little shorter, but anyways. I did also want to mention that I don't think it's necessary if you have thin hair to make it look thicker. I don't use these methods very often. To be completely honest. It'S for that every once in a while, where I want something different, I want my hair to look fuller and thicker. That'S when I use these methods, so I don't always you know the grass isn't always greener I have had. I will be doing a video in the near future about how I've grown my hair, because someone has suggested that I do a video on that. But it's a great example of how, like I've, always wanted longer hair and always had shorter hair. My hair is uncut, but it's still very short due to years of perming and heat damage and just having thinner, shorter, hair, naturally, and over the course of just a few years. Almost to my own surprise, my hair grew, I feel like it got like twice as long as it used to be and when it got longer, which is what I had always wanted. It came with challenges, so I don't know I'm rambling a bit, but I just wanted to throw that out there to say that if you have thin here, I'm not saying that you know I, like the smaller sleeker. You know look that's very easy to do within our hairs, but for those times when you want your hair to look a little thicker and fuller, these are some of the methods that I enjoy using and I hope you find them helpful. So let's get started okay, so the first thing that I'm going to do for this um hairstyle is I'm going to. I just took my hair down and I'm going to take like the top half, not even really that, like I'm taking like for my ears and going kind of up as much as possible, and I'm going to take this top part and clip it up here. Out of the way - and I'm just gon na clip it with like a little claw thing here now - is what I'm going to do with this hair that I have left in the back. I'M just going to do two curls, so I split the tube the back like you know. Third, I split it in half, so these are kind of larger sections. Oh, my goodness, I need to run my thing under hot water anyway, so I'm just gon na put some on my hands and run it down in a bit. I'M actually I'm going to take my ring off, so I don't get hair spray all over it, and then I'm just gon na use this as a barrel, especially for back here. Cuz. These ones are not that important, so I'm just gon na hold it in here. For I don't know five or ten seconds, or so this is the bottom third half of my hair and I'm just gon na do the same thing to either side. Do you see how I took that out? Okay, so I've just continued on to this other side and the reason there's probably a weird breaking this is my heat. Protectant hair spray is just not it's like that. It'S not clogged up. The like sprayer is defective, which there's a little unexpected problem and my plan for doing my hair right now. This is a new bottle. That'S why I didn't know it didn't work, but I'm just going to open the lid and put some on my hands and you know make it work. Okay, so these two bottom ones are done, and these are kind of the unimportant part. This part is just going to be pulled up in a button. This is an updo, so I'm just going to do a little bit of a similar thing, except for actually, I will show you now I'm going to do a smaller section so still from my ears, but I'm just going to take a smaller section and and then Of course again this will depend on the thickness of your hair, but I'm going to do so. I have a smaller section here, but I'm going to do four of these similar curls, so I happen have and then I'm just gon na do two on this side and two on the other. I'M looking a little crazy here, but this is all part of the process, so I made like a part right here. You can part it or you can do it all back. I don't necessarily keep this part. I just like to do a deep slightly crooked part. Right here and then I will do two curls on this side and then I'll do three or four on the other going. You know this direction so once I do these two curls here that I'm gon na do three or four on the other side that Pete that piece that's hanging down on to three or four more curls over there. Okay, now that I've got it all done, except for this one little square from up here, I'm going to start like working my way towards my face so from back here and do like one two, three, four five. So this time I'm going to use it not as a curling rod but as a curling iron and I'm just going to curl it toward my face, but a little crooked. And so this one I'm just going to. Let completely fall like this and literally pin it up how it fell like so so now, as you'll see, I've got my entire head and with fine thin hair. This didn't take a long time, there's not much I'm skipping through, but just right now and I don't do it super methodically or anything like that. So I just kind of do it up and it doesn't take a super long time and now I'm going to while it's up in this I'm going to spray all around and let it cool for a few more minutes and then I'll start taking them out. I'M just gon na start pulling out all the bobby pins on all of my head until they're all out still going now. I didn't mention that this one right here in the front, which is actually kind of falling out on its own, a bit that one I'm just gon na leave in for a minute. Now I'm just gon na kind of, as you can see, these curls are not super duper tight, but is what I'm going to do is now I say brush them out, I think or brush them out. So if you can see this, it just made it very. Very thick so now - and this is the interesting part - because this is the part that looks different every time is what I'm going to do. Is I'm just going to kind of. As you can see, these are just kind of curled and sitting where they're at I'm. Just gon na start twisting and pinning all in the same direction, which is toward the center of my head, starting up top so twisting and pinning, and you may be thinking you're going to see a bunch of like pinned things around my head. That may be true and you adjust those at the end, but the easiest way to do this is to just loosely twist toward the middle of your head back here and pin it in more often than not. You end up, naturally hiding the bobby pins and you don't really have to adjust much. I personally, don't I mean sometimes occasionally I will, but this is not a hairdo where I really teased it up and the reason why is because it's supposed to look very curly and I find that if I tease it up, it kind of gives it that matted Together, look: this is not supposed to look like it's all one size, all the way back to the back. This is supposed to look kind of highs and lows and just kind of as if you crowd your hair, very similar to what you did and just kind of ran it back. So now, then, we'll go ahead and take this one out, and this is the fun one. This is the one where I think makes most of the difference. So, as you see, I'm taking my fingers like this and pulling it back, I'm just going to adjust this a bit like kind of teasing it with my fingers. Okay, so now you'll see it's always a little flatter right here. So I'm just going to take this. I see how I naturally have one that kind of wants to say down and frame my face. A tiny bit. I'M gon na leave that out, but I'm going to take this flatter part right here and pull it just pull it up and pin it and, as you can see it just pulled, you know that piece up of it and it took care of the little depression That was right here and so now I before I do anything with the back, I'm going to continue to adjust it from the front until it doesn't look frizzy in any of these areas and maybe have to recur laughs. You tiny pieces pinned some things. Okay, so I kind of have that front how I want it and it's what I'm going to do is I pick up the back of my hair and pull it all the way up to about here. So you're, not gon na see it from the front you're. Only gon na see this, but to cover any of those bobby pins, anything that you pulled to the center I'm pulling this hair up and then, as you can see, it's just going to be arranged over top. So does that make sense so pulling all the pieces toward the middle and pinning him in and then you're gon na? Take this bottom part and pull it up and pin it up and it's going to kind of look like what you're seeing right now. In the end, but I'm going to complete it, so you can see it totally finished. Okay, so it's completely done now and, as you can see, it's just kind of it looks like an updo pretty much except for for my thin hair, which is what these videos are kind of catering to this is so much easier than me trying to do it In a traditional updo way, so I wanted to show you this. You know variation of how I you know kind of swoop it down. But if you happen to do this, hairstyle I'd love to hear if you do any different variations, because I have done like where you know, I pull it all back where I said it low, where there are different ways, you can do it, while still using the Same methods of curling it and pinning it in and not you know, doing the traditional you know twist or bun, or you know other ways that people with more hair may accomplish an updo. So this is the way that I probably go to most often, and the only reason is because it pretty much turns out the same for me every time with a little swoop and you know kind of those steps that all pretty much flows the same so anyways. I hope that you found this helpful and I hope that you have a wonderful day.


Comments
Mike Schlatre: I enjoyed watching your video and I think you did a beautiful job! However, I would have “loved” to have been able to see the “back” of your head as you were twisting and pinning your hair up. I (being older in age) really need to see things to be able to fully understand the instructions. But... you did a beautiful job.
Sherrie Fults: Why don't you show the back, and how you do it. It would be extremely helpful. God bless!
Jamie Johnson: Beautiful long hair and fun
adds jo: dont be so serious, youre beautiful smile from ur eyes somtimes
Debbie Harrison: Can we see the back?
Jamie Johnson: It's not too thin it's just fine anr easier to fix I actually kinda like my hair being kinda thin cause it's fun to do updos and do fun tricks and easier abd not as long ahd hard to fix as thicker hair but thicker haur us beautiful bit so this thin so I want thicker hair yes but it has its challenges too