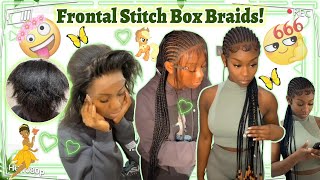
Detailed And Explained‼️ Trending 6 Stitch Feedin Braids With 2 Curly Buns To The Back | London Tayy
- Posted on 03 November, 2021
- Curly Hairstyles
- By Anonymous
Hey fran !
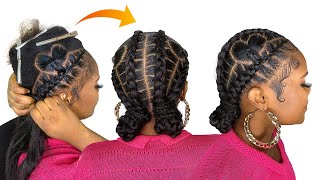
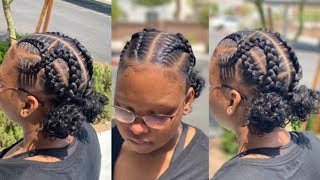
In this video, I am showing you a detailed video of how I do 6 stitch feed in braids with 2 curly buns at the back. These are sooo pretty on her and the edges just set them off
Enjoy and remember to like, comment, and subscribe!
Social Media
❤️Facebook : London Tayy
❤️Instagram Hair page :@thelondontayy
❤️Instagram Personal page: @londontayysway
❤️ Amazon Storefront : https://www.amazon.com/shop/londontayy...
❤️ Business email : [email protected]
Location: US -Columbia, SC
————-
Products used in the video:
hair used: 1 pack of ez braid jumbo pack : color 1b https://amzn.to/3BG5LbR
1 pack of spring twist hair : color 1b https://amzn.to/3BOMl4Y
style factor edge control (black top) : https://amzn.to/3k1gmYU
shine n jam mousse: https://amzn.to/3pmmfU7
shine n jam oil sheen :https://amzn.to/3vEJXfi
got2b freeze blasting spray: https://amzn.to/3E3saBu
vigoril olive oil mousse: https://amzn.to/3EEOKAQ
Hair tools used :
edge brush:https://amzn.to/2WgCypc
rat tail comb:https://amzn.to/2UHPp3h
wrap strips: https://amzn.to/3bdL6Bo
hair pins: https://amzn.to/3BCC6AB
------------
Music by DRUBEATZ - KiLLShot - https://thmatc.co/?l=5CB0F29F
Music by DRUBEATZ - sLiDE - https://thmatc.co/?l=A79AD28B
Music by Ryan Little - Take It Easy - https://thmatc.co/?l=F9407243
------------
keywords:
stitch braids,stitch braids for beginners,stitch braids into a bun,stitch braids bun,dess dior braids,braided bun,2 low curly buns,stitch braids with 2 buns,stitch braids with two buns,stitch braids with curly buns,stitch braids with two low buns,stitch feed in braids with bun,stitch feed in braids with comb,6 stitch feed in braids in a bun,6 stitch feed in braids,6 feed in braids,6 feed in braids with bun,6 feed in braids straight back with bun
So so, hey guys, what's up welcome back to my channel, this is linda tay, coming to you today with another video in today's video. I'M going to show you guys how i did the stitch braids on natural hair and i'm going to show you guys how to do the curly buns in the back. Okay, two curly buns in the back all right! So if you guys are interested to see how that looks, then go ahead and continue watching so right now, i'm just going to section her hair out. So since i'm doing six braids, i'm going to part her hair down the middle, because it's an even number guys. If it was an odd number, then i would not part down the middle okay. I would have a braid down the middle okay if that makes sense. So, since i know it's gon na be six, i'm just gon na go ahead and section her hair, half and half all right. So you guys see at the beginning what i'm using i'm using um that shot that style booster. I use that when i do stitch braids, because it gives me enough grip to be able to do the stitch braids effectively, i'm going to use the shine and jam mousse and the shine and jam oil sheen. I'M going to use the got to be glue cream, which is in the yellow bottle for her edges. Okay, i'm going to explain why i'm using everything and when i'm using everything um so yeah guys like i said i import her down the middle and right now. I'M just going to go ahead and pre part, so i'm just going to go ahead and section her hair off and braid it out the way to give me some type of visual on how and where i'm going to place these braids okay. So that is what i am doing right now, so so, okay, so now that i'm basically done with that pre-parting guys, i am going to just start with that. First braid. Now i'm just going to go ahead and braid that first braid, because i feel like you guys didn't go, didn't get a good visual. So i'm going to slow down and explain when i do the second braid guys, but i just want you guys to see like how i'm doing it, i'm just taking the two breaks that i'm working on. So if i'm working on that one braid, i got to make sure that the parting's right, so i have to take out the other braid okay, just to make sure the parting is good. Okay, because i don't focus on the parting when i pre-part - i guess, if you do focus on the parting, it will be a lot easier, but i don't do that. Okay, so um, so yeah. This is what's been working for me. Eventually, i think i will just go ahead and perfect the part and then i'm just gon na you know just take one braid out instead of taking two braids out to fix the braid, all right so yeah guys so, like i said i just um apply the Style factor on the parts, and then i use the rat tail comb to clear up the parts i like to use the middle part to clear up the parts and define the parts all right and right here, i'm just going to go ahead and braid. The other braid that i'm not going to use, but this time i'm going to braid it a little bit tighter. So that way it's i'll make sure that the parting won't be messed up: okay, so yeah! So now that i am done with that first braid, guys, like i said, i'm doing the same thing i did with the first braid, i'm just perfecting the part, and here i am about to get started guys. I put that shine and jam at the front of the braid. I'M make sure that i part out the baby hairs that i want to not include okay, so i'm just going to go ahead and put that shine and jam on both sides of that braid that i am doing guys and i'm just going to smooth it in With the comb it's gon na do both sides that way, so i like to put it at the front and put it on all the sides - okay and just comb - that in and smooth that in guys and then i like to part out the front part where I'M going to start that first stitch, i'm going to have that on the front i like to make sure that's really really defined and crisp and clean. I'M going to do that and then the next step i am going to just um. I'M going to put that shiny. Well, i'm sorry, not shining jam. I'M gon na put that style factor on that. First, behind that first stitch, okay, guys! So that's! Basically what i'm doing i'm just kind of getting everything defined and everything clean and crisp. Before i go ahead and start braiding guys and then after that, you guys missed it, but i part it down the middle. I probably will include it, so you guys can see how i part it all the way down the middle. So that way, whenever i do start the stitch, i'm able to just pull from the left side, pull it from the right side, pull from the left side, pull from the right side, yeah kind of like how you'll see me doing okay. So this is in real time guys. This is how slow i do the stitch braids. I just use the comb, as you guys can see. I have nails and the nails are not even like that pointy type of nail, so i can't even use my nails personally. I try using my nails - i don't like using my nails guys. It just doesn't give me it's just more of a hassle to me, and i know that using the comb will give me a better a better parting, okay, another a tip that i like to use guys. I do not like to use that those combs with that teeth missing at the front, because whenever i am stitching, it's not going it just doesn't it just it does the part good, but it won't like comb up the hair at the same time that i'm stitching, Like a regular comb with you know, because it has all those those teeth it has, it has all those teeth and the teeth are not missing. Okay, so since it has all those teeth and when i'm doing the part i kind of get to part and comb, and that helps me grip the stitch way better guys. So that's a tip i like to use when it comes to these stitch braids also, i learned how to make the stitch braids neater, and that is by doing very, very slim, pieces of the stitch okay back then i used to do like thick stitches. Like you know like just do a stitch here and there, but i feel like it's a lot neater me doing it the way i'm doing it now, which is small slender pieces of the stitch, and i'm doing it as i go so yeah. So i'm stitching to the right i'm going to add that stitch, i'm going to bring that stitch into the hair and then i'm going to go ahead and go back to the left. Now her hair is full and it's thick guys. So i'm literally only going to add like two or three pieces of braiding hair: that's it guys um now i did start to add braiding hair. I'M sorry i add some curly hair to the end guys she didn't tell me she wanted the curly buns until she was already here and i didn't have the hair. So i tried with this kind of loose loose wave hair um, but the curls were not as defined as i wanted them to be guys. So i did add those curly pieces to the end because i knew it was going to be buns. So i knew that i wanted to kind of like wrap it wrap it wrap it and then the curly ends will be visible guys, but the hair is just too thin and too straight. So when you see those curly pieces, you'll know what i was trying to do, but that hair was just too straight. So what i ended up using was, i ended up using some spring to his hair guys and whenever i just did the bun. I end up. Wrapping that spring twist around the bun, so that way it gives it that curly bun look still okay, so yeah. So this is just me like slowly slowly doing the stitches guys. I wanted to show you guys in real time, because a lot of people always speed past these processes, um, so yeah, you guys are gon na be able to see a lot better but yeah i like to go. I like to like stitch from behind. So that way i can see the entire stitch you know, so i'm going to braid to the right guys. Once i braid to the right i like to get that comb make that stitch grab that stitch and if it's not defined, i do it again. Grab that stitch put that comb where i could easily accessiblely grab it put it right there now if the hair was thinner or shorter guys. Of course, you will start to add hair um, but you know with these braids i actually like the kind of thinner braid. Look, i don't want or like a bulky braid, so i wouldn't even add a lot of hair, but i would for sure, add hair, okay, guys so yeah. So that is basically what i am doing. I think i will start to speed it up a little bit because i'm sure you guys kind of get the concept you just kind of braid to the right stitch grab the hair braid to the left, stitch grab the hair and i just keep doing it over And over again, until i am done, do so so and right here guys, i'm just adding the pieces of braiding hair because i just want it to be a little bit more a little bit. Thicker. Okay, the braiding hair does not match her hair color. Her hair color is more so like a color number. Two, the braiding hair that i got was like a color number um, 1b they're pretty similar, but they're, not they're, not the exact okay, so yeah guys. So i think, i'm going to add a little bit more braiding hair, just because i want it to be a little bit thicker in the back and then i'm going to start adding that loose wave hair. That i was telling you guys about. I'M going to kind of feed it into it like i just did just now, feed the hair into that and braid it a little bit. I did like leave out a little curly piece because, like i said, i wanted it random curly pieces now if the hair was way curlier than that, i think it would have looked really cute initially, but it ended up looking cute on the ends or at the End so i really really appreciated that guys and i'm just going to do that same concept throughout the entire hair hope you guys enjoyed this video whenever i get more so towards the end, i will come back: okay, already, foreign, so all right guys so right here, As you guys can see, i have these loose pieces of hair and then i have the hair at the end guys so, like i stated she told me late that she wanted curly ends, so i didn't even have the proper curly hair to add um. I would have added some like a bohemian curl hair, because that would have gave me the tight enough curl that i wanted guys, but this hair is was more so like a loose wave hair. So whenever you start to like stretch it out guys, it just gave this type of light. The type of curl that i felt like would get nappy very very quickly only because it's just so straight and this type of hair is just really not to be worn. This straight, so what i ended up doing was. I ended up kind of just wrapping all the hair around eventually, because you guys can see. I was trying to leave out curly pieces and things like that, but it just was not given the look that i wanted. So, honestly, it was my client's idea. She said you know we look back at the picture and we said you know what why don't we have some curly hair and just wrap that around the bun, the base of the blend, so what i ended up doing guys. I had spring twist hair, so i ended up literally just getting like three or four pieces of the spring twist hair and then i wrapped that around the base and that's what ended up giving it. The look that i wanted so after i just kind of covered all of this up right here i used that spring twist hair and then i started to wrap and then, as i was wrapping guys, i started to kind of just leave a couple pieces just kind Of randomly out so that way, it gives it that kind of full curly type of look. You get what i'm saying so that is basically how i ended the look um after i do that um. I basically started to do her edges and kind of set everything. The way i wanted it to look so it gave it gave that it gave what it needs to be given okay, so you will use um the pre-trip, the pre stretch, hair, and then you will use the spring twist hair guys. All you need is one pack of that spring swiss hair. You don't need much, but it gives it that kind of full curly look in the back that we were going for. So i was super super excited. It was a really good idea that she said she said you know what why don't you just wrap it around instead of kind of braiding it into the ends like i already had the other hair braided into the end. So this is just perfect. So after this guys, i did get um some bobby pins and i kind of place a few in the bun. So that way everything can kind of stay and everything wasn't like kind of moving around all right. So here i'm just using the got to be blue cream only because guys she has very soft curly edges anyway. So all i really needed to do was use that cream. Now, if you have more of like a kinkier texture, client or your hair, is more kinky or textured um, i highly suggest using style factor, edge control and then placing that got to be cream on top. So that way, it holds for days the way it's supposed to okay, so i'm just trying to figure out how i'm going to kind of do her edges and how i'm going to play with them and then yeah guys, i'm just going to end everything we got To be glue spray a little bit of oil sheen and guys that's it, there was no dipping of the ends. There was none of that. Okay, guys hope you enjoy this video. I hope it was informative for you guys, and i will talk to you on my next video love. Y'All bye. You
Comments
London Tayy: Somebody finally asked for 2 curly buns with the braids
Infamous Beauty: Love it gonna try this on my daughter!!
Kiesa Smith: Lovely sis!!! Thanks for sharing ❤️❤️
London Tayy: Here are some time stamps to help you navigate through this video! 1:01 products used 1:14 hair used 1:27 hair tools 1:44 preparting 5:15 start braiding
Daisia Lanae: thank youu
deseraymiles87:
Imani Thomas: Id wanna do this style,it looks so gud but how do u tie it up at night,any suggestions?