How To:Claw Clip Trend On My Type 4 Natural Hair|Black Girl Friendly #Type4Hair #Clawclip
- Posted on 22 November, 2022
- Easy Hairstyles
- By Anonymous
Kinky Hair| Beauty| Fashion| Lifestyle
#clawclip #type4hair
Socials
Ig: https://www.instagram.com/jada__maria/...
TikTok: https://www.tiktok.com/@jada__maria?_t...
Pinterest: https://pin.it/qKE7dRC
My first time trying the claw clip trend on my type 4 naturally curl hair. The claw clips were purchased from Dollar tree. Hairstyle was quick and cute. My new go to hairstyle.
Comment below if you’ve tried this hairstyle!
Products used in the video:
- Shea Moisture Black Caster Oil Holding Gel: https://amzn.to/3OqYy7R
- Shine n Jam: https://amzn.to/3EQErN9
- Mielle Rosemary Mint Edge Control: https://www.amazon.com/dp/B07N7PWKKQ/r...
- Black elastic bands: https://www.amazon.com/dp/B0791BYJWG/r...
- Black snap clips: https://amzn.to/3Gw4meh
- Smooth brush: https://amzn.to/3Vizl1E
- Tail comb: https://amzn.to/3gv6ZlL
- Claw clips: https://amzn.to/3VeCjE7
Catch a few of last videos:
- Type 4 Wash N Go| No Gel: https://youtu.be/Ghkcsgm9XpQ
- How to Bantu Knots: https://youtu.be/1kXR6u3KUjQ
- Quick Weave| Synthetic Bundles: https://youtu.be/66jP7_kPy_U
Enjoyed my content? Here are more ways you can show support
Donations accepted:
CashApp: $JadaMariaBusiness
PayPal: [email protected]
Intro and Outro Music: AmberNicolex
“Superman”
Additinal background music:
Music by Goosetaf- Bumblebee https://app.hellothematic.com/promo/25...
I do not own rights to this music!
Disclosure: Links contain affiliates. When you make a purchase through one my links, I will receive commission. This is at no cost to you. Thanks for your support.
***BUSINESS INQUIRES ONLY***
Email: Jada.Maria.business @outlook.com
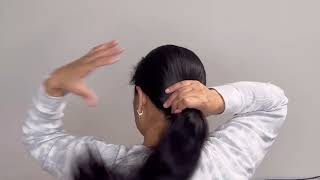
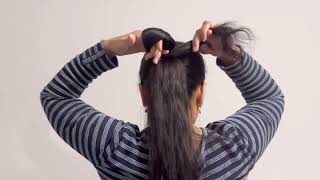
Look what I got. I finally got some claw Clips. I'M gon na do a claw clip Style on my type 4 hair. I'Ve never ever done this before on my type 4 hair. I remember back in the day, though, when I had a relaxer. This used to be popular, this used to be in style. What do they say? How everything comes back in style like I used to rock this, when I was literally in the fourth grade, I was probably like 2008 and now it's popular again, all right. So what I'm gon na do is I'm gon na. Do it down the middle and I'm gon na take out the front right here. I'M not making it a perfect part, because The Parting is going to be covered up anyway by my hair. So I'm not too worried about it all right, I'm just going through and trying to finger detangle, my hair. I want my hair detangled so that the product can sit nicely and be defined and not as volumized, so that my hair can actually fit into the claw clip like. I basically don't want my hair to be too big, so we're gon na try to contain it with gel like a lot of gel and a lot of water foreign. So what I'm actually going to do, I'm going to split my hair in half and I'm gon na work on one section with water and gel and then I'm going to section it off and do the top. I think that will be a little bit easier. So I'm just going to put this on here. All right. I did get these from the dollar 25 store um. They seem like they're good quality and it opens up pretty wide. So I think this will work nicely alright, so my hair is still pretty big because it's not as damp as it should be, so I'm going to spray a little bit more water. This is new, it's so that it's a holding gel, but it doesn't work as a holding gel on my hair, so I'm just going to use it as a styling gel I'm applying it all over roots to end roots to ends all right. So you can see that my hair isn't as big as it was earlier in the video. However, my ends aren't as defined yet so that's what I'm working on all right, my hair is tamed. It looks good, it doesn't look as puffy or as big or volumized. It looks like it's actually going to you know, lay in the claw clip, so I'm just going to twist this off and use the claw clip to section it off. I'M going to do the other part. I do not like this brush. I need a new one. I need a new smoothing brush. Okay, I'm gon na brush this half back into a ponytail and I'm going to use a hair tie to contain it. I'M going to put it a little bit lower and then, after that, I'm going to let the bottom section out and I'm going to twist it up and um put the claw clip so like this ponytail is going to add a little bit more length and exaggeration To make see like my hair is stretching longer than what it really is. Thank you all right. That seems good. So I'm going to take my hair tie, make a little pony, I'm actually going to put it into like a little tiny bun so that I can work on this section at the bottom and um. My ponytail won't be in the way I put my ponytail flipped up, and then I have this section. I'M gon na go and brush through I'm going to twist it and then flip it up. Okay, now, this ponytail can actually be a little bit lower, but we're gon na leave it right where it is because I don't want to do it over again. I'M just going to put my claw clip right here. I'M making sure that it's covering the ponytail I'm going to flip the hair back down and I'm going to actually shingle all of this and try to make sure it covers this part that I have right here to make it look like it's only one part. Instead of two, let's jingle this part first up here and then we'll take care of the front and separating it taking out all of the knots and Tangles and just shingling it so that it looks a little bit better when it dries all right. I finished shingling in the back, I'm going to show you everything when I'm done foreign from behind, but that's what it's looking like now in the front here, I'm just going to spray a little tiny bit of water, not too much. I'M going to use a little tiny bit of gel, not too much, and we are just going to put a little bit on here, make sure we get our edges and we do need to get the ends of the hair. The ends are actually going to need. A little bit more water than the roots. So once again we need to tame those ends so they're not as puffy and volumized and thick like my hair, trying to disguise it for this hairstyle a little bit. We'Re gon na finger detangle again all right and then we're gon na smooth with our brush, we're just gon na smooth, smooth smooth as much as we can. I'M actually going to try and leave out a little tiny bit of edge a little bit. I don't like having dramatic edges like I don't like when hair sits on my face either you know or all right, I'm actually going to take my shine and jam. I'M going to smooth this down. This works best on dry hair. In my opinion, that's why I didn't want the roots to be too wet and we are just gon na smooth that down okay and then, at the end, we're actually going to smooth some on this as well. All right, I'm just going to tuck this behind my air, really quick, so that I can get this side and we're gon na do the same exact thing: spray, a little water on the roots, not too much and kind of like drench the ends a little bit. Tiny bit of gel, so you see the ends of my hair - are dripping we're gon na smooth, smooth and then what we're going to do is take a black elastic band and we are going to connect them in the back behind everything. I'M actually going to take. Some of this and use it back here smooth a little bit all right, then we're gon na get our elastic band. I'M just gon na hold it in my mouth. So it's easier to grab foreign all right. I'M gon na tighten it in the back as much as I possibly can. I'M going to smooth out the front, do my edges and cover my hair for it to dry. I use one of these black clips snap clips secure it back there, I'm not going to do any dramatic edges just like bobby pin here, I'm going to use that for that piece. That'S hanging out in the back we're just going to take the piece we're gon na twist it and tuck it right under here we're going to take the bobby, pin and go ahead and pin that back there try to disguise it as much as possible make sure The hair is covering this is what my hair looks like from behind a handy dandy head scarf cover up my hair, make it sit for a little while and I'll be back all right. My hair, isn't I'm not gon na, say it's 100 dry, but it's been like an hour and a half, so we are going to take this down and see how it's looking. Oh, this is cute. I should have put a bobby pin right here to make it a little bit more flat, but that's fine, and this is how my hair is definitely weighed down and defined, and not poofy and volumized. Like normal all right, let me give you a 360 for my hair really cute and it was actually very easy to do. It only took me like 30 minutes for this hairstyle, so I do think that everybody should try like don't think just because your hair is really thick, really coarse, that it won't be able to be accomplished on your hair. If anything, what you can do is probably blow dry it and then do exactly what I did but blow dry it first. If you think that your hair is too kinky and then when you get it up into the claw, that is when you can go ahead and Define it, that'll probably be the easiest way for you to do if this process doesn't work out for you. Of course, I will link all the products, as always down in the description box. Hope you guys enjoyed watching this video I'll, see you in the next one foreign foreign
Comments
jasmin shelly: Pretty hair and the style is super cute