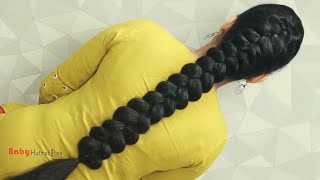
6 Easy And Beautiful Hairstyles For Outdoors, Hiking, Exercising For Long/Medium Hair
- Posted on 13 March, 2019
- Easy Hairstyles
- By Anonymous
In today's video I will share with you my top 6 favourite go-to hairstyles for long or medium hair that are perfect for hiking and any outdoor activities. All of them are good for keeping your hair away form the face and at the same time looking very cute, and all you need is a brush and a couple hair elastics. So let's begin!
#hairtutorial #easyhairstlyes #outdoors #hiking
Let us know if you have enjoyed this video leaving a comment below and don't forget to give this video a thumbs up and subscribe to our channel for more videos like this one. We are really interested to know what hairstyle you would like to recreate and which one is your favourite.
Watch our Morning Camping Routine: https://youtu.be/C3GR4UU1m34
Our Night Camping Routine: https://youtu.be/iadKx63UfmE
What's in our backpack for the Camino: https://youtu.be/LnrQiocZId4
Watch our Camino de Santiago del Norte Hike here: https://www.youtube.com/watch?v=LnrQio...
*****
Ways to support the channel:
http://ko-fi.com/walkingnatureworld
*****
Join us!
Facebook: https://www.facebook.com/walkingnature...
Instagram: https://www.instagram.com/walkingnatur...
Thank you for watching and subscribing to our channel!
*****
We are a couple who once fell in love with mountains and couldn't get back. So we decided to follow our heart and move from a big city to a small village to be able to do what we love and to create this content. Our goal is to promote the healthy lifestyle, to motivate people to travel more and care for nature around. We are passionate walkers who love hiking, trekking and camping. We offer the detailed information of our hikes and routes, including the map and all the directions, so that you can repeat it if you'd like to.
We choose walking over driving and other types of transportation whenever we can because we learnt that this way we see so much more and can explore and feel the place better. Walking is an excellent activity that has so many benefits to your health and requires no special equipment or practice, so we encourage you to get the most out of it and get out walking.
We speak English, Spanish, French and Russian, so don't hesitate to address to us in your native language.
*****
For business and collaboration inquiries contact: [email protected]
*****
Music by Walking Nature World "Life is the way", "Go with the Flow", "The living spirit", "Peaceful mood", "Waiting for the Miracle", "On the move"
If you like the music in the videos we encourage you to visit and subscribe to our Music Youtube Channel: www.youtube.com/channel/UCAOb-hSoOrwGy...
Listen to our music on Spotify: https://open.spotify.com/artist/2Dpjpt...
On Itunes: https://itunes.apple.com/fr/album/wond...
On Amazon: https://music.amazon.com/albums/B07PPQ...
On Soundcloud: https://soundcloud.com/user-647137192
*****
DISCLAIMER:
All content on our channel is subject to copyright or other intellectual property ownership by the creators of Walking Nature World.
In today's video, I will share with you my top 6 favourite go-to hairstyles for long or medium hair that are perfect for hiking and any outdoor activities.. All of them are good for keeping your hair away form the face and, at the same time, looking very cute and all you need is a brush and a couple hair elastics.. So, let's begin So before doing any hairstyle, it's very important to give a hair a good brush to get rid of any tangles it may have.. My hair, for example, is quite curly and thin and tends to tangle quite a lot.. Also. I find that having a second or third day, hair helps a lot too. For me, it's always easier to deal with first day. Hair is more tricky., And then we have a good base to create. Well, the first hairstyle is going to be the simple braided ponytail.. It is the easisest of all, and I use it a lot during the hikes, especially when we are stretch on time or I'm not in the mood of creating something more complicated., So first gathering all the hair in the ponytail adjusting the height of it. According to your preference and how you like to wear it. For me, it works to have it somewhere in the middle, not too low and not too high.. I use the flat hairbrush to flatten my hair, but you can get along just having a normal one.. I am using one hair elastic to secure it in place. I take the simple quite thick hair elastics to make sure that they will actually hold my hair and will last for some time.. You can leave it like this and go with a ponytail or you can start braiding, as I am doing, it. Splitting the hair in 3, equal parts and then starting by taking the side strands one by one and going over the middle one.. You'Ve noticed that I actually like doing a reverse braid by going underneath the middle strand.. I just find it easier for me., But the look of the braid doesn't change that much. To finish braiding. I am taking the braid to the side.. Also, I have my hair parted on the side. That'S because my hair lays flat better that way and it works for my face, but you can always do it in the center or brushing the hair back., And it is ready, simple and quick one to get your hair gathered and out of the face.. Our second hairstyle will start with the same base having the regular ponytail.. But this time I will be doing a fishtail braid instead of the simple three-strand one.. First, splitting the hair in two equal parts and then separating the small strand of hair on the right side and bringing it all the way over to the left. Side. Then repeating it. On the other side, taking a small strand of hair on the left side and bringing it to the right., It is quite tricky to keep the main two strands, separated the whole time and continue braiding at the same time. But it's very important not to mees it up.. Here you can get the closer look of how I am doing it. Again, you can go over or under the strand, creating a normal or reverse fishtail.. I prefer doing a reverse one.. If you take the bigger strands of hair, it may look less intricate, but also will take you less time., Don't worry if the texture of the braid doesn't showing up right away, just continue braiding and you will see it. Overall. It may need a little bit more practice time and concentration to get it right, but when you get the hang of it, it will be as easy as a simple braid for you. And as a bonus, you get a good training for your fingers. In the end, you can pull the braid a bit for the thicker, look otherwise keep it nice and neat.. In my opinion, it looks quite intresting and intricate and is great to change the look of the simple ponytail., The next hairstyle. We start by having our hair loose and we are going to create a one. Reverse crown like braid, going over to one side., Make sure that you hair is nice and detangled and start by taking three little strands of hair at the forehead on one side. Braid them once and then start incorporating the parts of hair from the sides.. So take the right strand and a little bit of loose hair on the side and go under the middle strand and repeat it on the other side. You do it once to secure the braid and then you continue incorporating the hair every time to the lower strand Closer to the neck, but you leave the upper strand as it is and just go with it under the middle strand, every time., So you're, basically doing the reverse french braid, but only with the lower strand, leaving the upper one alone and that what creates the 3D Volume look of the braid. Getting to the end of the braid. You take the strands close to the face and incorporate it to the braid very tightly because you don't want your hair to be falling apart during the day., Continue to braid very tightly all the way. Down. Secure the ends and you're good to go Beautiful crown braid that keeps your hair, nice and neat. For the fourth hairstyle. We are gon na, be doing the regular French braid.. That'S perfect to keep your hair in place and away from the face when the weather is hot. Start by brushing the hair back and dividing three small strands of hair right at the forehead. Braid it once going with left and then right strand over the middle one.. Then start incorporating the hair from the sides.. Take the left strand and a little bit of loose hair from the side and go over the middle strand. Then take the right strand and a little bit of loose hair from the side and go over the middle strand. And continue on like this. Until you run out of the loose hair and reach the back of your head., The regular French braid is more challenging. For me, and takes more time as I normally go with the reverse braids., But the look is a bit different and sometimes when I have the inspiration and want some change, I go for it.. Then, when you run out of hair, continue doing a simple braid. All the way down. And you are all ready for the day Now giving a hair another brush. We start doing one of my favourite and quickest hairstyles - reverse French braid.. It is very similar to the one that we did before the regular French braid, but instead of going over the middle strand, you go under it. So again separating the hair in three small, equal sections: simple braid it once now going with the left strand under the Middle section, and with the right strand under the middle section., Then start incorporating the hair., Taking the left section and a little bit of loose hair from the side and go under the middle section. Then take the right section and a little bit of loose hair from the side and go under the middle section and repeat it all the way down to the back of the head and until you ran out of the loose hair.. All these French braids are a good training for your arms and it won't take much time to feel the burn., But it always good to get some exercise on the side. Isn'T it When you get to the back of the head? Continue simple braiding: it all the way down. Secure with the hair elastic and in the end you can fan it out a little bit if you prefer the fuller and thicker look., And this is the finished hairstyle.. As you can see, it looks quite different from the one before with more obvious three-dimensional braid and is a good variation to take from a classic regular French braid.. Our final hairstyle would be the two reverse French braids. That is another of my go-to when I am in a more playful mood like today, and I decided to leave it for the day. Start by separating all the hair in two equal sections where again my flat brush comes in handy., Don't worry about being it too Perfect, it doesn't have to be. We are not going to the office in the end.. I trained myself to do it without a mirrow at the back, but if you have one available it can de useful of course. So separating it. Well, give it another brush if needed and clip the one half of the hair away so that it doesn't get in the way when we are braiding the other half.. The technique to follow is basically the same as with the one reverse French braid, that we did before.. You start right at the forehead by splitting the hair in three sections: simple braid them once going under the middle strand and second time incorporate the hair from right side to the right strand and go under the middle strand. Then incorporate the hair from left side to the left strand and go under the middle strand., And basically this procedure is all the same. Till you get to the back of your neck.. By the way, you can do two regular French braids. If you like, ot better., Just follow the steps we did on a hairstyle number 4 with the one French braid. When you get to the back of your neck and run out of hair, as always continue. Braiding till the very end, doing a simple reverse: braid. Secure the ends with the elastic fan it out. If you like, and going on to the other side, repeat all the previous steps that we did on the first side. By the way we filmed this video just on a normal day of hiking on our Camino de Santiago in the bathroom of one of the campings, We stayed. That's in case if you're wandering, where we are., And here you have the finished, hairstyle And you're all ready for the fun and exciting day, And this was the last hairstyle in today's video. Let me know if you enjoyed this video and found it useful. Leave a comment below telling which of the hairstyle you would like to recreate and which one is your favourite. Give this video a thumbs up, so that more people can benefit from it and subscribe to Our channel for more hiking inspiration, Looking forward to hear from you and hope to see you again soon. Bye,


Comments
Walking Nature World: Let us know if you have enjoyed this video leaving a comment. We are really interested to know what hairstyle you would like to recreate and which one is your favourite. Find more information on our website: https://walkingnatureworld.com Support our work and help us to save up money for our future trips here: http://ko-fi.com/walkingnatureworld Find our music we use in the videos on pond5: https://www.pond5.com/artist/walkingnatureworld#1/2064 Or on Audiojungle: https://audiojungle.net/user/walkingnatureworld/portfolio If you have any other questions or suggestions - leave us a comment below. We would love to communicate with you!
Shannon Bilger: I was hoping you would show how to do the traditional Ukrainian braid like Tymoshenko often wore.
Yaacoub Kari: nice video
librevasion: Hélas ça je ne peux pas le faire ... très joli cours, merci