Overnight Heatless Curls- Twist Out Technique | Uptownbeautie
- Posted on 31 May, 2018
- Heatless Hairstyles
- By Anonymous
Hello Beautiful People,
In this video I am showing you guys how I achieve my heatless curls using the twist out technique. I hope you guys enjoy it.
Links to buy the products used:
TGIN Twist and Define Curl Cream:
Scuncies:
Plastic Pintail Comb:
Camille Rose Herbal Tea Oil
Social Media:
Instagram: @uptownbeautie
Twitter: @uptownbeautie
Website:
Music License:
Relax by Simon More https://soundcloud.com/user-73416670
Creative Commons — Attribution 3.0 Unported — CC BY 3.0
http://creativecommons.org/licenses/b...
Music promoted by Audio Library https://youtu.be/FTUkaPnYdLU
** Some of the links above are affiliate links which mean if you click and purchase any of the products through the link I will receive a small commission through your purchase at no additional cost to you. This is a small way in which you as a viewer support my channel. Thank you.
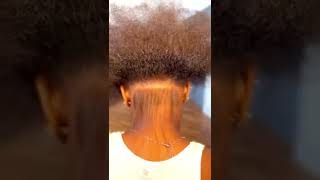
Hello: everyone, that's a girl outside beauty and welcome back to my channel. So today I'm bringing you guys a how-to tutorial on how to do this heat bliss overnight curls. Now this is my first time to win them and I really like the outcome of the of the look. So if you want to see or learn or watch how I do my own hair to get it to style like this, just please keep on watching this video, and I will show you my tips and tricks on how to achieve this hairstyle. I hope you guys enjoy it okay, guys. So what you're going to need is a satin scarf a twist and defined curling cream or hair gel a comb just as the one that you're seeing right now and a spoon Chi to secure your hair. Now the first thing that I like to do is part my hair right in the middle. You can part it on the size. However, you like is up to you and, of course, your preference now. The next thing that I like to do is start part of my hair sideways and you can. I pick the thickness of like the of like two fingers, but you can choose the thickness as you want you to put it more thinner or more thicker. It'S up to you now I like to comb my hair throughly, making sure that there aren't any knots and then I grab my styling lotion and start distributing it all over my hair making sure that each strand has a little bit of the product and especially towards The end because my hair is really frizzy on my ends. I had to cut them so now we're going to start twisting our here onto our scalp. So you kind of want to do this like a braid, but instead of three instead of using three strands, you're going to just be using two strands and once you've done with the strand and what I like to do is curl the bottom to make sure it Does not come off or start falling apart, just as you see me doing in this video and I'm so sorry about the products on my ear, I didn't realize that I had it until I started editing, so my apologies to anyone that might be disturbed by it. So again, I'm starting the second one at the same thickness about two fingers, and it is important that you pull me in here throughly that making sure that there aren't any knots again. I'M grabbing some of the products, some of the products and applying it my ends and throughout my hair now I did notice that I applied for this hairstyle a little bit too much of the product, so please make sure to just grab a decent amount and not Too much because why you like, I had a little bit of white wrestle too at the end, and we don't want that. Mm-Hmm and again, I'm doing this for another section of my hair. Now I'm gon na do like a round bowl around my hair feel free to style or do the twist out braid. However, you desire is definitely up to you. You can get as creative as you want, but for me I just did like a bowl because it was just easier to do now. I'M now I am working on the right side of my here and for the right side. I am working the twist in the direction clockwise for the left side. I did it counterclockwise. So please be aware of that. If you want your twist to come out having a little bit of volume on the top - and this is pretty much it now - I'm working on the last twist out braid, which is in the back and as you as I mentioned earlier. I did. I do kind of like a beach ball style and the ones on the back that direction doesn't really matter but yeah. This has how your twists should be looking like right now and yeah, pretty much it yeah bouncing and yeah. Now what I did was grab my satin head scarf and you don't have to do this that. But because I was going to bed - and I didn't want my twists to be moving around or get frizzy. I did use a head satin scarf. But if let's say, if you do it in the morning, you don't have to do it, but if you're going to sleep, I highly recommend so so now. This is kind of like the next day and I'm taking out my scarf, and I am shaking out my twist and kind of just opening it up and stretching them and before you open the twist. Please be very careful like don't just run your fingers through it. Just be very lightly like and careful with it, and you start opening up opening them up really carefully you like, because if you don't do this, then it might mess up the pearls you already have on your hair and yes, Curly's and guys. This is pretty much it. This is pretty much how I do my twist ow and I really like it. I just use pretty much one product to style it and then I'm using this oil just to kind of add a little bit of shine to my hair and give it a little bit more volume just feel free to shake your hair up and open those twists Out ups and yeah, this is pretty much it. I hope you guys enjoy this tutorial. If you guys have any questions comments, please feel free to comment below and also to follow me on my Instagram at uptown beauty. I love you guys. Bye, bye,


Comments
C V: Beautiful you the best
Kaceo Spades: new subb
Erianny Diaz: FIRST COMMENT HAHA :P