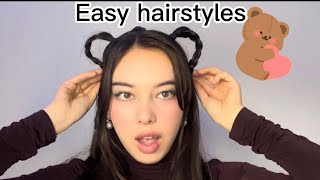
Easy Heatless Hairstyles For Long Hair!!
- Posted on 11 November, 2015
- Heatless Hairstyles
- By Anonymous
Hey lovelies…
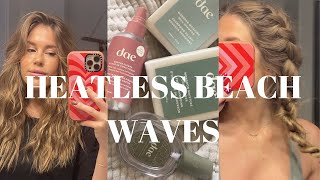
Today we decided to do heatless hairstyle tutorials. Taking care of your hair is super important, and staying away from heat will do wonders for it! These styles are super cute, easy and help keep your hair healthy. We hope you enjoy our video, and remember, we will be doing a Q&A at some point soon so please leave any questions you have down below or tag us on twitter!
Thanks for Watching!!
Be sure to subscribe if you haven’t already and thumb this video up if you liked it.
xoxo
Andrea & Angela
ONLY 20 DAYS TILL VLOGMAS!!!
Message us @ [email protected] for any business inquiries.
We just made a new twitter, follow us!!
https://twitter.com/AndreaAngelaYT
Follow us on insta:
Andrea @andream13
Angela @angelafrizado
THANKS FOR 300 SUBSCRIBERS!!
Only 200 more till our contest…lets try to get there by christmas!!!
NOTE: Once we hit 500 subscribers were doing an exciting giveaway so please help us get there!!
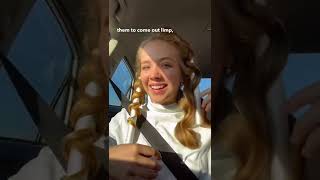
Hey guys so today I mean Angela decided to do a heatless, hairstyles fattoria. We did on me. I did a braided crown and then on her we did a waterfall headbands. Both you can do with your natural hair, so you won't be using heat to grow. That hair and nice and long and healthy, ok start out with this hairstyle to start out with my natural hair, my natural hair is creepy, but if you had like straight hair and actually probably work better because you'd be able to see the braids more so, for This hairstyle, where it's going to start with you, can print store with any part, but I like to do it right about in the center not really center a little bit off the side, but like that, you just going to start with the one section on either Side of your head and you're going to take a piece about about this big, my biggest tip when you're doing like you want the braid to be like nice in like plump at the start, you want to start out with a piece. That'S like that. Has no hair to meet here, so the piece is like really flat, so we're going to do for the brain not going to do a regular braid we're going to do a Dutch braid. So it's like inverted that way it just it's a lot thicker when you do the Dutch braid, so you're, going to start out with three pieces, like so just start doing a Dutch braid for a Dutch braid to go underneath, instead of over just going to start Out doing the first row like that and then you're going to like a French braid just going to take a piece in the front and bring it in and then go underneath and you're just going to keep doing that process all the way down. So what I like to do to frame my face as I like to leave out like some pieces like right here and you could like take it in, but I like what I have like little hairs like frame my face. So it's not like my hair is all the way up chase what I continue and keep raising all the way down. But when you braid, you want to like pull it towards the back of your head because we're going to pin it in the back. Oh right. Finally, once you get down to the bottom of this one, you just want to take either a clear elastic, or in my case I found black elastic, but I really don't care, so you can't really tell so you just want to tie it off. You want to tie it off like I'm a little bit lower than the actual braid end, because we're gon na, like I guess it's called pancake. It you're just going to like pump it up and make it a lot bigger, because I love with braids or like my big and messy so you're, just going to leave that dangle here. We'Re going along next side, pretty much you're just going to do the exact same thing and take a nice key piece from the front of your head like this. Alright, so when you get to the end of the other, brain is going to do the exact same thing. You'Re a tie off so now comes. My favorite part is making the braid like nice and thick. So how I do this is just go pretty much want to pull the braids apart so for the front pieces I like to touch too much because it makes it a little bit like best up. So I just like to close out a little bit another one of my tips like when you want your friends to look really really big but not like. You still want to have like the braid part in tact. Is you want to take like the outside loops? Like this right here, you just want to pull the hairs out. Words that are closest to the outside are not explain. You see just like this, so the way that way, the braid that's in the middle stays a braid, so it doesn't get super messed up and once I get towards the end, I really like to make it really big a messy. I mean you can just do it to your preference. I just think braids, look like more intricate, like you put more time in it when they're, nice and big you. So if you get to the end, us hide the elastic a little bit under the braid. This is why? Because, when you pump it out, you'll see that the last just keeps moving up and up because the braids getting thicker. So by time you get to the end. You probably give you 80 to have to lower the elastic little more but yah. Once I get to the end, I just like to like get a laugh little oil pump, you gon na, take the other side and do the exact same thing alright. So when you get to the end, yours going to have two braids like this, this is like a braided crown tutorial, so yours going to bring both the braids around to the back your head and end them behind each other. So you don't see anything. So it's going to take first break here and you're going to pin it where the other one starts. So when you bring the other one around it'll cover and then for other ones. You see how this the bobby pin to show you how this little under here is showing so how you're going to cover that up is just going to bring this brain right over it and you're just going to do the same thing on this side. We'Re just going to tuck it so when you're done pay on both sides, it should look a little something like this. So yeah, that's just how you do. I think she's called a braided crowd. I love to do this when my hair is a little bit greasy or like third day hair, because it works out really well. I think I'd look even better with people who have straight hair because you'd be able to like see a little more but yeah hope you guys liked it so for this hairstyle Angela's gon na do my hair, because, to be honest, I suck at doing hair so Step so for this line it's um, so mine was like a braided crown. Hers is gon na, be like a braided headband to kind of like a faux waterfall braid. So it's pretty quiet, no idea where i saw this probably Pinterest or something cuz. I live on. Pinterest well yeah, what's hot man are you gon na need from this is some little elastic, so i can use some last one and some bobby pins for this hairstyle you're going to need a really really big part so like how i like to find a really Deep part, is you want to start at the end of your eyebrow, so for her you start at the end of her eyebrow right here here. Take all home. You should that's a big part. Yeah are your others long, but it looks too deep. Well, it's obviously not oh yeah god. This is it! This is a hairline just kidding all right, so you're going to take a piece. That'S about like this big you're, just going to do a regular braid, not French or anything, just a regular, three-strand free, alright! So you're just going to have a regular braid just like this, so back to the really deep part you're going to take this first. I spoke you the I know. Oh I'm gon na take this first little section like this all right so on the braid. These little top little bumps right here on the top. Those are what are you're going to be using to make the headband. So I'm going to take the pair from the front right here and you're going to pull it through the first bump, so you're gon na open up this one just going to pull this piece through. So then you're going to take the next piece. You don't want to take too big of pieces you're just going to take next piece like this right here, you're going to take the next bump right here, you're only gon na be using the top bumps of the braid. Take that open it up and pull that piece through so yeah I pretty much just going to do that same exact method, all the way through. Okay, like garage for the past five: hey here's on dresses, so many people out of here you so you just want to keep pulling the strands until you get to the end of the eyebrows to match the other side. Alright. So when you get to the end on the other side, where the edge of the eyebrow is you're just going to tighten up the elastic just so it tightens up the brain a little bit and you're going to take this piece right here and lift up some Hair this you're just going to secure that down what about so then, when you're done, you just want to take the bumps that you just pull the hair through you just wanna about a little bit, so you can see the brave from the front. So she has a little bit of baby hairs my front here, so I'm just gon na take my hand like this, probably not the greatest thing for your skin. I just realized, but you know: oh, who cares your loved ones right, so you just want to take this little baby here. Just sleep! You
Comments
Simply Sandra: I absolutely love both your hair! I am definitely going to be trying these looks! Great video!
Ree Mo: Loved this video! You both have stunning and healthy looking hair! Loved these looks
Lizzy: Love the looks!! So pretty
ClasssCulture: You both have such beautiful hair!! Great video xx
Yaritza Suarez: LOVE THIS!!!! I AM STILL TRYING TO LEARN HOW TO DO BRAIDS ON TOP OF MY HEAD I CAN DO IT ON THE SIDE OF MY HEAD
AlexyaTV: Great video! Will have to try these hairstyles :)
Manuela Reynolds: you both have beautiful hair <3
Erika Strong: Goodness! Awesome Ideas! I love them! Subbed! (:
Lexy Rose: your hair is so pretty!
Hannah Hooker: Great video! I subbed
The Lash Tag LLC: Hey for some reason your comment wouldn't sow so I couldn't reply but thank you for the sweet words and for subscribing! I also just subbed
Netterz: thanx for the sub.. just subbed back!