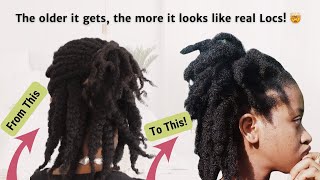
Easy Box Braids/ Try These Tutorials Step By Step /101 /Protective Style Tupo1
- Posted on 01 January, 2023
- Heatless Hairstyles
- By Anonymous
Easy BOX BRAIDS/ Try these Tutorials Step By Step /101 /Protective Style Tupo1
I hope you guys find these tutorials to be helpful. #jumbobraids #boxbraids #protectivestyle #4cnaturalhair #roadto600k . I enjoyed filming this video I hope you guys enjoy it too. PLEASE DON'T FORGET TO SUBSCRIBE, LIKE, COMMENT, SHARE & RING THE BELL so you don't miss anything.
Thank you guys for watching my videos
Have a blessed day
Love you guys.
Happy New Year Guys!
VISIT OUR WEBSITE https://tutphil.com
PRODUCTS USED:
* 3X PRE-STRETCHED 52" HAIR
*3X Freetress braiding hair Color #1 ( 10 BRAIDS)
*X-pression Hair 2 Packs Color 27 & 1 pack 613
*X-pression Hair Color #30 (I used 1 1/2 packs)
*Shine N Jam Gel: https://amzn.to/3q2VS3E
*Rubber Bands https://amzn.to/39aSNIL
*Edges brush :https://amzn.to/38yykgF
*ECO Styling Gel 80 oz :https://amzn.to/2UkACYz
*Coconut Oil :https://amzn.to/3l2Y2MZ
*WE ARE LOCATED IN ROCKVILLE MD.
*How To: DIY SENEGALESE TWISTS for BEGINNERS /Protective Style :https://youtu.be/Iag82jKCWq4
*MY GORGEOUS COLORFUL SENEGALESE TWISTS : https://youtu.be/s3zNj_m8A2s
*10 QUICK & EASY WAYS TO STYLE SENEGALESE TWISTS/BRAIDS : https://youtu.be/6M7kGjOJLbU
Business Inquiries: [email protected]
Camera I Use : Panasonic LUMIX S1R- https://amzn.to/3gHnN6L
Panasonic Lumix S PRO 24-70mm F/2.8 L-Mount Lens- https://amzn.to/3vniuxw
Editing Software- Final Cut Pro
Location : Rockville Maryland
Nationality : Malawian
KEYWORDS
How to diy jumbotwists
protective style
4c natural hair
Hey guys welcome back to my channel, it's your girl tupo, if you're new here welcome, welcome please subscribe like comment. Give me a thumbs up guys today, I'm going to show you this easy gorgeous jumbo box braids. So if you guys want to see how I achieved this looks, please continue watching all right guys. My hair is already washed and moisturized. I already have my hair sectioned into two, so I'm going to be showing you one side, one technique and then the other side, the other technique, so guys. I already have my hair done in the back. I just wanted to show you I'm going to be using this gorgeous gorgeous hair. This is great. A lot of people wanted to see me do some gray hair. This is the gray situation going on and this color is teal silver. It has gray on the top and then the silver on the bottom, and this comes three in a pack, I'm actually using four packs, guys: okay, I'm going to be using three packs of the Tea Silver and then one pack of this silver guys. So I'm going to be using my shine and jam my red tail comb and some rubber bands to achieve this look as well, so this is a rubber band technique, guys so both techniques I'm going to be using rubber band, but it's just in different methods. Okay, what I'm gon na do is I'm going to be showing you two sides: okay, so I'm gon na do one side, one technique and then the other side, the other technique, when you start by sectioning the hair okay. So I'm just gon na do straight lines. You know just across exactly like this and then I'm going to use my shine and jam just to make sure it's really nice and Sleek sectioning into boxes using my shining jam and then I'm going to be holding the hair with the rubber bands. So the rubber band that I'm going to be holding the hair with I'm actually going to be using the same rubber band when I start braiding. Okay, if you guys want me to do like a parting video, let me know in the comments below, if you guys want to see like a whole video of me, just partying sectioning, my hair, guys, okay and they're about 65 braids, and this took me longer guys. This took me about about two hours, taking the hair, the rest of the hair and using a clip to just hold it out of the way making this braiding hair, guys sectioning it as I'm doing right here. So I decided I was gon na do like a medium kinda. You know medium kind of box braids. If you want to keep these braids in for a long time, you want to do like a medium small kind of size, guys, okay, so I'm sectioning the braiding hair, just like in a traditional braiding way, smaller piece and a bigger piece, and then, when you Loop Them around it's going to be exactly like this, so you're gon na have three equal pieces hahaha. So what I'm going to do is I'm going to take the rubber band out and I'm just going to take my you know, shining Gem and apply it to my scalp, making sure my scalp is really nice and clean and Sleek or whatever I'm going to separate. My natural hair into two exactly the way I'm doing and then I'm going to take the smaller piece of the braiding hair place it in the middle and then take a rubber band and secure it. Sis, I'm telling you if you have never done box braids on yourself sis. I mean this method right here is going to work every single time: hey, hey, hey, hey and then you're just going to separate your natural hair into two give yourself a little tie using some more um shine and jam just to make sure it's really nice and Sleek, so once I place the hair down, you know I'm just going to make sure the hair is nice and equal on both sides. Once I place it down, you know it's already covering my natural hair. I'M just gon na go ahead and take the bigger piece and place it on the top exactly the way, I'm doing and then start braiding all the way down. If you are not able to do braids on yourself or on your kids. Try this method right here, sis and you will thank me later. I actually do this style on Chase. You know my daughter, and this is tension free. She doesn't cry when I do this. It actually works all the time and it's easy it's actually. It'S faster. You don't even have to stress about trying to grip the root system. You can't grip the roots, since this is your style. Okay, I'm trying to make your life easy. I mean we're out here trying to save money time and everything 2022. We are coming for you with a bang honey, we're saving some coins, laughs foreign, so once I'm done braiding all the way down, I'm just going to take a little piece from the side and then use that to tie a little knot. That way, I do not have to work twice. It does not have to unravel or anything like that says all right. That'S all I'm doing since very, very easy. All right guys, so I'm going to show you guys again, you're just going to take the rubber band out. So once you take the rubber band out, you're just going to take some shining Jam, apply it to the scalp, make sure it's really nice and clean or whatever, and then you're just going to separate your natural hair into two you're, just gon na. Take that little piece and place it in the middle exactly the way, I'm doing and then take a rubber band and secure it and then you're just going to separate your natural hair into two give yourself a little tug, not too tight that you're going to have A headache or you're going to break your natural hair says it's going to go ahead and take the bigger piece and place it on the top exactly the way, I'm doing and then start braiding all the way down. Why was you talking sis? Have you subscribed to my channel, don't forget to turn on your notification button, so you do not miss out on any Apples, because this channel is getting wet it. Yes, today's shout out goes to Melissa Bowman. I hope I'm pronouncing your name right, sis. Thank you. So much for supporting my channel. Thank you for rocking with me. Thank you for all the love. I really really appreciate it. You are everyone today, okay, sis, all right guys, so I'm going to show you guys again, you're just going to take the rubber band out. Okay and I'm just gon na take my you know, shine and jam and apply it to my scalp, making sure my scalp is really nice and clean and Sleek, or whatever I'm going to separate my natural hair into two exactly the way I'm doing, and then I'm Going to take the smaller piece of the braiding hair place it in the middle and then I'm going to use the rubber band to hold it and then you're just going to separate your natural hair into two give yourself a little tug, not too tight that you're Going to have a headache or you're going to break your natural hair sis, but you're not tight enough that it looks really nice and clean. Okay, that's the whole point. You just want to make sure this hairstyle looks really nice and clean. You want a little professional like somebody who has been doing your hair since, but it was yourself honey we're out in this dress, looking Extravaganza extra Bubba Puma extra, whatever okay, oh my gosh, you guys already know when I'm this hype. It means that style is what is and they're about 65 braids, and this took me longer guys. This took me about two hours to do. Okay, I'm done braiding all the way down. I'M just gon na take a little piece from the side and then use that to tie a little knot. We'Re gon na go on the other side. So I already told you one side is gon na, be you know the placing on the middle and then the other side is going to be the other technique. I'M just gon na take the rubber band out just gon na take my shining gem, apply it to the scalp, making sure it's really nice and Sleek or whatever, and then I'm going to take my rubber band and secure it foreign Rubber Band Method. So what I'm going to do is I'm going to be sectioning the hair exactly the same way. I did on the other side a smaller piece and a bigger piece. So what I'm going to do is I'm going to take this smaller piece? First, guys? Okay, just gon na take my crochet needle place it in okay, exactly the way I'm doing, and then I'm going to take the braiding hair, the smaller piece of the braiding hair and placing it on the hook close the hook and then pull it out. Once I pull it out, I'm going to be pulling on one side, guys I'm going to make sure it's really nice and Eco on both sides and then I'm going to take some more shine and jam apply to the hair to the remaining of my natural hair. Okay and then I'm going to take the bigger piece and place it on the top and then I'm just going to braid it down. Oh my gosh! How simple is this guys very, very simple, and once I start braiding down it's going to look exactly the same as the other side? Can you guys imagine, oh my God, it was super. Where have you been? I mean I've been around. You just did not know about me sister, okay, but I've been around. You know I've been around. We got a whole lot of videos down there. You better go check them out my sister laughs. I mean this looks exactly the same as the other side. You can never tell that this one is the crochet method, and this one is just you know, placing the rubber band in the middle or whatever you can call it all right to take. My shining Jam apply it to the hair and then using the rubber band to secure it, and somebody was asking me super art is not going to break my hair. I'M telling you if I use The Shining Gem and then I moisturize my scalp, my hair does not break I'm going to spice this hairstyle up, because you know me, I got ta spice everything up says so, I'm using the silver silver hair, white or whatever you Want to call it and then I'm just gon na do the same same technique. So this side, you know one side is the um, the crochet method and then the other side is just placing in and then using the rubber band to secure it. So let me know which side you prefer sis, let me know which one is easier for you. I just wanted to show you guys like. If you can do one technique, you can actually do the other one okay. So this right here is always going to come. All the way through and then I'm going to take that bigger piece and place it on the top and then I'm just going to braid it down. Do one technique and you start one technique and you tired or you cannot do the you cannot do it all over your hair. You can actually do the other technique, the other side. It actually comes out the same exact wastes. Okay, all right guys. So I'm going to show you guys again so once you take the rubber band out, you're, just gon na take some shine and jam applied to the scalp, make sure it's really nice and clean or whatever, and then you're just going to separate your natural hair into Two you're just gon na take that little piece and place it in the middle exactly the way, I'm doing and then take a rubber band and secure it foreign and then you're just going to separate your natural hair into two give yourself a little tie, you're just Going to take a little more of The Shining Jam applied to your natural hair, just make sure you know it's really nice and Sleek. So once I place the hair down, you know I'm just going to make sure the hair is nice and equal on both sides. So once I place it down, you know it's already covering my natural hair. I'M just gon na go ahead and take the bigger piece and place it on the top exactly the way, I'm doing and then start braiding all the way down. Ha, hey, hey! So once I'm done braiding all the way down, I'm just going to take a little piece from the side and then use that to tie a little knot, all right guys. So once I'm done braiding I'm just going to take my mousse and make sure everything is laid all the way down. And then I'm going to be using my scissors just to cut the flyaways foreign and then I'm going to be using the hot water just to make sure everything is nice and sealed honey? Is nice and sealed, okay make sure you're safe, you're, very safe when you're trying to do this hot water? You guys, because you don't want to burn yourself anyway. So once I'm done, I'm just gon na be using my case Edge fixer and make sure this baby hairs are nice and light honey using the brush that I got from Amazon already know what it is. Oh bye now and then I'm just gon na take my styling strips and make sure everything is nice and laid and baby. When I tell you this hairstyle came all the way through this. I am living for these braids right here. Let me know if you guys are loving this silver, two silver silver, combo, hey, I'm loving this size. I am loving the fullness of the hair honey. I have about 65 braids and I am living for them. Yes, braids and you know me, I got ta. Do a few Styles here and there in their bed, their styles are coming all the way through. Let me know if you guys are loving them. Let me know if you guys are going to be trying them. Let me know which technique actually works for you. Let me know which technique you prefer. Let me know if you guys want to see me do another. You know um technique, comparison. Let me know if you guys want to see technique without the rubber bands. Let me know in the comments below honey, because I am here for you guys. I am here to serve you guys, I'm here to give you guys what you need. Okay, let me know what other color you guys want me to do, because I am loving this silver tea, silver, silver kind of situation - sis, okay, homie. I could not be at the accessorizing Queen without adding some accessories, so here I go adding a few accessories that I got from. Oh my son, you already know what it is. Oh bye now and this style came all the way through as well. Let me know if you guys are loving it. Let me know if you guys are loving this color on me. Let me know if you guys are going to be trying it all right guys. My hair is already washed and moisturized I'm going to be using my shine and jam, my roxo comb and my rubber bands to achieve this look. So what I'm going to do is I'll start by sectioning the back your nose from ear to ear just a straight line, just exactly the way. I'M doing once I'm done sectioning the line, I'm just going to take my shine and jam and make sure the line is really nice and clean or whatever, and then I'm going to start sectioning the hair into boxes. So once I section one box, I'm going to take my rubber band to hold it, but I'm also going to use the rubber band for this style guys. So this rubber band, I'm just holding the hair right now, because you know my hair is 4C. I don't want to you know just section my hair and then lose the sections or whatever. So this is what I do. I section my hair and then I secure it with the rubber bands just to make sure I have really nice lines all the way through. I have about 26 sections all over guys because I wanted to do like some medium large kind of box braids. So this is the look that I was going for all right, so I'm using this expression here. This is the ultra braid 3x expression hair, and this is 52 inches, I'm using two packs of the 27 and one pack of the 613.. So I wanted to do like some medium large braids. So, that's why I'm using you know three packs or whatever, but you can use less. You can use more. It just depends on what size you want the braids to be hey, hey, I'm just going to take my hair clips and hold the hair out of the way. What you're going to do is you're going to take the rubber band out that you were using to hold the hair okay for the sections, but you're not gon na throw that away sis because we're going to be using the same rubber band for this hairstyle. Okay. Anyway, so you're, just gon na take your shining Jam, apply it to the hair, making sure it's really nice and Sleek or whatever, and then I'm going to take the same rubber band that I took out guys the same rubber band that I was using to hold The hair I'm just going to use that rubber band to secure my hair, guys, making sure it's really nice and snug, but not too tight that you have a headache. You know nice and snack that it's giving you a really nice grip on the roots. Okay, so I'm going to take the expression here guys, so I'm going to do a smaller piece and a bigger piece, just like I'm doing a basic traditional box, braids, hey and then you're just going to place that on top of your natural hair, where you have Your rubber band and you're going to be using the smaller piece to go round just like one time like you're, tying a little knot, you're going into a circle kind of motion right there: okay, just going around one time and Tack your hair in guys so tuck That hair in and then I'm just going to start braiding down exactly the way. I'M saying very, very easy: oh my gosh! If you cannot grip the roots for nothing, if you cannot do any of the tutorials any of the techniques that I've given you since this one right here this one, I mean this is going to work, give it a try, it is going to work, and especially, If you want to do like small ones, if you want to do like you know medium sized ones, it is going to work for you, sis, foreign, this braiding technique. Right here is tension. Free says, when I tell you you better, not tie the rubber band way too tight on the bottom. That way, you do not hurt your scalp. I mean this right here is going to look neat. It'S going to look good. It actually lasts for a long time as well, braided all the way down and tie and not at the end. That way it does not unravel I'm going to show you guys again. So what you're going to do is you're going to take your shine and jam, apply it to the scalp and then you're going to take the same rubber band and secure the hair so making sure you're tying the rubber band tight, but not too tight sis you're. Just going to take the braiding hair, so you're going to do like a traditional braid, a smaller piece and a bigger piece, okay and then you're just going to Loop them together. So the smaller piece is going to be used as one strand and then the other bigger piece is actually the two strands: okay and then you're, just gon na go around using the smaller piece. I actually prefer taking the um, the outer piece, the outermost piece. Okay and then tucking your hair in with that piece right there and then start braiding down since so tuck, your hair in especially if you're using Color just the way I'm doing the most important part is just to make sure your hair is nice and tucked in That way, it does show a little peekaboo, but not too much. You know where you're like oh, what is going on over here, especially if your hair is a different color from the hair that you're using it is actually very important for you to just make sure you tack your hair in foreign. I could have been rocking this on Thanksgiving dinner. Honey. Don'T worry, you can rock this on Christmas, okay, we're gon na be pulling up at the Christmas party like, but okay in this braids that I did by myself. Why was two talking sis? Have you subscribed to my channel, don't forget to turn on your notification button, so you do not miss out on any uploads, because this channel is getting what yeses today's shout out goes to Francis Tara. I hope I'm pronouncing your name right, sis. Thank you. So much for supporting my channel. Thank you for walking with me. Thank you for all the love. I really really appreciate you. You are everyone to die. Okay, sis. This hairstyle right here took me an hour to do very, very easy. Anybody can actually do this, but you know what it's gon na. Take you a little longer it's okay, it's okay! Since you're trying this for the first time for the second time it's gon na! Take you a little longer. Don'T worry, don't sweat it as long as you can get this done. You are good and make sure you tack your hair in especially if you're using another color just the way, I'm doing if you're using black, you don't have to worry too much. Hey, hey! Hey! Hey hey, so I'm going to show you guys again, I'm just going to take my rubber band out. Take the shine and jam apply it to the scalp, making sure it's really nice and Sleek, or whatever checking the same rubber band and secure in the hair. Giving yourself a little tug making sure it's tight, but not way too tight that it's gon na break your hair or give you a headache? Okay, so I'm going to take the expression here guys, so I'm going to do a smaller piece and a bigger piece. Just like I'm doing a basic traditional box, braids all right and then you're, just gon na go round one time using the smaller piece and then you're going to use the outermost piece. You know the outermost strand on your left side and Tack, your hair in guys. So tuck that hair in and then start braiding down this right here is the easiest techniques you can ever do foreign. This is for my sisters, who cannot grip the roots. This is for my sisters, who are beginners in braiding. So listen, sis I got you. You know, I'm always here, to give you the easy techniques making sure we're saving money in 2021, 22, 23 and forever, and here honey. When you do this braids right here, but yourself, people are going to be looking at you like this. Who did your hair and tie a knot at the end that way it does not unravel so this is as simple as it sounds very, very easy. I mean anybody can actually do this foreign. I decided I was going to do some color. You know I decided. I was going to do the 613 on the top right there and then I was doing the 27 all over. You know the hair just to give myself a little bubba boom a little um a little. You know bye now, okay, anyway, so that's all I'm doing right. There is I'm doing the same same technique. Take my expression here, taking a smaller piece and a bigger piece, just looping them together. Just like a traditional braid, I'm just going to take the expression here. You know and place it on top of my natural hair, where I have the rubber band right secured and then I'm going to go around like I'm tying a knot like I'm going into a circle. You know just one time using the outer strand to make sure I tack my natural hair in and then I'm just going to start braiding all the way down, sis very, very simple, hahaha. You know I love playing with some color or whatever, but this right here. Oh child, I'm telling you I am feeling this look right here even before it is done, honey, yes to the bridge. Okay, oh my gosh. I am so hyped about this hairstyle. You guys already know when I'm this hype. It means the hairstyle is easy. This hairstyle right here is so easy and I am filling this 27 and 6 13 situation going on once I'm done braiding all the way down. I'M just going to take a little piece from the side tie a little knot, making sure my hair does not unravel or anything like that. Take the shine and jump apply to the scalp, making sure it's really nice and Sleek, or whatever checking the same rubber band and secure in the hair, giving yourself a little tug, making sure it's tight, but not way too tight that it's gon na break your hair Or give you a headache: okay, just gon na take the expression here. You know and place it on top of my natural hair, where I have the rubber band right secured and then I'm going to go around like I'm tying a knot like I'm going into a circle. You know just one time using the outer strand to make sure I tack my natural hair in and then I'm just going to start braiding all the way down and that's about it. I mean this right here is so easy that, even if you did not know how to braid my cyst, you can actually do this hey and once I'm done, I'm just going to take my scissors and cut all the flyaways. You already know what it is just to make sure you know this hairstyle looks all the way legit or whatever, and then I'm going to take my mousse okay, making sure you know this hair is nice and laid all the flyaways are nice and laid or whatever Hey: hey: hey, hey, hey! I'M going to be using my coconut oil and Jamaican black, castor oil, making sure my scalp is really nice and moisturized. You guys already know how I feel about moisturizing your scalp when you are getting a protective style. Okay, I'm going to be taking some hot water, making sure I'm dipping the ends and using my towel to dry. It be very careful. You do not want to burn yourself or anything like that. Foreign, I'm just gon na take my case Edge, fix and make sure this baby hairs are nice and laid honey. Yes using the brush that I got from Amazon, you already know what it is. Oh bye now and then I'm taking my styling strips just to make sure everything is nice and laces that's about it and bear bear. When I tell you this style came all the way through. I am living for these braids right here. Oh my gosh, I am living for this 6 13 and 27 mixture honey. I'M telling you this hairstyle right here came all the way through look at those braids. They look like traditional braids, honey, foreign Bowl. The color combination right here, because sister I am living for it right now. You know me, I got ta, give you some Styles here and there and look at this style right here. I am living for this Huff up hop down, says when I tell you this bun situation is giving me life and you know me: I cannot be the accessorizing Queen without adding some accessories, so here I'm adding this gold accessories that I got from. Oh my son. You already know what it is bye now and back back. It took this out all the way to 100.. Let me know if this is going to be your next hairstyle right here, because this is easy. Thank you guys so so much for watching my videos. Thank you for subscribing, thank you for sharing. I cannot believe we are here today, let's get to 400k put their bag at this point. It is up from here all right guys. My hair is already washed and moisturized I'm going to be using my red tail comb in my shining Jam. So what I'm gon na do is I'll start by sectioning, my hair from the back just exactly the way. I'M doing just this straight line. I usually use two mirrors one in the front and one in the back, so this works well for me, okay, so once I'm done, I'm gon na take my shine and jam and just make sure the line is clean. Oh, whatever foreign, the first line, I'm going to section that line into three taking my shine and jam, making sure my lines are clean and then using my rubber bands just to hold the hair, I'm not going to be using the rubber bands, as I'm braiding, I'm Just holding my hair, as I section guys that way, my sections don't get messed up, see I'm just placing them once I'm not even you know tying them tight or anything. That'S exactly what I'm doing just to make sure I hold the sections I actually have about. 26 sections in my hair, because I wanted them to be like medium size. I wanted them to be big, but not too big, I'm going to be using this pre-stretched expression hair, and this is the 3x. It comes three in a pack and this is 52 inches and I'm using two packs guys. Okay, this is the amount of hair that I'm going to be using for each section, I'm going to section it into two, just like I'm doing a normal, traditional braid. Since that's exactly what I'm doing, okay, I'm just gon na you know, take the clips and hold the other part of the hair that I'm not gon na, be using right. Now the rubber band out take my shine and jam applied to my scalp, making sure my hair is nice and Sleek or whatever on the bottom, and then I'm going to section the hair into three, I'm just gon na start braiding my natural hair, just exactly the Way, I'm doing just like you do your natural hair, braid, okay, just a normal, normal braid, making sure it's not as tight on the bottom. So this is the only thing that you guys got ta make sure you do, because you want the crochet needle to go through. You don't want to break your hair, trying to pull the hair in or whatever okay, so I'm placing the needle in going upwards. First. Just going to take the smaller piece that I had, okay, so apply a little bit of shining gem to it, making sure I roll it on my finger that way, it's easier to get on the needle place it on the needle close the latch and pull it Out so exactly the way, I'm doing this, as you guys can see, I'm not even having trouble pulling it out because, as I told you, my hair is not as tight when I was braiding it. Okay, making sure the hair is nice and equal on both sides and then I'm going to take the crochet needle again, placing it in the other way and taking that expression here, because this is a bigger piece. We need to go closer to the tail um and roll it roll it on my finger and then place it on the crochet needle close the latch and pull it out together. You'Re going to have three strands so one two three and then you're, just gon na hold it and start a braiding upwards. So this braiding technique right here. You want them to look like not less braids. So that's what you're going to do start braiding upwards. So the other piece that you're holding your natural hair with just make sure you're holding it really nice and tight that way, your natural hair is hidden as you're braiding down all right. This technique right here, very very easy. If you had trouble doing this other technique, this one works. Like a charm, I mean it works every single time. Trust me, you just got ta have the patience this okay! This is a perfect perfect. You know back to school right now. The kids want some hair done, quick, easy style that you can do an hour an hour and a half enjoy dances. Okay, so I'm gon na show you guys again. You'Re going to you know, take your shine and jam apply to your scalp braid, your natural hair, just a normal braid all right and then place the crochet needle going upwards. First, take the little piece place it on the crochet needle close the latch pull it out, and then you know as you're pulling it out making sure they're, nice and Eco on both sides, and this is automatically going to hide your natural hair. So the other piece you're going to go horizontal, going all the way to the tail, because this is a bigger piece that way you can place it once this put it on the needle close the latch and pull it out, making sure they're, nice and equal. So, together you have three strands. The middle piece is going to be hiding your natural hair, just going to stop braiding down okay, sis so going upwards. Okay, just braiding up just exactly the way I'm doing, and this is so so easy like anybody can actually do this. I want my sisters to be able to do their hair by themselves to be able to go outside and be like sis you're. Looking all kinds of cute I'm in 2021, we are winning how about that foreign? I'M going to show you again take your shine and jam apply to your natural hair, separate your hair into three braid. It all the way down. Take your crochet needle place. It upwards. First, okay, take the smaller piece from the expression here place it on the needle close the latch and pull it out. The next part you're just going to place the crochet needle again going the opposite direction right and then you're going to take the bigger piece and placing it on the um, placing it on the needle close the latch and pull it out so making sure they're, nice And equal and then you're just going to start braiding, making sure you're holding really nice and tight on the bottom. That way, it looks really really neat on the bottom. Okay, that's what we're trying to do since foreign? This is so easy. It actually took me an hour. Listen, this is the easiest of them Styles like if you don't know how to grip hair from the rootses. This is it for you. You can do this. You can do this on your sisters. You can do this with your cousin. You can do this on your clients. You can do this on yourself. I mean we're trying to win in 2021 while we're still talking sis. Can you subscribed to my channel, don't forget to turn on your notification button, so you do not miss out on any uploads, because this channel is getting what yeah? Yes, today's shout out goes to Olivia chuku. I hope I'm pronouncing your name right. Sis. Thank you for supporting my channel. Thank you for working with me. Thank you for all you're doing. Thank you for the love. I really really appreciate you, sis. You are a real one today, okay, sis, so the last one says we're gon na do the same same concept apply some shine and jam braid your hair and your natural hair. All the way down. Take your crochet needle place it first okay and then take the little piece of the expression hair place it on the needle close the latch, pull it out, making sure they're, nice and equal both sides take that bigger piece of the expression here closer to the tail Place it on the needle close, the latch, pull it out and and then making sure they're, nice and equal on both sides and then just start braiding down. I mean this is the easiest technique I have ever seen in my life. I mean this one right here is going to work for anybody - hey, hey, hey, I'm just gon na take my mousse and make sure my hair is laid all the way down. You know with all these flyaways and everything everything gon na be laid all the way to gathers it, and then I'm going to be using my Jamaican black, castor oil, mixing with my coconut oil to make sure you know my scalp is nice and moisturizes. That'S what we got ta do and I'm going to be laying my baby hairs using my kiss Edge fixer using my brush. You know what it is. I got this brush from Amazon. Of course, you already know what it is bye now and then I'm going to be using my um styling strips just to make sure everything is laid honey, and you know your girl got ta accessorize because I'm the accessorizing Queen. So today I'm going to be using this beads. These are my daughter's beads, but you know what assist gon na come all the way through too right. Anyways, I'm gon na be using this beater that I got from Amazon and I'm going to place four beads on each braid and then I'm going to be using my rubber band just to make sure it is nice and secure foreign came all the way through. Yes, I am filling these braids right here and you know me: I got ta throw in some Styles here and there and baby this styles are coming all the way through as well. Let me know if you guys are feeling them. Let me know if you guys are going to be trying this hairstyle right here. You want baby, we are winning honey, we are winning. You can rock this. You know summer is almost over, but I was like yo. I got ta come up with some color another color and baby. This burgundy and pink is coming all the way through all right guys. My hair is already washed and moisturized I'm going to be using my red tail comb. My shining Jam, my yarn. Yes, we're using yarn instead of rubber bandses and as well as my scrunchies, to achieve this look. So what I'm going to do is I'm going to start sectioning my hair from ear to ear just a straight line exactly the way I'm sewing, I'm going to make sure the line is really nice and clean on the front right there, all right guys. So once I section my hair from ear to ear, I'm going to start working with the front first, so I'm going to section my line from my Tempo all the way to the middle right there exactly the way. I'M doing so I'm just going to use my scrunchie to hold the hair just so you know I don't have to work twice. My hair is really thick, as you guys can see. If I don't pre-section my hair, I'm gon na have to be working twice. It took me an hour to get myself all together, so you better believe it you're about to be looking cute. So I'm going to section one line in between my back exactly the way I'm doing and then I'm going to section three lines in the middle as well. So, together I have eight section: six, okay, so it doesn't have to be like really nice and straight or whatever it just has to be nice and decent. You know what I'm saying you want to make sure the lines in the front are really nice and straight that way it looks cute. I was two talking sis. Have you subscribed to my channel, don't forget to turn in your notification button, so you do not miss out on any uploads, because this channel is getting wet. See. Yes, so I'm going to be sectioning out the little yarn string that I'm about to use for one section. So this is the amount of yarn you just got. Ta make sure it's nice and long going to take my shine and jam and then apply to my hair just to make sure the line is really nice and clean or whatever, and then I'm just going to take my baby hairs out of the way too. Just so you know, I look all the way cute period and then I'm just gon na take my shine and Gem and apply it to the remaining of the hair, just to make sure my scalp is really nice and clean, and then once I do that, I'm Just going to take my yarn, okay, the yarn that I section out, I'm just going to make sure I have a little piece on the top right there and then the longer piece is on the bottom and then I'm just going to start going round. Like I'm doing a knot or something like that, you know I'm just gon na go around in a circular kind of motion, just exactly the way, I'm doing so just make sure you're, nice and snug on the bottom, but not way too tight that you're going to Give yourself a headache or anything like that, as you guys can see once I let it go, it is not going anywhere. It is not unraveling, so you're, just gon na take the little piece on the top and then you're going to go on the opposite direction and just tie a little notches. Okay, so that's all you're gon na do and then you're gon na cut the excess yarn using your scissors very, very easy, very beginner friendly. Anybody can actually do this all right. So I'm going to be using this 3x free Trace braid. This is 68 inches and I'm using two and a half packs for this look. So it comes three in a pack. So what I'm going to do is I'm just going to take um the hair out exactly the way I'm doing foreign take the little rubber band that it comes with off and then I'm just going to take my scrunchy and secure the hair. So I'm using one a little piece for one braid, okay, sis and then once I do that I'm just gon na um separate my hair into two and give it a little tug that way, I'm really nice and snug or whatever, and then I'm taking a little Bit more of the shine and Gem and applying to the rest of my hair on the top anyway, just gon na take the braid and I'm going to place it on my hair. Okay. So I'm going to be securing that little screen that way it is nice and secure, and then once I flip it down. Okay, I'm just gon na take a little piece from the braiding hair, just to make sure I'm giving myself a little. Nice snag situation. That way, I give myself a little base on the braid sis - okay, because you don't want your braid to be moving around. You want it to be really nice and secure, I'm going to be sectioning the braiding hair into three exactly the way. I'M doing I'm just gon na take my natural hair and put it in the middle strand. Okay, so I'm tucking it in the middle Strand and then I'm just going to start braiding down exactly the way. I'M saying so it's very very easy, very beginner friendly anybody can actually do this. When I tell you this is easy: peasy lemon squeezy, you better believe it, because sister anybody can actually do this. You can do this on your daughter. You can do this on your mom. You can do this on anybody. I wanted to give you some easy summer, styles, that you can do an hour and you are out at the door. Today'S shout out goes to all my subscribers. Thank you guys so so much for subscribing. Thank you for walking with me. Thank you for all the love. I really really appreciate you. You guys are the real MVPs. I am nothing without you. Thank you from the bottom of my heart. So once I get to where I want the braid to stop, I'm just gon na take a little piece from the side and then I'm tying and not like four or five times, because the braid is Big. Okay, because it is thick. You want to make sure you are securing really really well so at least four or five times going to take your shine and jam apply it to your hair. I'M going to make sure you know your scalp is really nice and clean, or whatever you're going to be taking your yarn, placing it to your hair, making sure you have a shorter piece on the top right there, and then you have the longer piece on the Bottom and then you're just going to start going round, make sure it is nice and snug on the bottom, but not way too tight that you're giving yourself a headache, you're going to be taking the smaller piece of the yarn on the top and then combining that With the bigger piece of the yarn and then just tying a little knot that way, it is nice and secure that way, you don't have to work twice and then you're gon na cut the excess yarn using your scissors and then I'm taking a little bit more Of The Shining Gem and applying to the rest of my hair on the top that way, it is really nice and Sleek. It'S gon na take their braid and I'm going to place it on my hair. Okay. So I'm going to be securing that little scrunchie like three or four times that way it is nice and secure, and then once I flip it down just gon na take a little piece from the braiding hair. Just to make sure I'm giving myself a little. Nice snag situation. That way, I give myself a little base on the braces. Okay, I'm going to be sectioning the braiding hair into three exactly the way I'm doing. I'M just gon na take my natural hair and put it in the middle strand, okay and then I'm just gon na start braiding down exactly the way, I'm saying so it's very very easy, very beginner friendly anybody can actually do this. This is for my sisters, who cannot use rubber bands who are afraid to use rubber bands because they break their hair, or they just don't want to use rubber bands. They want to try using something else. Okay, so once I get to where I want the braid to stop, I'm just going to take a little piece from the side and then tie a little knot. So, just a little piece exactly the way, I'm doing right there and then I'm tying and not like four or five times make sure you are securing really really well. So this four or five times it is going to be nice and secure, and once you let it go, it is not going to unravel system. Hey: hey, hey, hey, hey, just gon na take my case Edge fixer and make sure I lay these baby hairs using the brush that I got from where oh my son, you already know what it is bye now, okay and then I'm going to be using my Styling Stitch just to make sure everything is nice and situated, so I'm just gon na be using this lid pouring in some water, because I want to be able to touch the braid once I start burning it. Okay, so I'm going to be using this lighter. So I'm just gon na start cutting the hair on the bottom, where I have the knots tied okay, so I'm gon na go down a little bit so once I do that, I'm just going to take my lighter and then I'm going to start burning the ends. Okay, just make sure you are very, very careful because you do not want to burn yourself this, so I'm just gon na be holding a little bit of the water to make sure you know, I don't burn my fingers. Okay, that's the whole point. Damn baby, when I tell you these braids came all the way through. I am loving this jumbo Bob braids. Let me know if you guys are going to be trying this technique right here, happy to access the rising Queen without adding some accessories, so I'm gon na be adding this gold accessories. Okay, I'm going to be adding it at the end, where I have the little knot and bear bear. When I tell you it took this out all the way to 100.. Let me know if you guys are feeling it. Let me know if you guys are going to be trying this. Let me know if this is a hot summer style or whatever, because I am filling these braids right about now. Is this okay? You know I mean I got ta, give you a little Styles here and there, let's put this braids up in a bun and then left one down just to make sure I'm giving myself a little um boom. Okay, easy! This is so beginner friendly. Okay, it's gon na pull all the braids up in my bed. When I tell you, I am feeling myself and using a little bobby pins just to make sure I take your word, and this hair is already washed and moisturized I'm going to be using my red tail comb. My eco styling gel my Diana brush and my braiding hair, so this braiding hair is 3x free, Trace, braiding hair, and this is in color number one and I'm going to be using two packs. Okay. So what I'm going to do is I'll start by sectioning. My hair from ear to ear just a straight line exactly the way, I'm doing just make sure it's really nice and straight because you want to make sure this style comes all the way through sis. So once I'm done sectioning from ear to ear, I'm going to start sectioning from the front, so I'm just going to section A little slanting line from my Tempo all the way to the back and then on the other side as well. So I wanted to do like a little triangle, a little V or whatever you want to call it. You know just to make sure the style looks all the way cute or whatever just gon na, be using the rubber bands to hold the hair, but I'm also going to be using the same rubber bands for these hair stylist. I'M going to section the back as well, so what I'm going to do is I'm just going to section a straight line from the top to the bottom? Okay, so I have two sections in the back and three sections in the front. This is a very easy tutorial for my sisters, who don't know how to braid who are learning how to braid. So once I'm done, I'm just gon na pull out a little bit of hair in the front. So you know when we're done, the baby hairs come all the way through sis and I'm also going to be using my water bottles, this okay. So what I'm gon na do is I'm going to take the rubber band that it comes with off and I'm just going to be securing that rubber band very close to me. So I'm just going to take my water bottle spray, my natural hair and then make sure it's nice and juicy, and then I'm going to take my eco styling gel, apply it to the hair. Take my Diana brush and make sure everything is nice and situated, and then I'm going to take the same rubber band that I was using to hold the hair and then just secure it. So I'm just going to be securing it like four or five times that way it is nice and secure not too tight that you're about to break your natural hair. Once I secure my natural hair, I'm going to start with the other section, so I just wanted to show you guys that you can actually just slick your hair down all the way before you start braiding. So that's what we're going to do today. So I'm going to do the same exact way I did take my eco styling gel, apply it to my hair, take my Diana brush and make sure everything is nice and laid use my rubber band to secure it. This is the easiest technique. When I tell you this technique is easy, it is quick, it is time saving it is money, saving foreign. I love to use Eco styling gel because it flicks my hair down really really good, and you know I have 4C hair since so you already know if my hair can slick down your hair is going to sleep down. Okay, my hair is nice and Sleek. I love this gel. It doesn't make my hair white when I'm done like after a week, I'm still looking good sis, okay and for some people who can use Eco styling gel you can use whatever gel works for you sis anyway. So I'm just gon na slip down all five sides of the hair, so I'm doing the same exact technique. Take my water bottle spray, my natural hair and then take my eco styling gel, apply it to the hair. Take my Diana brush and make sure everything is nice and situated and then use my rubber band to secure it once I'm done slicking my natural hair down, I'm just gon na take the hair the braiding hair now. So this is a 3X free Trace, braiding hair. So I'm going to be using one piece for each section, so I'm just going to take the hair out. It does have a rubber band that it comes with, so I'm not even taking that rubber band off this, I'm going to make sure I place it exactly. The way I'm doing so that way when I flip it over, it does hide the rubber bands. It'S going to secure the hair four or five times, and then I'm going to section my natural hair into two okay and then I'm going to flip the hair back. So I have two pieces of the braiding hair. Okay, I'm not even doing anything since I'm just going to separate where the rubber band is secured. That'S all I'm doing right there, I'm going to be sectioning, my hair, my braiding hair into three. So this one strand, I'm going to section it into three, so I'm taking the middle piece and tacking my natural hair in and then I'm just going to start braiding down just make sure you have a really nice grip on the hair that you're talking in that Way, you know it does not peep through it does not do all of that very easy, very beginner friendly anybody can actually do this and, as you guys can see, my hair is nice and tacked in because I'm using that middle strand to tack the natural hair In so I have two pieces of the natural hair: one is going to go with one strand and the other one is going to go with the other piece. Okay, this is a cute cute style that you can do on a Sunday night, okay and Monday morning. You are just looking good, but while let's do talking sis have you subscribed to my channel, don't forget to turn on your notification button, so you do not miss out on any uploads because this channel is getting wet. Yes, then, I'm going to take a little strand from the bottom and just tie that into a knot. Okay, so I'm going to do that twice that way, it is nice and secure that way. It does not unravel that way. My says we don't have to be working twice once we are done. We are done so I'm just gon na. Do it exactly the same way with the other one, I'm going to section my braiding hair into three Eco pieces and then I'm going to tack my natural hair into the middle piece and start braiding all the way down? Oh, what I'm telling you if you haven't tried any of my Styles, you better try this one, because guess what sis it is going to come all the way through. It is something that you can just wake up and get it done, and you are wear out. The door? Okay, so you better make sure you are trying this Styles, because sis, when I tell you they come all the way through. I have a lot of people who tell me Tuple. The styles are working. Oh, my gosh.

Comments
Lady lizy: You are now my role model,I have been flaunting different hairs find by me,I thought it wasn't possible before, but after watching many of your videos I became determined, and I do my hair very neat and nice that people even had doubt that I didn't do it myself,big thanks to you my pretty lady,,
grlRex: The braids is good, you hear me. The braids IS GOOD! But the beauty is the way you carry yourself. That positivity, that self-respect and confidence is a consciousness all of us owe ourselves. Might sound corny or whatever, but having a conscious commitment to doing you while grooming and styling brings the beauty. It makes me make the time for myself. Thank you for bringing it. (Queen to Queen )
Tanya Mann: Thank you!!! I will be able to do the Braids on my daughter. Appreciate the details & explaintion in your videos
Kristina Dundy: Thank you for sharing these styles they are quick and cute and easy I get a lot of compliments every where I go!❤️❤️❤️❤️❤️❤️❤️
olusola348: Love this video, thanks. Quick question: How easy is it to take the rubber bands out of the hair after a couple of weeks?
Sydney Wright: I love all the styles. My favorite is the Pink and Jumbo. It’s always a good time watching your videos! Love them!
drik Monteiro: Vc é simplesmente incrível. Seus penteados são perfeitos. Vc me inspira muito. Obrigada e que o ano de 2023 seja de muito sucesso para você!
Joyce Musungu: Happy new year ❤ Tupo lets continue rocky the year as always with the amazing styles that you present to us ,,,,,love you❤❤❤❤❤
Annette Allen: Absolutely love the color on you. Thank you I learn a lot from your videos.
Thandie: Thank you sis for the techniques ❤️ Happy new year sis ❤️
Ali S: Im inspired! Cannot wait to try some of these styles in the new year!
Tolisha Ragland: Never could braid and I used this method and I've been saving my money for my daughter's hair
rosangela silva: Vou vou fazer curso de trancista no Senac, logo menos estarei fazendo estas maravilhas
Lobe Queen: Girl you must have telepathy. I big chopped and was thinking last night what would be the best way to do this!❤
Ang: All of the styles are beautiful you look beautiful thank you for the new techniques I will be trying all ❤
Grace Designer: Hi Tupo, you really rock with all this styles, I'm feeling the vibes ❤❤❤❤
Ramadimetja Portia: U make it look so easy. And I believe it is. Thanks for the video
Michelle Love: You are so talented, I will have to try one of these styles!!
SINGER: She kills me when she says "Juicy yaaasss!" I love it!
Allison Brown: Love all of the hairstyles. I will be doing them.
Kela Olds: Now I'm fin start on my hair because u taught me step by step
Yvette Barnett: Please do a tutorial on parting. That's my biggest issue. Happy New Year
Tee zin tan: Another masterpiece!
Rose G: Great job as always sis, Happy New year.
Hack your life away: I would like a parting video but would love to see how you prepare your hair for braids. Also, see a braid take down video.
ROSE OLIVER: Wow beautiful beautiful own you thanks you for sharing this I did the other one for this week loved your VIDEO
Shawn Jarrett: I enjoyed your video I am definitely gonna try them thanks for sharing
ROSE OLIVER: WoW you rock it i like them all i will try it out also I really like the style thank you for sharing keep up the good
Kathi McMillan: Happy New Year!!!!!!! Tupo, may your year be Blessed and Prosperous!!!!!!!!!
L Bossi: Super Cute!! Happy 2023!! All the best to you this year!!
Ann Marcano: Thank you girl you're the best
BurpyDuck: My hair too soft for thissss. 2b♀️. It does work well for twist. Ima try it
martha francis: love all your styles
Miriam Shelton: You know I love you I'm trying to do my hair today like now
Toni Batte: Gdm hun happy new year and awesome braids and nicely done
Anitsha Ross: ❤️ beautiful
never give up: happy new years beautiful ❤️
Carlene Donald: Typo, I’m watching all the way from Trinidad and Tobago and it’s such a pleasure being here. What braid method are you using, over or under hand. I’m a bit confused. Warmest regards Carlene
ROSE OLIVER: I will try it out for my self the Gray and black because I am all ready this color gray hair I don't touch up that much
Sibongile Mtungwa: I love you you sisi ❤️❤️❤️you always on point
anecka Parchment: I'm going to try this one
Flower Power: Thank You
SeraphimBee: Thanks sis
CrazyNaturalPrincess: ❤️❤️❤️
Vonda B.: Happy New Year!
Em Gracious: Aunty Tupo I tried one of the styles it's soo good.
Jeneba Mangar: ❤❤❤❤❤❤❤❤❤
Miriam Shelton: So how many packs?
ADHIAMBO VIV: Happy New year @Miss tupo 1
chocolate kisses75: Good morning happy new year
Flower Power: Yes yarn braids
Muziranenge Claudine:
Michou Charles: Thank you baby
ᴛᴏᴅᴏRᴏᴋɪ Sᴏʙᴀ: Happy New Year
Naggayi Halima: Wawoo hppy nu yr bb
martha francis: and your make up