6 Easy & Heatless Back To School Hairstyles For Curly Natural Hair | Nia Renee
- Posted on 20 August, 2018
- Heatless Hairstyles
- By Anonymous
Connect with me!
https://www.instagram.com/b.nia/
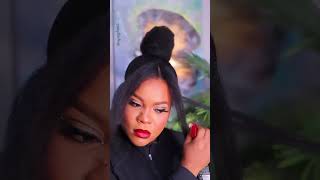
Thank you all for watching! In this video I show y’all 6 easy & cute hairstyles for naturally curly hair that will make back to school season so much easier. They don’t take too much work and will last you all week. If you like any of these styles, try them out and let me know how they turn out in the comments!
#backtoschool #curlyhairstyles #naturalhairstyles #curlyhairroutine #backtoschoolhairstyles
Hang on what's up, welcome back to my channel so today we're still in back-to-school mode, alright, but now we're trying to look cute when we go back to school and we're not trying to do too much work when it comes to our hair. Okay. So today, I'm gon na be showing you guys, six hairstyles, that you can do throughout the week, while you're at school, without having to wash them between. You know that are super easy super cute and less work. Okay, so I hope you enjoy them and if you use them, let me know and yeah, let's get right on in it. Okay guys, so I am fresh out of the shower. My hair is still completely wet. I all I did was use a t-shirt to just stop it from being dripping wet. Okay. So with this first style, it's gon na lay the foundation for your hairstyles for the rest of the week. So as long as this one's really done right, you can't really mess up the other ones. Yeah the first one's gon na be two braids easy right, yeah, so we're just gon na go ahead and part where we want the part for me. I don't like to do a middle part, because my foreheads too big so I'm gon na part right here, is where I normally do it and then I'll go diagonal over the top of my head, so that the braids are even and then I'll just go straight Down the middle, so that if I should have about the same amount of hair on each side, alright, let's get started. Okay! So now that we have our part down, we are going to use my fav leave-in conditioner Cantu, shea butter, leave-in conditioner, I'm gon na put about a dollop, this big on each side, separate and use a brush to work that through okay. So now that we are all dis angled, I don't know about you guys, but I never really learned very well how to braid my hair on my head, like a French braid or a Dutch braid or a cornrow. So, instead of having a braid come over the front of our face and down on this side, we're gon na do a twist and it's really easy not even a twist really it's like a roll um. It really looks like kind of a crown around your head. So yeah that's gon na be what we do instead of a braid and it's gon na tie into all the rest of the hair cells that are gon na be used in the rest of this week because of this foundational hairstyle, you feel me, okay, alright, so We already have our part and we want to smooth everything down before we start rolling or braiding. So we got our smooth brush and we're gon na especially make sure that these sides are all good the top. We don't want any frizz, because we want this to be as smooth as possible. Okay, so now that we're all smooth in advance, when I do my braids, I like to have my baby hair, it's kind of done already, so I don't have to go back and do too much work after I finish the braids, so I'm gon na take my Fish Jessie's jelly, soft curls and my toothbrush. You know the drill and lay these babies down. Okay, same thing here: okay, now I like to start on the side. That'S gon na be covering my forehead, the most. So what you're gon na do to roll is literally just pick up the front pieces of your hair right in the corner, where you parted it and just start rolling backwards and add in more hair as you go along, I promise it's so simple, not complicated at All make your role as thick as you like: just keep, adding hair okay, and once you get to about your ear, whatever hair that you have added in pulled that out, because this is gon na be one strand of the braid of our three shared braids. So make sure you don't have too much just because you want to make sure it's even and then separate the last two sections that we're going to use to braid hold it with your chin cuz. You know we ain't, got enough hands and add it in make sure that you're combing through your hair, as you braid, because we got ta drive, look make sure you're combing through your hair as you braid, because when you take these braids out for the rest of The week after it's all dry, you want to make sure that your hair is is defined as possible. Okay, now we take a little elastic put that if there's a lot of hair sticking out at the bottom, that's fine! If you want to just braid that little section at the bottom, you can for me I like to just twist it so I'll, separate two strands and there you go all right. I'M gon na do the same thing on the other side. Now, alright, you guys so here you have your first hairstyle, so just let this dry in we'll come back tomorrow with another one, okay, guys! So now that our two braids have dried, we can start working on the five hairstyles that we're gon na get from just setting it like this. So the first thing we're gon na do is just unbraid. These braids make sure they're 100 % dry before you embrace them. We have a really pretty new pattern so for style number one, we're gon na do kind of half up half down kind of thing, with the front of our face, bring the two strands of the braids to the back and kind of mess it up to try To get rid of that middle part and then the two strands that you twisted for the braid we're just gon na keep the little crown that we made yesterday fix it up a little bit grab a ponytail holder, two pieces wrap them around. Okay. So, for the third style of the week, we're still gon na stick with the two crown pieces and we're just gon na do two side ponytails make sure, first that your hair is parted on the back, just like it wasn't into the braid. Okay in here, you have saw number three for day three next for day four out of the week, we're just gon na go with one ponytail straight to the back. You know you just want your hair out of your face, keep the crowns going. You know now for day five day, five day: five, if your hair starts to loose the curl pattern, that we got from the braids out and some of the definition, then we are going to keep the crown in the front right. But today we're gon na. Do two buttons instead of two ponytails cuz, when all else fails put it in a bun and there's two: that's not cute: okay, okay and finally, now why are they six? We made it all the way through the week, our hair is probably feeling dirty nasty gross. Wash day is tomorrow, okay, so now we're really just gon na keep the crown. You know if we have to grab a little bit of gel grab your toothbrush, redo your edges and twist once again make sure it's nice and tight on the other side too, and we are just gon na - do a bun straight to the back for day six, Because we just want it out the way and we're ready to wash tomorrow there you go. Ladies there you have six styles for your back-to-school sessions. Your back-to-school looks okay. Thank you good to go all right. Thank you all so much for watching this video today. If you enjoyed these hairstyles and if you plan on using them, make sure to give me a like subscribe to my channel, if you haven't already hit that Bell in the corner to get notified, whenever I post a new video and follow me on Instagram and come Back comment: we'd love to see you come back, alright, thanks again for watching. I appreciate y'all's time and I will see you all in the next video bye
Comments
Angelic: You’re hilarious I don’t know why you don’t have more subscribers I’m subbing today and excited for more videos!! ❤️ (Also I have curls too so this was vv helpful )
Micaiah L.: Cuuute!