Easiest Sleek Back Low Ponytail On Thick Type 4 Natural Hair| Only 2 Products| No Heat
- Posted on 17 July, 2022
- Heatless Hairstyles
- By Anonymous
What's up guys, welcome or welcome back to my channel! Today's video, I am going to show you guys how to achieve this super sleep low ponytail using NO HEAT and only 2 PRODUCTS! Thank you guys for your support and I hope you enjoyyyyyyyy!! ✨✨✨
MUSIC:
BURNA BOY LAST LAST INSTRUMENTAL [reprod by. ufedo]
CONNECT WITH ME:
IG: https://www.instagram.com/brimitch_/
Business Inquires:
Email: [email protected]
#naturailhairstyles #type4hair
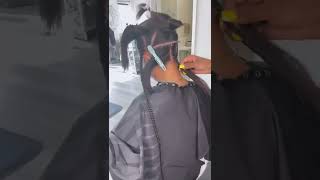
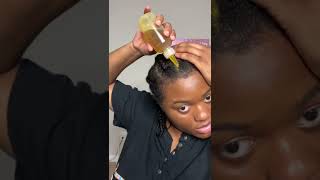
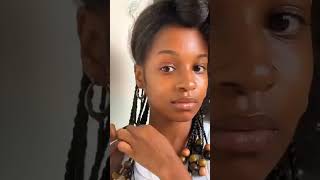
Breakfast, what's up guys remich here, welcome to my channel if you're new here welcome, don't forget to like share comment and subscribe down below if you're returning a subscriber welcome. Welcome. Welcome. Welcome! Welcome! Welcome! Welcome back! Thank you so much for being here. Thank you. So much for the support, i appreciate it to the moon and back okay guys. So in today's video i am going to show you how to achieve this simple, cute, fluffy, sleek, low back ponytail situation that i have right here on my head. I think it is so cute and so elegant and is absolutely so easy and affordable to achieve. So if you're interested please stay tuned and let's hop into the video hey guys so starting off, i'm going to go ahead and remove my bonnet and, as you can see, my hair is in some big old plaits that it's been in for a while um. So what i'm going to do is remove these plaits individually and how i'm going to achieve this style. Is that i'm going to slick it back in sections that were already kind of provided from the plait? So you see me just remove one plait and then detangle that section and then after it is thoroughly detangled, i'm going to go in with the wetland extreme gel and i'm going to go ahead and slick back that section i know y'all can see properly right now, But y'all gon na get a better angle. I'M gon na use a brush a hard bristle brush and slick back that section and then put it away and go ahead and keep doing this section by section. So right now, y'all have a better view of it and, as you can see, i just remove the plait or the braid, and then i detangle it with a wide tooth comb go in with the wetland extreme and just use a hard bristle brush and slick it Back and by doing this, this is how i get my hair to be as flat as possible and getting your hair as flat as possible is key to this hairstyle. So i'm just going to continue to do this until we get to the top, oh and, as i finish with each section, i'm just going to remove that hair tie and add it into the bigger section and once i get to the top, i remove both of Those sections at once and i'm going to detangle them together and i'm mainly doing this at the top. Because i want to make sure that my part is as centered and as straight as i can possibly get it. And because we're at the top we're going to use a little extra work so, instead of using the extreme wet line gel, i'm going to use the gold well styling gel right here. This is the truth. This is actually what's going to get the hairstyle to where we need it to be, so i'm going to apply this um to the top of my hair on either side of that middle part that i created and i'm mainly applying it to the roots because um, That'S really what we need to focus on to get it slicked back, i'm going to go ahead as soon as i'm done, applying with a hard bristle brush the same one. I'Ve been using and just kind of brush that top section down. This did take some time because, as i said, i was really focused on getting the hair super flat, so i just brush and brushed and brushed and held and brushed and held now. This right here is an arm workout. I won't lie to you. This is an arm workout, but it is so worth it, but once i'm pleased with how the how flat my hair is, i'm going to go ahead and tie that away and now i know it looks a bit white on the top, but it really isn't and Plus it's going to dry down, so don't even worry about that. But then i'm going to go ahead and add some more gel because you know you can never have enough gel in your hair. I'M going to go ahead and add some more gel and then i'm going to brush that down as well and then now i'm just going to go in with a hair, pin and just pin my hair down a bit at the sides just to help to make It look a bit flatter, then i'm going to use that same goldwell, styling, gel and just work on my edges. I love this gel one of my favorite things about this gel is that i can use it on my edges and i don't have to tie it down. That'S how strong it is. The only downside about this is that sometimes it does leave white flakes, but i just usually put some oil or some hairspray on it to just um, make it go away, but other than that this gel is amazing. I'Ll definitely have it linked below. Now, once i am done with my edges, i'm going to go. Get my hair tie to tie that hair down so that it so that it sits in place, and i'm actually going to use two hair ties, as you all are going to see very soon and the purpose for me doing this is so that my hair is Just extra set, i realize, when i use one it doesn't get as um set. I have no better term, but it doesn't get how it gets when um when i used to so that's what i do and then i'm gon na go off camera. Do my makeup? Come back and then remove those hair ties now my makeup took about 40 minutes to do so. This has been sitting for about 40 minutes and, as y'all can see, this is the final result you see how stuck that is. That here is not going anywhere, and that's thanks to that goldwell styling jam now i am spraying the hairspray on some areas that that had dried a bit wide so that um that white cast goes away, but that's about it. You can also use oil to do this as well, but i only had hairspray and now we're going to go in with the ponytail. This is the ponytail that i will be using today. I got this from the beauty: supply store um, so it was super super affordable and it is a drawstring ponytail. So right now, i'm just going to pop the tag off of it and then i'm going to show you guys the clips in the middle. So it does have two clips, one at the top and one at the bottom and the drawstring, and i'm just going to go ahead and attach this onto my hair. I know you all can see i'm just attaching the clips and then once the clips are attached. I'M going to go ahead and draw the string and then wrap it around a bit so that it doesn't show up under the ponytail. Now, once the ponytails on i'm gon na go ahead and fluff it out a bit with my fingers as well as a wide toothed comb, and i'm also gon na go ahead and separate the curls a bit just to get it a bit bigger and to my Liking and once that is done, this is literally the hairstyle y'all. This literally took no time so simple, so easy and so cute, and then i just turned around to show y'all how the back was looking but yeah. That was really it guys. Okay guys! This is all i have for you for today's video. Thank you so much for watching. I really hope you enjoyed. I hope you all try and recreate this hairstyle, because, as you'll see it was super simple for me to do so. Let me know your thoughts on it in the comments down below so with that. Thank you guys again so much for watching. Don'T forget to like share comment and subscribe down below share the video with a friend. Follow me on instagram and until next time guys take care. You
Comments
Donna Mitchell: Simple beautiful my dear. And the green makes you pop
Joyce Burke: Love that green on you.