My Heatless Curls Tutorial As A (Long Hair) Hairstyle Method - Real Time Uncut
- Posted on 02 December, 2021
- Heatless Hairstyles
- By Anonymous
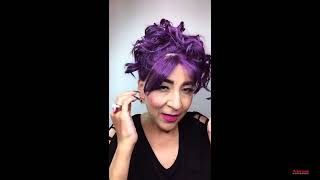
My heatless curls tutorial as a (long hair) hairstyle method tutorial - Real time uncut
In this real time tutorial I am showing you how I do my favorite heatless curls hairstyle. You can join me and try it on yourself while watching. ♀️
(it's recorded during an Instagram live session)
The hairstyle I am using to make the heatless curls can be worn to sleep at night or also as a nice hairstyle at daytime and then release the curls for an evening event or the next morning.
For me if I wear this hairstyle overnight or a day and then release the curls, my curls will usually last me at least 1 full day, sometimes 2 days or more. Use hairspray to make the curls last and style them in whatever way you like!
part 2 of the video, releasing the curls: https://youtu.be/ZcYEa35YcTs
If you want to do this also, all you need is:
- A long big bow, or the tie from a bathrobe or a thin scarf.
- A spray bottle with water
- Hairspray
- 2-3 hair tights
- Hairbrush
- A hair clip
- Bobby pins (optional)
- Hair curlers for your eventual bangs (optional)
Or grab a cup of tea and watch me doing it. ☺️
Some little reminders:
1. the thicker the fabric you are using, the bigger the curls will get.
2. spray your hair until lightly damp, not wet.
3. your hair needs to be fully dried before you release the curls.
4. always keep the fabric straight and wrap your hair nice and tight around it. if you braid it you will end up with waves, not curls (can of course also look nice!).
I hope you like it and have fun trying it out for yourself! I would absolutely love to see your hairstyles and curly results! So feel free to tag me or send me your pictures!
#heatlesscurls #heatlesscurlsovernight
#heatlesscurlshairstyle #heatlesscurlshack #curlyhair #curlyhairstyles #holidayhairstyle #holidayhairstyles #longhairstyles #longhaircurls #hairstyletutorial #hairstyletutorials #rambutpanjang
Well, hello, uh, as promised. I am live today, uh, because i am going to show you all my heatless girls method and i will just maybe look if there is somebody going to answer quickly. Yes, first person already here, hi, eva hi, kerstine, oh hi, that's nice! So today i want to show you how i do my heatless curls and it's quite an easy method and yeah. First, of course we need to brush our hair. I don't know if you want to join me with doing this. I will just show you in a moment what we will need, or i will just show you now um something you will need is like a scarf or a big tie, or some kind of very big bow. I didn't make this one myself um or you just. Can use a thin scarf or the tie of a bathrobe? It'S also going to work very well and something you can watch out for when you are choosing your fabric to use, for this is the thicker the fabric, the bigger your curls are going to get. So you can also play around with that um if you are going to use, for example, a thin scarf or a thin tie from a buffer when you're going to use that your curls are going to be more smaller and if you're going to use a bigger One i sometimes use this one and i use also than the tie of a bathrobe. I just put it inside here and then it's bigger and then your curls are going to be bigger. So that's something you can always play around with and i will show you also some different options later on. So this is something you will need some kind of piece of fabric to wrap your hair around. Then we will need a little bit of water in a spray bottle. I have distilled water which i use on my plants, but it works on my hair too so and hi wendy, and i also have some hairspray. This is a very mild natural hairspray, which i will use right now. You can also use regular hairspray. You don't necessarily have to use it, but it makes it last a little bit longer and a hairbrush of course, because we want to brush our hair, then we will need a few hair ties and some bobby pins, so not necessarily the bobby pins depending on. If you are going to sleep on it or if you are going to wear it as a daily hairstyle also, we will need a hair clip so and um. This is also optional. You could use something if you have some bangs and you want to style them. A little bit differently or a little bit more perfectly kinda when you're going to sleep overnight. You can also use things like this. Where you can wrap your bangs around you don't have to. We can also just incorporate them in the hairstyle, so um. First things. First hi everybody hi cindy, oh so nice to have you ever all here. So yes um, i'm just going to remove the pins i have in now, and then we are going to brush our hair, which is very important because of course we need to detangle it. Um another reason for that is: we want to detangle it right now because um, if we are going to take this style out, and we want to release our curls, we don't want to brush our hair anymore, because we would end up with one big fizzy bump Of hair and that's not what we want, because we want nice and defined curls, so we want to brush our hair now very well and then not when we are going to take the style out tomorrow in this case for me tomorrow. So, as i said, um we are, i am going to do the hairstyle now for uh sleep, so i will sleep with it and then, tomorrow morning, somewhere or tomorrow later on, whenever i feel like it, i will take uh it out and release the curls um. But i will also show you how you can make it look nice to wear it uh, just as a daily hairstyle, and then you can go to sleep with it afterwards and release it the next day or you can release it in evening. However, you like it's all possible, hi so nice, to see you all yes, so brushing already done that did go quickly. This time it just came from dancing most of the times. It'S a little bit worse, so our brushed all set um. We are going to separate our hair into two parts and because i usually wear my hair like a little bit, um, not symmetrical uh. I will also just separate it like this, because otherwise my hair hair is going to come out very weirdly tomorrow and it's not going to fall the way i want so i will just separate it the way i usually wear it, which is like this and then I will just separate it in the back and depending on, if you're, going to make this as a hairstyle to wear over the day um and go out of it, you can just make it the separation a little bit more like perfect and uh nice and tidy, Which counts for all of the hairstyle so and then i will brush it all straight again. Well, when we have separated our hair and we are ready, we are just going to spray it with some water to get it a little damp. You don't want it wet, but it needs to be a little damp, so the water can dry in overnight or over the day. However, you like, and that's the purpose of this way of doing it, because if it dries that way, it will also keep the shape more and therefore you have really nice curls. Of course, it's not really necessarily to wet your hair, but it works better that way. So yeah, that's what i do a little bit other side also so, and then i will also use some of this. Um hairspray also spray this lightly in a little bit. Well - and i am recording this as well at least i try to so um, not with all your texting - that's all private or just in here um, but i will try to also upload it later as a video. So you can come back to it and watch it again. Oh thank you ava! Thank you! So much yes, my hair is really long. It took quite some years to get it this long um. If my hair is going to stick because of the hairspray. No, actually not, it depends on your hair spray, though, if you have, i have had some very cheap, bad hair sprays and they are likely to stick, but i'm not sponsoring any brands. I just have this from a german yeah shop and it's a more natural hairspray. This one is very mild, and it's not very sticky, so um. If you have yeah usual regular hairspray. Normally it will work, but there are some bad hair sprays out there which are gon na stick anyway. Whatever you do so yeah that is going to stick um, but this one not actually and like. I said if you're um afraid it's gon na stick and you really want to make it make it work at the first attempt, then just don't use the hairspray if you're afraid, that's one, that's going to stick, but it's usually not yes, true afa. Yes, in this case, this is what i am using well, like i said, i'm not sponsored is from the german dm market and it's alverde and it's um biological hairspray, and for me, this works very well and tomorrow to fix it. If i want to have it a long time, i will use a regular hairspray hairspray to coat over it, but this one is like i said it's quite mild. It doesn't really get hard and this works for me very well. It'S not really necessary, though you can sometimes also use some types of like hair gels kinda, or these leaf in masks sometimes also work for this um make sure your hair is not going to get very heavy and very oily. That'S, of course, not something we want. Well then um we have just brushed it through a little bit because um then it gets better through our hair, the little bit of dampness and the hairspray mixing it in very well, then we take our hair tie and we want it to be same length. So it should come out like this, and this one is very long because i want uh to be able to wrap it around my head at least once and make a bow or twice and just knot it in the back uh, because with that length you can Do more hairstyles um, you don't necessarily have to do this. You can also, depending on the length of your hair. I have, of course, quite long hair. So therefore, i also need to wrap it more if your hair is a little shorter and you're just ending somewhere. Here or halfway or you are not even going to wrap it because you are going to sleep, it doesn't really matter, then you can just have a scarf. That'S like yeah. You can just measure it like the length of your hair, like where it's going to end. Like that and that's what you will need at least so, but because i wanted to be able to also make this into a hairstyle at daytime, i did just do this one myself with the sewing machine, and yes, so this is what we are going to do. I am just going to fix it on top of my head first, which is going to look quite funny, but that's what we are going to do and i'm using just a regular hair clip for this. Whatever you have just a hair clip to just fix it. On top of your head and then we are going to start with one side and um. If you are wanting to leave your bangs out um for a daily hairstyle to do your bangs differently, then just separate them now out kinda. I will just show you what i can do with or what i do with bangs sometimes so i will just separate them out, so i can show you later on. Otherwise, i would just also wrap them in and it will just be fine and then all we are going to do is just take a little part of the front. Take a little part of the front. Take a little part of the back. It'S kind of like a french braid, but not the same, so a part of the front which i am going to wrap underneath the fabric and over to the front again, so the front always ends on the front and the back will always end on the back. So the back is going underneath the fabric and over it and back to the back, we will need to make this tidy. So, as you can see, i am just wrapping it around the fabric. I'M not braiding here, i'm just going to wrap it around. That'S very important: if you are going to braid, you will end up with waves, which can also be nice, but you could also have braided your hair and so again we are going to add another little piece from the front and then we are going to get Separated here going to get underneath and back to the front and again make it tidy to get nice curls up here already so and again from the back add another little piece, i'm going to sleep with it, so it doesn't have to look very, very perfect. We are just adding some and then again, underneath over and back to the back and making it tidy again same for the front. So add another little piece separate it. So you can do this and underneath back to the front, make it tidy always keep the fabric straight. So don't braid it just keep the fabric straight and wrap your hair around it again, underneath and over here so, and we're almost done with the hardest part, which is just adding the little piece of hair here so for everyone who is joining later. I am also recording this and then i will just add it to my instagram page, eventually also to youtube not sure about that, but it will end up on my instagram if it works this time so and again, underneath and over so and by now we have Finished this so adding more of the hair. I will just brush it one more time to get it all nice and straight no tangles here, because i don't want to brush it tomorrow and then we are just continuing with the wrapping. So again we are gon na. Do underneath and over same for the other side underneath and over try not to make the gaps very, very big, some gaps are nice can also look nice and again under and over hi, now, yes again under and over, and always, as i said, keep the fabric Straight to do this and really just wrap your hair around forget about braiding for a moment, because if you think you're braiding you're gon na braid, so for me my hair is longer so it takes a moment longer. But that's not a problem, because this is more easy than the first part, but it's still not hard. If you have done it a few times, it's gon na be easy. Also, if you're gon na sleep on it, it doesn't matter how it looks so we are at the end and i try to wrap it all around at the end, just wrap it as good as you can, and then you are going to take a hair tie And just tie it make sure you cover the ends of your hair, so the last pieces with the hair tie, so they don't unravel. Then we end up with something like this and you can, of course, if you want to make the stylish you can use all kinds of nice looking fabrics or scarves to use this. We can remove the clip and then, since we wanted to separate the bangs, that's what i'm going to do right now and my bangs are already really long, because i'm trying to grow them out. So the longest part is somewhere here already. But i'm not sure if i'm gon na take everything about. This is fine, i think, and then i will, like i said, separate the bangs just somehow tie them to the side here. Okay, like that fine, where is the fabric here? Okay - and maybe i'm a bit obsessed about brushing my hair every time straight, but for me that works the best if it's nice and straight, the curls are also going to be really nice and aligned. So we are again starting with a little part at the front. Wrapping it underneath and back to the front over again like this, then we are going to get a little parts from the back separated from the rest of the hair, and then we are taking this underneath and over back to the back again make it nice and Tidy, we are going to add another little strand from the front, separate your hair and then the front is going under over the fabric and back to the front. So we are always just wrapping the fabric, that's all and adding little strands another a little piece from the back and then we are going under the fabric and over the fabric and again tidying it back to the front. Adding another piece here and then again under and over keep the fabric straight, and i will take the last piece from the back ripping it under well, i missed a little wrapping it under and over to the back so and then we can just start wrapping it Again so the front always ends at the front and the back will always end at the back, because we are just wrapping around the fabric. Again, i hope you can see this. I guess you can and again try to keep the fabric straight and don't make the gaps too big. If your gaps are going to get bigger, your curls will also going to get bigger. So that's the difference there, but for a hairstyle to wear the daytime, it looks nice if you are using a nice fabric and then have some gaps in between. In my opinion, that way, your strands are also going to be longer your braids kinda. Thank you ava. So it's visible, so if you have some gaps, your um braids wraps are going to get longer, which is nice for making a hairstyle like this, and we are almost at the ends and at the end we are just going to wrap it around. However, it works make sure to make it nice and tidy well, and then we are going to secure it again with a little hair tie, like i said again, tie the ends of the hair off very well, so they're not going to unravel well. This is where we are at right now. They should come out kinda at a similar length. If you can see this, so that's how we can do it um. Yes, yes, yes, i have experimented with different materials. Like i said, i have used the tie of a bathrobe, i have used thin scarves. I have used this type of fabric. It doesn't necessarily make a very big difference if you are going to use, for example, cotton or synthetic material. Synthetic material doesn't dry quicker, which is good in this case, because you would have a less long drying time so also, if you are going to use, for example, cotton really make sure to not make your hair too wet because it will take longer to dry. But you can, in emergency cases, also use a hair dryer, so a blow dryer to go over it one more time, um, but usually this. What i'm using here is viscosa um, i'm not sure if that's the right, english name, it's like made from bamboo, if i'm right, bamboo and wood. So it's not cotton, but yeah. You can use different materials if it's thicker, your curls are going to get bigger. If it's thinner, your curls are going to get smaller and i find little scarves and things like this work very well for this. So now we are here um. I will just get my oh. Where did i? Where did i put my bangs okay, i hear yes, i got them. Oh, i almost thought i would have wrapped them in here again, but no they're here so usually i will just put them behind my ear or something like a very sure amount. So um at this point you have different choices. You could have wrapped your bangs inside here and you could be done right now. If you're going to sleep, this might be more comfortable, because now you still have nothing at your back and you can just lie at the back of your head, and this is also kind of flexible still. So you could just put it aside and lie on the side of your head, so this is still working quite well to sleep um, depending on your what you want, so this is for going to bed. This would be kind of ready if you have wrapped your bangs in, and you can also wrap your bangs in different styles, which i will show you in a moment. But for now i will also show you how i like to wear this hairstyle also at daytime, and i will just change around for this. So from the back. We have just those two um yeah braids wraps. However, you want to call them, and the only thing you are going to do is cross them kinda, so one is going under and one over and it's important to make this work that we are always going to be under the one that's fixed here, because otherwise It'S not going to hold same on the other side going on there and then we are going back to the front. So you can see it's here crossed but we're taking both under again to the fixed one and that's it at the back. Then we are back at the front since i have still left here a piece i am going to use that to put the frabex fabrics um on there, so i will just loosen one. I can just pick it up later. I'M just going to open this. A little and take the fabric through to make it more uh durable. This is going to hold better same again here, going to put it over, but because we want to tie it. I am going to get this under from the other sides, so this one's going from here may look kinda complicated, but otherwise you would not have this and you could not tie it make sure it's all very nice and tidy get it on here and then what I do because otherwise the knot is going to get very big. What i do is, i will use a hair tie, so this will be the bow version if you're going to make a bow in the front. Well, i had to restart my camera so, but i will just um tie this here with a hair tie and then get it all tidy, and then you can just use those pieces to make a bow, which is not always very easy like this. I don't know if i made this one very nice. No, i don't think so. Okay, uh wait. We are doing it again, so, okay! Well, this did turn out a bit better. Then you can just unravel the fabric to make this bow a little bit more loose. Like this make it tidy and then you would have a bow on top if you like, that, can also look nice. You can style your bangs to go with it and have a hairstyle. So my bangs are quite long now for this, but you could do that and i will show you one more method, which is where we are going to unravel our bow again and also the hair tie, and this method is actually more simple. So we are back here at this state. If you can see this and then only thing we are going to do, we are going to cross them to the other side, so we can make it really nice and tidy, and then we are going to get this back to the back. But underneath again, so it's getting tidy same on the other side underneath going back to the back and at the back we are just going to make a little knot. Ouch, and this way we have this kind of tuban like hairstyle hope you can see this. So you have now this, like crown of the rabbit braids, and this is something you could just wear as a daily hair cell. You could fix it now with some bobby pins. If you need to for me this time, it holds very well actually and sometimes, if it's not yet tidy enough, you need to use some bobby pins to make it more tidy and good. But for now this is gon na work and then again you could use this as a daily hairstyle, which looks kinda cute. I think i don't know. Let me know what you think like this and again you could just style your bangs in whatever way you like to wear this as a daily hairstyle. So if you're not going to wear this as a daily hairstyle and you're going to sleep with it um you can just let them loose, of course, like i said, because it's more comfortable and you can style your bangs also differently. Well, they are almost dry again. So i will just wet them a little. Yes! Thank you. Yes, it also looks nice for um the christmas time holiday season from i think. So it's very nice, so you can just wear it one day as a very nice hairstyle and then the next day you have curls. So today's covers covered, which is very good. I think um. I am going to use for my bangs these little ones, um, because they are a little thinner from the roll than the fabric, i'm using so my fabric, if i would roll it like. This is bigger, bigger and thicker than this little piece, and this means my curls from my bangs are going to get a little smaller than the other curls, which i think can look very nice. You don't have to do this. You can do this so and i will just separate them a little because otherwise it's too much at one time. Well, i want to sleep with it so later on. I will also loosen this again so to make it more comfortable. You can, of course, also sleep like this and dig a hole into your pillow, and then we are just going to wrap it around and roll it up. Just like this, nothing fancy and you can just cover it like this. You can use a hair tie for this or bobby pins, whatever you like. I am using a hair tie right now, because i don't want bobby pins to poke my head so much, but i will use one bobby pin to fix it because otherwise, i will have it hanging into my face all the time, so just go and fix it. Like that, so there's one and then the other sides too well, my bangs are here at different lengths, so i will need to add the rest later like now and again: roll it and here's some metal inside. So i can just um deform it like the way. I want again i'm going to use a hair tie for this and a little bobby pin to secure it. Okay, that didn't work well, okay, so this is what i ended up with for um going to bed in a moment, and then i will just unwrap it, and i hope you like it. I will show in a video separately also when i'm going to unravel it. Um tomorrow - and i think i will just add a video for that, because if i am going to do that tomorrow morning, most of you will probably be working and don't have time for her life anyways. So yes, this is the finished. Look anything left to say. I'M not sure i don't think so, and i want to thank you all very much for watching and oh yes, i want to tell you for taking out already a little because, of course we are going to sleep with it. We need to make sure this is very well dried and when we are going to take them out so when we are going to release the curls um, everything needs to be very dry. If you are not sure if its dry, you can just use like. I said a blow dryer and just go over it also for the blow dryer, so it doesn't get too heat. I always move it around, so i'm not fixating. At one point i always move it around. You don't have to use, of course, the hottest setting and then just make it dry really dry, that's important, because if it's still wet it's going to loop out very quickly. So if it's drying like this for me personally, the curls will last at least one day and sometimes even two days or longer, depending on how long it has been in and how much hairspray i used so um yes, but this is it and if you're going To take it out, just be very careful, just unwrap it very carefully and don't pull it too much apart, just unwrap it and don't brush it, because otherwise it's going to be one big, fuzzy ball and so just unwrap it and then just um very carefully. Pull the strings of hair a little bit apart, so you have nice and curly curls, and i will show you that in a video, how i take it out - and this is it for now so far so yes, yeah yeah, just try it out. Like i said, i will add this as a video to my account. You can always come back to it and watch it again or do it with me because of course it's just in real time, i'm not going to cut it, i'm not going to make it quicker. You can just grab everything you need and then just do it with me and um yeah. So if you have done it a few times, it's going to get easier, it might look complicated for now, but the only thing you really need to remember is you just have to wrap your hair around the fabric. That'S the only thing: don't braid it wrap it and the thicker the fabric, the bigger the curls, the smaller or the thinner, the fabric, the smaller your curls are going to be um. That'S all! Actually, so that's the most important part. If you're going to sleep with it, it doesn't matter the way it turns out. Usually the curls will turn out still very nice, so um yeah. For me, this works very well. I have done this on my uh first wedding day, also and - and i have had very nice curls from that - i have had done this for uh wedding, styling shooting for someone else. Also it did work very well and the curls did last so yeah. This is the method i am using, usually because, if i would have used a curling iron, it would not only take me way longer to curl my hair, because my hair is long and it's gon na take a long long time and also the curls will last. Maybe even one hour, not even one hour and they're gone so for me that doesn't work this way it works and it really dries in really nice and that's going to give you very beautiful curls. So that's it! For now and in another video i will just show you how i take the curls out and yeah. I hope you like it and i would really really love if you're going to share pictures and just tag me or whatever and share your results with me, and i would love to see it. So i am wishing you all a very, very lovely evening and thank you all so much for watching and yeah bye.


Comments
Catie: Wow! I gotta try this technique! The results are incredible.