Are All Long Layered Haircuts The Same? Find Out On Episode #70 Of Hairtube(C) With Adam Ciaccia
- Posted on 17 November, 2019
- Long Hair
- By Anonymous
Just when you thought he had done all the long layered haircuts, Adam has done it again! Not all long haircuts are created equally for & again Adam proves it!
**Don’t forget to follow me on my other social platforms:
Instagram: www.instagram.com/adamciaccia
Facebook: www.facebook.com/adamciaccia
Twitter: www.twitter.com/adamciaccia
For all the professional tools used by Adam visit:
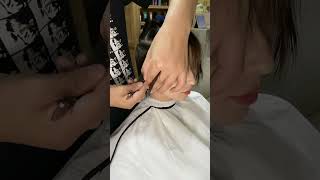
Hey guys welcome back to another installment of here tube, I'm here today with Kota, thanks for coming to join us doing something a little bit different today, we're actually not going to be cutting very much, I'm just going to be trimming a hair up, but today we're Going to actually do a little bit of a style video, so I'm going to share a little styling technique with you guys about how to build like an editorial wave in here, actually going to work with quite strong, curl and brush it out to create an editorial. Look, you will get to see me do her haircut, it's probably not a lot different to the haircuts I've done previously. Obviously, it actually will be because I'm cutting it to suit her face, shape and her body size, but we want to maintain as much length as we can, so we can actually style it make it white beat we're going to take her over the base and we're Going to use the so silver, shampoo and conditioner so that we can budge some of that brontë toning, that's coming through out of the ends and then we're gon na come back and start the excited. You know someone will cut all your hair off. I think she'd. Look amazingly short here: what if we could get like 200 or 300 people to say, you'd, look with short hair. Would you cut it off? Make sure you put a comment, the bottom, this video and you want to see we short here. Let us know we'll get it come back, but we're going to go to the basin. Now we're back from the basin. We prep the hair in interest of time. I'Ve off-camera I've, pre, dried and now we're just going to section up for our haircut and then we're going to move straight into our look for today. We'Ll take our first section just about cutting this baseline, nice and strong yeah. Once we've done that we'll continue through to the rest of the the hair on top as you've heard me say before, just take a section that you can now handle with your scissor in your comb. I'M not real fast on super small, big sections, but what we want to try and do on coda is we're sort of create some base on here see it says little bit gapi on the ends its head straight ahead for me now you're, looking in the mirror And they're heading each straight ahead: yep chin down! Thank you! Okay, a bit too far, but just all these things. So once I've done my baseline, I like to split it in at the back. I like split in the middle, and then I split it to two sides. If you could look into the mirror for Mikoto they'll be great just ahead to natal it perfect. What that allows us to do is to just trim the front and the side without having to worry about the shoulder. You could see. There'S nothing here to cut really just tiny little trim on the base on there. You know if you can look the other way for me perfect to sit back in the chair. Thank you, perfect. Let'S try hit and justice wagon. Thank you. We just nicked those little corners off and just straight ahead for me. Perfect done it's time to frame the face up a little bit, so we're going to start with this triangle section to create a guide, the rest of our shape, and we don't want to do it too short. We'Ll definitely need to have this face framed up really. Well, so you can see my section there, I'm going to spin round now, so you can see the projection from the side, making sure that the short hair is behind the long hair short hair directs along here, and we just want to create the start of l-shape. There, I think, that's a good length if you execute this correctly. You can actually have this as a like as a standalone element and I'll show you, then you pull this back and that should even an existing haircut that you haven't done before that. That should integrate perfectly like that, so you can see straight away just one little section, one change it's really framing a face up nicely and then that will flow on into the rest of the haircut. So we've created our guide here. So what I'm going to do now is split this in the middle and we're gon na do one side at a time. You don't want to overlay this. We just want to just have a really nice smooth shape, just to sort of frame like well. Obviously this one, the one we just did is for the cheek and the chin, depending on how its styled and obvious this is all about the body. So it doesn't need to be over-the-top, but you do need to have a clear defined shape there just want to make sure that we don't cut it too short and the way we have avoid that happening is making sure that we turn our body and are we Over director here, so you don't want to cut it down this way. You actually want it to come around like this. Let'S see under there, my god is there. We don't want to cut here. Just to there. You can see it's starting to work. The only to this longer length - and we keep going until we run out of here chin up a little bit gorgeous hit up perfect. Thank you. I like to stand behind it. Just cross-check. Looking down these little hairs in here will just clean out perfect. Now, we repeat, on the other side, stray to me yep again, I like to stand to the side and we just look over the top and cross check that and we'll be done. Using geometric techniques like this in long hair are good, because we often speak about wash-and-wear and real wash-and-wear means that, with a shape like this code, I can literally flat brush your hair like I've, done and see a clear defined shape in the hair. The requires almost no styling whatsoever, even though today we're actually going to do one of my favorite editorial or styles along here and I'll. Prove that to you by just pulling it off a face, so you can see it I'll spin around this way. So I can see first so got the the shape here. That really brings her face out. It'S very gentle, and then we've got this shape coming through here, which is going to ultimately grow out, really really well, it's adaptable to different links that we could have gone shorter and shorter. These could have been shorter. It all flows but grows out really well. So for your clients that want a minimal amount off, because they're trying to grow their hair, this is a great technique and they don't have to be worried because the length is here that hasn't changed, but we've changed the length inside here. So this is something it could be either you can make sure that or you can back it off without any sort of growing out pain whatsoever. Okay, cross-check the Front's done so now we're going to do one of my favorite layering techniques, so we're going to lay the back by cutting it into the front. So I want to take a section through the middle on the middle parting, so I'm gon na spin. You this way what's up this way, it's be easy for me, this is a great, a great way to lay it here. If you don't want to take too much of the weight out of the back, what I died there and it requires a little bit of patience, because once I've cut my guide, I split it back into the parting in the middle, and I just do it all. At once, so you just have to be patient with combing it up to where it needs to be, especially if you you're working with more hair, you can split it into multiple sections if the hairs too thick or if your hands are too small, and you can't Hold it all at once, I like to do it all at once, and then you have to get both sides together. I like to grab a brush to do this. First, it's a little bit more comfortable, sometimes and easy at home, so we'll just brush it up. Majority of it up to here just find that when you're combing the hair in multiple directions for haircuts like this, it can often get naughty so to use a brush to do. This part helps get a few of those knots out. Sometimes you get snags and use a comb, see the majority off it out like that. One cutting combs for these techniques are good because they're, like rulers, you can just hold the hair in the comb spread up evenly over the plane of the comb. The hair falls out underneath and it doesn't reach, don't stress too much. This is just cross-checking and requires patience as I've said, because you have to get all the hair into the one spot. This will make sure that they are balanced on both sides. We'Re just a little bit of texture there, not too much head forward for me gorgeous and hit up. We should be able to see a really beautiful shape coming through there. Now now we're going to move into our styling. So I'm going to section this up. Just there's nothing: fancy about the sectioning, just I'm going to take quite small sections around about a centimeter width and I'm going to try and make it as tight in terms of a movement as I can and then we're going to brush it out and make it Like editorial style, so you'll see me went on back and have it all sectioned off. Well, while the hair was wet, I actually prepped it with wonder boost before our audience. I thought that was quite important to mention, because it's essentially going to provide us support for what we're about to do so. You can see it's about centimeter wide I'll, just get my fingers and I'll just put them in there like that, create for real, quick sections and then we're going to wrap this around this tongue as tight as we can or recommend using a heat glove. If you're going to do this - and you have another before because these fines, if you just touch them once, you burn your hand chin down for me, thank you. It'S been around a little bit more just so you can see literally once in a bit 1 centimeter by 1 centimeter block of here and we're using a horizontally leave it in there for around. This is on a medium heat for about five to seven seconds. I want to make sure we give that time to cool down as well, so I'm going to continue to work through there horizontally and I'll be back when I get to the top movements in the hip. So let me just recap on this section, so who did it this way once in a movie by one centimetre section? So I took a horizontal section: it took almost like one: centimeter squares worked horizontally all the way through to the top. Then, underneath here we took horizontal, probably two sections and then we started doing diagonal back. We did down both sides. So what I want to do. First is comb, it out really gently and then we'll do the styling so head back gorgeous. Let'S start combing this out. We want to make this quite fun. Just be gentle going through start in the ends, because what you're likely to do is get caught on the hair and it can be quite uncomfortable. Let'S pull this back, so I'm gon na start loosening all this up again. This is just a really beautiful editorial. Look so if I was working with a designer we're going to a fashion shoot - and you know they're looking for something - that's versatile throughout the day. This is how I'd start, because I can start with the movement in the hair, well lights out, and we can start putting it up. We can do a braid, so, for you guys out there who are looking for a really beautiful editorial looked at is actually technically. It'S super super basic in my opinion, but it's very very effective, especially when you've got the right shape in the haircut. It really doesn't need much at all. The previous styles have done, you've seen it's, it's been, I've needed to actually go in and once you use a flatiron and you've got to move the hair a little bit and put into position. This has not locked up because, essentially it's using the same principles as a set so provided that you're the angle of the lines placed properly when you curl it. We can leave it like that, which I think we're going to, because I think it's beautiful. So, let's dress it out and style it and then we'll be done so there's three products, I'm going to use for this. First, one is smooth setter and smooth said we're going to use just tiny, tiny amount, and we just want to use this sparingly on the insides and the reason one on the inside is you can see here. This is a great example see that here is just it's annoying, so we just want to bring this on the inside to bring this back together. I don't mind the airiness on the outside, but on the inside we really need to make sure that's all sitting in together. If you need a little bit more use a bit more, it's often only used as a straightening balm or as a blow-dry bar. It'S amazing, as like a finishing cream, it's so light it's very, very hard to to kill the hair or make it go really flat using this. So if you guys using the strolling range out there, it might be something to try. You can see that that's just bringing all that back in together through the ends gon na use some height riser for supporting here head for gorgeous eyes closed, it's good to ask your clients to close their eyes, because this can actually go into their eyes, especially when You go in this way. This is really good just to get some root, lift I'm just going to spin around, so I can check yeah. We just want to get that real lift in there and in the back. Also, if you could look up to the ceiling for me gorgeous, that would be great. That'S really nice just just to create these plumpness always for me, just above the occipital bone I like to have that sort of fluffy Airy organic, feel then pretty important that you grab blow dryer just to blow the excess off close your eyes, please and last, but Not least and itches style fixer again I like to use these on my hands, but before we do that, let me just make sure we've got this kind into place. First, just head up a little bit. Let me just pull this back. It'S made it a little bit flat. That'S better! So lifts a lot, so I'll spin Quanah this way, so you guys can see and start on this side. So I like to just define this: bring it in just keep it quite separate. You know want to all clump together if it looks too perfect, but I think that's good we're living in that that fashion, that hair fashion error at the moment where it's all about undone here, but I don't think it it needs to be totally undone. So for me you can have a balance of done in and around here to face up frame her face up, but this can be the undone part and that's why I love using that light rise up. We can just really pick that up eyes closed, bowed. So just gon na spray that away from the face on that side open a face up, sprays there and they're just in a little bit on my hands just on the inside. I think we're done done happy. So we had a chat done before we started cod. He was a bit apprehensive. Men look at me, you never met me before and I'm about to cut you. He probably freaked out too right. So just like cod, don't cut it short, but today was more about you know. We often have clients coming and I want to grow their hair and we're scared to actually give them the shape that I need to grow up. So that's what we did today, strong baseline. It'S a really functional layers. We framed the face up, so it's versatile and then we finished with this beautiful editorial. Look. So we've smoothed it out quite a lot here, but if we wanted to, we can actually start to make it quite eerie. And if you have a look in the back, I've actually loved that that soft sort of Airy texture that we've got going through there. I think she looks amazing. You go ahead. You trust me yeah! You look good. If I couldn't make you look good on very bad and why job, let's be honest, do you Instagram joining to give it a shout out and people might come, follow you on Instagram done, you might have to press pause rewind and to play that back, but you Can I mean, go and put them in Instagram too? If you don't mind, that'd be great, because I always appreciate support so just to recap on the products we used today. We use this so silver shampoo, I'm you can see that that's sort of taking that price and this out of the ends we use a miracle created a prepper before we dried it. Don'T forget that I did put the wonder boost in it's just here. I'Ll put that in - and I dried it in before I cut because it's cutting and raw and that's why you get that beautiful hold in. So it's really important. You have the right products in their hair to support that style and if you don't tell your clients that that's what you're doing it'll be very hard to them to replicate it. So, thanks for coming in today, I really appreciate it. I mean I got a hot fire. That'S good! Until next time see you later


Comments
Veera Rantanen: Yes! She would rock a short haircut for sure Aaaand without even seeing you cut any of the hair, great job as always!
Holly Burke: Excellent work ,as always, and I agree a short cut would be so beautiful!
No more War!: Yes she can pull off short hair for sure Amazing job as always Adam
RollerCoasterLisa: A short pixie would add more pop to her lovely eyes. The long thick hair seems to be too overwhelming for her petite features. A shorter style would open up her face more and bring out her nice bone structure.
76 7: The thin ends I would cut off, but it is difficult sometimes for people to do that, I mean for the client!
Robin Burcham: I think she looks gorgeous with her long beautiful hair. Plenty of time to have short hair later.
Linda Lincoln: Shoulder length would look nice.What size is the curler? Beautiful look! Love, Love that you curl hair. My hairdresser would never do that!!
messi 6: Do it girl! Accentuate that beautiful face! Thanks, Adam! You have taught me so much.
apriori: I'm a big fan of long hair, even though her hair without Adam's magic looks so empty and dull.. I would make some keratin treatment for her. And cut a little bit more.
Catherine Bell: Short style would accentuate hose beautiful eyes and strong cheek bones!
John Connor: A short cut would look beautiful on her
Chelsie Bullard: What cutting classes do you recommend?
Shel Ma: Great style.
bandit girl: Go short. You will look amazing
Jsmum: Her hair looks so damaged when it's not curled. If she didn't use color her natural hair would be the best. Also, shampoos and products strip the hair as does conditioner. No poo is the best.
RAMANEDITS: Love you boss
Donna Subotnik: I say cut it and try it, it is just hair it grows back.
Tetiana Dzeba: Excelent.
Cynthia Pineda: Helloooooo from UAE!