Long Pixie Haircut & Hairstyle For Women | Pixie Variation | Short Layered Cutting Techniques
- Posted on 26 January, 2021
- Long Hair
- By Anonymous
Learn How to cut a Long to Short Haircut. A longer length of the longer pixie cut allows to experiment with silhouettes of your hairstyle varying the amount, length and position of layers.
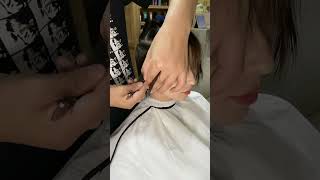
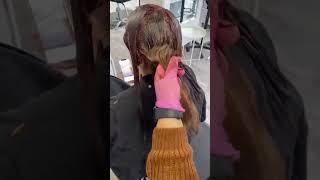
Hey guys welcome to another hair brain live, i'm michael conspiracy, education. We have the beautiful james and kids behind the camera. I'M the creative director director of slavehead education, i'm going to do a really cool haircut for you today. It'S a pixie variation. It'S going to be something that has quite flat graduation in the back and working to some flat graduation on the sides. Afterwards, we're going to be layering through the sides just to remove the weight and then we're going to have a long disconnected front. So it's going to be a really modern, long variation of the pixie haircut and what i'll do is after i've cut this first section now, i'm going to show you guys the sectioning pattern that we're going to be working through, but as you can see for that, First section: we've got a really nice flat graduation and that's perfectly where you want to start. So what i'm going to do is i'm going to show you the sectioning pattern that we started with so we've separated this haircut into four major zones. So what we have is we have a square section here in the back. We have a square section here on the side. We have another square section on the top, so what i'll do is i'll, just curl this down and i'll start to move the bowl around for you. So what you can see is the square section. Here we have one square section that we work through in the back another one on the side and then our square section through the top. So we have four major zones here within this haircut and what we've started with is we've started to create a really nice flat graduation in the back and the way we've done. This is we're taking vertical sections and we're cutting them in a very flat cutting angle. What i mean by this is we're taking them very flat to the head and not at a heavy angle, so because they're very flat to the head. It creates this very modern, very flat, graduation, and what i'm going to be doing is i'm going to be taking vertical sections which run across the head, i'm going to be over directing slightly to the previous, therefore, creating a nice square flat graduation in the back. So let us know where you're tuning in from guys, let us know how you're doing today, we're really excited to show you this haircut, cool, so maria says hello, hi, maria hi maria we've got people tuning from slovenia, germany from new york all over the shop. Amazing guys, thank you so much for joining us. So for those of you that are just joining us, we're doing a really cool pixie variation. It'S going to have some quit square graduation in it. It'S going to have some layering. It'S going to have a long, disconnected top very, very modern, look a lot of fun to do something. You can do. That'S a bit selling creative when you're in your salon and working on your clients. So what we're doing here is we're starting from the top and the reason we start from the top. Is you have a tendency to create something more flat when you work from the top of the head down? If you work from the bottom towards the top, you always have a tendency to create something a little bit heavier and because we want this to be quite flat to the head, we're going to start from the top and work our way down. So you can see that my fingers start from the top and as i'm working down, what i'm going to do is i'm actually going to turn my fingers to the bottom, because it's very hard to connect it all the way down when we're working from the top. Only so as we get more towards the bottom of the head, we're just turning our fingers and creating a nice flat, graduation, okay, so we've got people tuning in from malta, switzerland, idaho, kansas! Thank you so much for tuning in guys, don't forget if you do enjoy the video please like and share. We appreciate it. We love joining you guys. We do hair brain lives every month, we've been doing them for two and a half years. Now really love being here with you, so anyone who's watched it before knows it's a very interactive thing: you can have a joke with us. You can comment you can like you can ask us any question. You like we'll be more than happy to answer them. There'S no such thing as a stupid question only stupid answers, so don't worry. So what we're doing is again we're just taking these vertical sections, if you can see from the top of the head down, and what we're going to be doing is as we're taking these vertical sections we're going to be connecting them to the previous. In order to create something, that's square across that has some very flat graduation from the top to the bottom, so again working our fingers from the top of the head just carefully about over direction that we're not under over directing, therefore creating round we're not over directing Too much, therefore creating something triangular. We just want to see something: that's nice and square across. So if we want, we can just come across horizontally and just check that we're working something square from the top and that's what we want to see so once we're happy with that, we're coming again back down making sure we're keeping a consistent cutting angle, keeping it Nice and flat, and as we said when we get to this point, what we really want to do is then turn our fingers the other way, so we can grab all those little hairs from the bottom. So this is something really fun that i like to do. A lot of creative cuts of mine are based on some form of square graduation. It'S a very strong look and it works with corners. So what you'll see is, as we work through this haircut you're, going to start to see the use of corners within the haircut, which is something really important that creates the squareness within the haircut. So cassie says: hey michael ben's tuned in says: hey guys, hey burn! How you doing nice to see you again so soon, so what we're coming now is we're coming to our last section in the back, and what we're going to be doing now is we're going to be keeping that consistency moving the hair back, keeping the corner there. So a nice square shape, along with that flat graduation and we're not going to work on the sides here, we're going to finish the back first and then afterwards, we're going to move on to the sides as well, so again a lot of repetition. What we're doing is we're moving the head towards the previously cut section, we're looking to keep that nice flat cutting angle. So remember, if you can't see your guideline, you know something's going to go wrong, so i always say if the guideline is not like a smack in the face, you might end up with it wrong. It really has to be that clear and that cleans you. You really have to be able to make sure that you're hitting your guideline every time without fail. Okay, so a few comments, we've got. George akidios, i don't know if i said that right, george, hey george, how you doing ben's stalking you good to hear ben um, uh kellen's asked: do you use cutting lotion to keep the hair wet? Would you use a spray bottle, so we use both at this point? What we do is we do have a bit of cutting lotion in there. I'Ll just show you what we're using we've got a bit of the leave-in conditioner for milkshake. This is our cutting lotion. Our primal, we popped it in the back before we started and then after that, once we put it in once, we then use water there afterwards. So at this point, what i've done is i've created something that's quite flat graduation and it's looking to be square now. The truth is it's not perfectly square because i haven't cross, checked it yet. So when i come through, i want to cross, check it and make sure that it's square, but what i don't want to do. I don't want to cross check this side and then, when i do the second side, if it's wrong, i have to cross check the first side again. So, rather than checking this side, what i'm going to do is i'm going to go straight into the second side. Finish it and then what i'll do after that is i'll cross check it as a whole finished piece in the back. So again, i've finished one side, i'm not going to cross check it, i'm going to come through to the second side. I'M going to finish that and then i'm going to cross check it as a finished article from the back and so for those of you that are just joining us. This is going to be a pixie variation with a really nice flat graduation in the back flat. Graduation, that's square on the sides. We'Ll then add some layering through the top to give a nice disconnected sweat fringe. So i think this is a really cool haircut to do in the salon. It'S something quite modern, something that people are asking for a lot these days. So guys, if you're just tuning in, let us know where you're tuning in from we always love to hear that we've got dennis, saying hi, guys, love the sectioning thanks dennis um evan heyer, how you doing uh quick question michael. So how do you come up with this section, so this sectioning is based on a classic form of squareness, so the classic form of squareness of square graduation? It'S something we teach as part of our classic fundamental haircuts is square graduation, and what i like to do is take those very core square shapes and then break them, because what happens is when you do something square. It always has structure and strength to it. So anything that has structure and strength to it is a really kind of dynamic, strong, looking haircut and then how you break it thereafter is you can create so many different things with it? So, just by having that very strong core allows me to then have some fun with it and dissect it a bit. You know it's almost like when you do a very clean bun and then you pull out pieces to make it messy it's a little bit like that. It'S creating a very strong base and then having the ability to then break it to make it something more fun and modern and more interesting. So i find a lot of my haircuts are based on classic haircuts that we teach in our geometric course that are then tweaked broken and changed in whatever way we want in the client wants. So i always find those are the most fun things they have something with structure and something that works across and because square is a very specific shape of corners. We have a very strong baseline of how we achieve it, and so what we're doing here is we're starting the squareness by creating the back and then what we'll do is once we've gone to the sides, you'll be able to see where the corners are placed. So these sections we have here which separate the back from the side is where our corners are going to be placed, and we've done this by measuring the head shape and what i'll do is before i move on i'll show you our little secret of how we Found the corners within the head shape beautiful, so we've got people tuning in from ohio from maine from trinidad um christine asking. Where are you located so we're based in london? So we have our london academy here. It'S about one minute: walk from oxford circus right in the center of london. So if anyone's in london come pop in and say hello meet the team, we'd love to have you guys in as soon as the world opens up, and we can travel again and love to see you wherever you are in the world. Trinidad sounds amazing. Trinidad would be nice, wouldn't it yeah, it's very cold here in london in a minute, so dennis said so. It really follows the head shape yeah. It actually works against the handshape. So, in a way, it's weird because it follows the head shape, but at the same time it actually works against the head shape as well. So what we're going to do is if i can find my other kind of voila, they always disappear in our pockets. So what we do is we find the five major corners that create this four fundamental zones within the head. So what we do is we place the first cone on the back and the second kind, when this is not in the way we place over the top. In order to find the first corner that sits at the top of the head, we can then come from the side over the top, and we find the second corner, which is the second corner at the back same on the other side as well. When we work through so what that's found is it's found that first major corners here that we have, which is these two on either side and then the one over the top. So that's your one zone in the back, that's your sensors are in the back across the other side and you find the next one, and so what this does is. It gives us those two corners at the top and then what you have is your four zones. One two three and then what we have already in the back, our fourth one and what i've done is i've just created a very flat cutting angle and i've worked the cross square so all the way across so each time i did it i over directed to The previous and i made sure that my cutting angle was very flat now. What i'm looking is, i think my technique is nice. My graduation is nice because i've worked vertically down, but perhaps the shape is not perfect yet so what i'm going to do now is i'm going to come through and start to cross check it horizontally to make sure that it's a nice square shape? I believe i'm a little bit longer on this side, so this is my chance to now refine the haircut and make sure we have something - that's quite nice and square across the back. If that's making sense guys give us a thumbs up, give us a like. Let us know if it doesn't make sense me and james will be more than happy to provide anything for you and explain things again. Anushka said never saw such a precise and clean cut like this before, thanks for the share from mauritius. Thank you so much. That'S so kind of you, it's so kind of. If you do like these videos, we have about 15 on our website right now and we're uploading new ones starting again from this week. So if you want, you run slatehair.com at slatehair.com and what we're going to be doing is: we've got about 15 free videos up there and we'll be uploading new ones each week as well. So what i'm doing now is i'm starting to work across horizontally and i'm taking the hair up and i'm just making sure that in my fingers from left to right, the hair is nice and square across. So at this point, if i've made any mistakes, i'm not worried because i have the chance to fix it and, as i said, i thought i was a bit longer on this side than i am indeed and now. What i'm not doing here is i'm not worrying about the hair from the top to the bottom. I'M just trying to make sure from left to right that i have a nice square angle. So a question from mary fran says: is this a boo fade haircut, which i can't say i've ever heard of i've. Never heard of the boo fade. So sorry, mary, i don't know - maybe it is you'll - have to tell us at the end yeah at the end of this haircut. If it's a boo fade, then you tell us and then guess what i've just created a buffet without knowing what a buffet is, which i think that would be quite an achievement actually as well. So what i've done is i've just worked through the center and i've? Just made sure from left to right that everything is nice and square. What i'm going to do now is i'm going to work through the shorter side first and make sure this is square across and then i'll come on the longer side and refine it, and so what i feel is very important is always when you're doing. This is always refine the short side first, because what happens is if you refine the long side first and then the short side. What might actually happen is you might not be able to connect it so by knowing which side is the short side and then cutting it? First, you have a true guideline to connect the long side to does that make sense everyone. Just let me know if not and i'll go over it, because i think it's very important. If one side is long make sure you refine the short side, because if you refine the long side first and then you end up cutting the short side again, it's going to be wrong. Then you have to refine the long side again. So i think always find the short side refine the short side first and then connect it to the long side. So i hope that makes sense, guys. That'S great advice, colin said and geron's gerrard said: hey looking great slate. Oh thanks! So much for help. It'S amazing. So yeah just really nice, i think for me: we all make mistakes while we're cutting. I think that's the more normal best part of it. I don't think anyone really cuts like a perfect machine and if they do great for them, but that's not me. So what i need to do is think about where i'm most likely to make mistakes and where i have the best opportunity to refine it and fix it from and by understanding the where i'm most likely to make a mistake and where's. The easiest way. For me to connect it, i actually have the best chance of creating a nice haircut quickly, which is really what you want in a salon situation. You want to be able to refine your haircut quickly without having to go back over things so many times. So would you say you always cross check your haircuts yeah? I do so at slate. We have a really nice way of looking at it. I think we have something called technique, which is your top to bottom, and we have something called your shape, which is your left to right and what happens is when i cut vertically. I make sure that i cross check my shape horizontally. So i know what i'm looking for when i cut horizontally, i'm checking left to right now. Let'S say i cut this haircut from left to right, then what i would do is, i would cross check vertically, and i would only check from the top to the bottom that i have a clean technique. So i'm checking my technique. So if i'm checking things vertically, i'm checking my technique. My graduation, my line, my layering, if i'm checking horizontally, i'm checking my round my square and my triangle, so i'm really conscious of what i'm crosstalking and i think that makes life easier because i feel like a lot of times. People are cross-checking but they're, not always 100 percent. What they're supposed to be cross-checking when they work and by working like this? It gives you a very, very clear picture of what you're supposed to be seeing within your work. So we've got a couple of questions, so maria asked: do you check each section on the base, which is a great question yeah? So it depends what i've done. So i normally try and do the same over direction and the same elevations when i did the original. So as an example, because, naturally, this hair will sit on the side, that's where it will lie, naturally, by pulling it back. What i'm doing is i'm over directing it back off the base to be where i naturally cut it when i first came across so when i first did this haircut, i was pulling the hair back, so it had this over direction when i crosstrip i'm not pulling It here, but again i'm pulling it to the same place in the back, and so that's a great way for me to think about it, but i'm trying to have the same elevation and the same over the direction. So you want to check it where you cut it originally exactly and then jabari. I think i pronounced that right. Let me know if i didn't um, what is the haircut name, so the haircut name. This is a bit of a pixel variation, but if i had to give you a name, i would say it's a square graduated haircut, so it's square graduated. What i'm then doing is i'm doing a triangle layer through the top. That'S going to sit on that, but i'm also going to do some very cheaply internal disconnection which is going to be layered internally. So we would just call this a pixie variation or a long swept pixie, but in reality it's square graduation with internal disconnection with a triangular layer through the top for those of you that are a little bit more technical with it. It'S looking beautiful already. Thank you. So much so what i've done is i've finished the back and now i'm going to cross check it again when i've dried it, but for now i'm happy with the fact that it's balanced and we have a nice length across the back now you can see that It'S a really nice flat sitting graduation through the back, so i've got a question for you, sorry um so nandita said. Could you please explain why the corners are longer than the rest? Which again is a great question? I don't understand it so why the corners along with the rest, so why so? Why are the corners if we're going to do something square? What it means is we're working against the head shape. So maybe if you come from the top james, so what we can see is the center from the center of the head. The hair is actually much shorter. Now, in order for this hair to connect to this point, it has to be longer so in order for the head to be all pulled back, it actually goes shorter in the middle and longer towards the side, and what happens here is this is the widest point Of the head, and by having the widest point of the head shorter and the bit that recedes the most longer, what you're creating is a much flatter uniform silhouette. So we're looking at the silhouette the way the hair sits when it's combed down. It looks more flat and more balanced, because what we have is we have shorter in the middle and longer towards the corners where the hair recedes the most where the head receives the most in so we're slimming the widest point of the hair, the limiting the widest Point of the head: if we had the widest point of the head longer and the rest shorter, it would create more of a rounded feel and therefore make the head stick out more and that's not something you want to do so. It'S a very nice question, actually very nice, so you can see how we found the corner here using our cones and what we're doing is we're working with the natural corner of the head to then start creating our squares to the sides. So what i'm going to do is i'm going to pop a little clip here. Just so we don't lose the sides, and what we'll do is we're trying to keep that corner, because that corner is going to be my guideline for the size as well and i'll explain that in a little bit more detail. So where that section is. Is that? Where your corner is going to be yes correct, so where we have this point here is where my thumb is going to be so this her here is going to be the guideline for the sides, so what i'm going to do guys? So the truth is my head was a little bit forward when i cut the back and what happens is when the head is tilted a little bit more forward. You have a tendency to create more heavy graduation. So when the head is more forward, it's 10, the tendency to be heavier if the head is upright. You have a tendency to go a bit flatter so, depending on what you want to do, you can either have the head up or down. You can encourage yourself to do different things with it, so i hope that makes sense. So the more down the head is, the more likely you are to create something heavier the more head. The upright is the more likely you'll need to create something. So what we're doing is we're taking a little section across the side, is nice and square so the next thing. It comes nice and square through the side and we're going to start creating the side. Now. The main difference here is when we did the back. We were using vertical sections now when we're coming to create the side. What we're going to do is we're going to be working horizontal sections so, as we work through, each section is going to come horizontally and it's going to connect what we're doing here to the length we have in the back. So the back is the guideline for the sides. So what i do is i take a little section from the back it's my guideline. I put in a little clip, so i don't lose my section. I lift the head up and i keep my fingers square to the head and i start to cut so what i'm doing here is i'm actually making it a little bit longer just so, we have a little bit more to play with in the corner, so we Can see that the corners here and we haven't cut the back, we've just used the back as a guideline towards the front and we've kept it a little bit long. So we have a little bit more to play with at the end. If we want, we can remove it or we can have it longer as a little kind of alternative feature as it were so kellen's asked a question which is: could you use this technique, leaving the length slightly longer for a pixie yeah? Of course i mean you know the great thing about a lot of haircuts, i believe, is the fact that you can do the exact same sectioning elevation over direction with the same haircut slightly different lengths and all of a sudden it becomes a new haircut. It looks completely different, so i believe that, just by following this sectioning pattern and changing the angle, slightly from what you're doing you'll be able to create a vast array of different looks from it, which is really exciting. I think to be able to change your haircut that much just from changing the choice of them, so i believe choice of length is almost everything within a haircut. Sometimes that was a great question. I hope that answers your question kevin. Let us know if he doesn't answer your question just write us in the comments and we'll go over it again. You know we're more than happy to do that. So i've noticed that you've changed your body position there. Michael. Is there a reason for that? Normally, what i would be doing is, i would be standing, i'm standing a little bit on the side, but because we pull the hair towards ourselves. The easiest thing to make sure you're square is to stand in front of the head looking at the ear and making sure you are perpendicular to it, and what you can see is each time i take a section, i'm taking a little bit from the back and I'M using the back as my guideline for the side so each time working through looking just to create that nice squareness and because we're using the back as a guideline we're following the same elevation. So what we have is we have a consistent guideline from the back to the side and what you'll see is you'll start to see a corner building here, we've left it a little bit longer in the corner. We can remove that afterwards, if you want, or for those of you that are a little more arty you can or the client's a little bit more arty. You can leave that in as a nice little feature. So what you're seeing now is you're starting to see the horizontal sections really coming into play and really shape themselves, so lovely little horizontal sections across. Don'T forget each time to remove the hair and take a little bit of a guideline now. The reason why we don't just let all the hair fall down is because we don't want to lose sight of where our corner is so. The corner is where we're taking the guideline from the back. Now it's quite easy for me, because i can tell the difference between this hair and this hair when the hair cuts already a bit shorter on your client. Sometimes it can be a little bit harder to distinguish where the side ends where the corner is and where the back and the front start. So, what's the reason you've moved to horizontal sections here and i've kept it vertical. So actually, when you talk about square shapes, it's actually quite hard to maintain a square shape. So i find when you're cutting vertically. It can be very hard to maintain the squareness and what happens is sometimes your technique is nice for graduation, but the shape's not really perfect. So once i've actually established the graduation in the back, which is the hardest thing and i've done it vertically and then cross checked horizontally. I actually have a guideline of the graduation i want so if we did this graduation and we pull it over, we've already decided the graduation so we're just following the guideline that we have from the back all the way up towards the top so the length in The side is decided from length in the back right, so the length that you cut the occipital bone in the back is the length you're going to have around the front of the face. So, that's why i find it's much easier to work across horizontally once you've established the type of graduation you're going to have in the length. So when you cut the back you're, actually thinking about the length at the front so because you're cutting something square, the length at the back dictates the length of the front. So actually once you've done. The back. You'Ve already decided the length in the front and it's very hard to change it. If you want to keep something purely square, if you don't want it to be square, then you have an option to change it, but if you want to keep something, that's purely square, you end up having to actually follow that length and therefore it's already designed for You so i hope that makes sense guys give us a thumbs up. Give us a like give it a share if this is all making sense, if not hit us up with a lovely little question, we'll be happy to answer. So don't forget to let us know where you're tuning in from for those of you that are just joining we're doing a pixie variation. It'S going to have some square graduation in the back, and the sides followed by a triangle layer through the top which is going to come into this lovely swept fringe. So it's going to be all tightly shaped, all flat, graduation square, followed by a nice little longer fringe, that's swept in the front or long bands, long bangs. What do you call a sweat fringe in america so we're just coming across following a nice square, cutting angle. So if we look from left to right and so working across a nice square, we're using the back as a guideline, so once we've created the back, we pull it over to the side and that creates the length that we're doing and connecting it in. So you know, if you just keep working this way, you end up with square graduation. What we're going to be doing is we're going to be kicking it a little bit into something more modern by adding some disconnection just to show you a little variation, so you can see that pulling the hair from the back where the corner was into it and What we'll do is we'll show you again how we found the corners for those of you that are just tuning in by the way i'm michael pizzalitis. This is james acres behind the camera. James is our uk, the creative director and we're just taking you through this cool haircut, we're going to do a little bit of a recap once i've finished this last section and then i'm also going to do the same thing on the second side. So if you're, just tuning in you haven't missed anything, we'll recap the back and then we're gon na do the same thing. On the second side, perfect uh, there's a question from francesco: do you have any advice to get the elevation wrong? Do you have any tricks? You tend to use so the elevation should really be dictated by the corner. So what happens is if you pull the hair too far down? You don't have a clean guideline. If you pull it too high up, you can see that what's going to happen, is you're going to end up starting to cut some of the back that you've already cut. So there's your guideline and you can see that the hair is not clean and you're going to cut it. So if you start going down what happens is that starts to connect and what you want to do. Is you want to see that connect? So you see the back is being connect to the side. That'S how you know you have consistent elevation. If you go too far down, you can't see a guideline and it's a very messy line because you pulled it too far down if you go too high up what happens? Is you end up cutting into your guideline, so you can see the guideline there. So the only way to cut this is to actually clone it until you can see your guideline and you just pull it to the point where it's about to connect and then you work your way across so that way, you've got your consistent elevation, so the back And so the back actually dictates to you where your elevation should be so. You'Ve already decided your elevation from when you cut the back. So remember the back dictates the front because it's square so by cutting the back you've already decided the length in the front. So you just have to follow the consistent elevation. Okay, let us know guys give us a thumbs up. Give us a shout we're just about to do the last section now from the top, and you can really start to see that squareness come into it now. So i've got a question from jamae. She says she's, an apprentice and left-handed and struggles struggles with cutting. Do you have any tips yeah? Definitely i think the the thing about this as well. Is you have to understand the really basics of cutting before you start? Thinking of where's the best place to stand left and right. For me, it's one of those things that when you have a clear understanding of what type of haircut you're going to do, what shape is it and the balance that you're? Looking for whether you stand on the left or the right of your hands can really change things. So what i mean by that? It'S not just about where you're coming from, but also having the same movement in the fingers, so whether your left hand or right hand. I'Ll give you an example: if we're going to layer here and i'm pulling the hair up the best thing to do when we're doing the other side is to actually maintain that and stand in the back. So we can see that the fingers haven't changed from when i was doing one side to the other. The worst thing you can do is working this way and then changing your femur position. So the fingers work from the outside to the inside then all of a sudden, it's very hard to get the same kind of elevation in the same kind of balance. So for me, it's those things when you're talking about left and right, it's just maintaining the same feelings either on the outside of the inside on both sides, clean, concise sectioning, of where your technique is, in other words, where your graduation is and then your shape. If you're creating something square, rounded or triangular - and i think those basics of cutting can allow you to work through your haircuts very methodically as well. So it's a very large one. But what i would recommend is check out some of our videos on our website at slavehair.com. It gives some really easy to follow techniques so guys what we've done is we've done a square graduation in the back. It sits nice and flat. We'Ve worked through square graduation on the sides as well, so i don't know if anyone can see the kind of corner that we have placed here. So we can really see the corner coming out. So we did the back flat. The sides flat. We created a nice square shape and we've done this by creating graduations. It'S really nice graduation, it's created square, of course, and what we're going to do now is we're going to do the other side, so for those of you that are just tuning in what we'll do is we'll show you how we did this, we started by finding Our corners, so we put the first corner from the top with our cone finding where the corner is from the top, and then we moved on to the sides and we found the corners from the sides. We did this on both sides and so what we had was we had one two, three four sections: we created it with some nice graduation but then came across from left to right square, and then we did the same thing using what we had done on the Back, we moved it over to the side, and then we created a nice square, miss on the side, leaving this lovely corner. You have there as well. What i'm going to do is the same thing. On the second side, i'm going to cross check and i'm going to do a bit of internal disconnected layering as well before we have the front, swept thanks front swept. So if we were, let's say we're talking about the slate courses at what point, would you be doing this sort of haircut so, for example, with jamae who's, an apprentice etc? Would you suggest that she came on this course or so? What this course is is it's actually what we call abstract, which is more of our salon, created abstract, is more of our salon, creative, but this haircut is based on the classic haircuts, you're learning with us on our geometric courses. So if we were going to continue this haircut the same way i've done now and not layer it, it would be a classic square graduation and that will learn on our fundamental geometric courses. So geometric is the hardest classic haircut. What i'm teaching you today is one of our abstract, which is a song contemporary course. It'S basically taking what you've learned in geometric and mixing it and breaking it, and so this is a more advanced one. So what you're going to do is classic fundamental cutting. So you can learn how to do a perfect square graduation before you learn how to break it in the way that i'm doing and making it something a little bit more tailored a little bit more modern cool. So what we've got is: we've got the second side and we've cut the back. We'Ve established a nice bit of graduation coming along nice and square. What we're going to use is we're going to use the back as a guideline for how we're going to cut now. This square on this side so we're using the back as a guide to cut square now on the second side, so i'm just repeating what i've done on the first side now on the second side. So if you guys are enjoying this, give us a thumbs up, give us a shout, tell us how we're doing if you want us to go over anything. Let us know you're more than happy evelyn says hi, guys. Sorry, if it's a bit quiet, i think i'm maybe i don't know, maybe i have my hand over the mic or something. So let us know if this is any better. Oh no guys! Sorry, maybe i need to shout a little bit more. Maybe i need to not smoke so many cigarettes capacity back, all right beautiful. So what we're doing is we're going to do the same thing, we're elevating slightly more in the first one, just to give a little bit more length. So we have something to play with at the end afterwards, and what we're going to be doing is we're going to be working through this with some nice consistent elevation. So remember the back is what creates the length on the side so once you've created the length in the back, it's actually dictated to you the length that you're then going to see on the sides just moving your head out the way. So what we've got here is we've got the length we've got to create on the side and what we want is we want consistent guidelines. So what this means is we're taking a little bit of hair from the back and we're using the back as a guideline from the side. So when we lift the hair up, what we want to see is that we're using the length in the back as a guideline for the side, so you can see here. This is the corner that is actually dictated by the shape of the head. So on my mannequin, the corners here on a human, it might be a bit further forward a bit further back. This is why we measure it in order to find out the true corner, so we're working exactly with the shape of the head to find out where the true corner is for this specific individual we're working on okay, it's a lot of fun when you do it On your clients or your models, because you really start to see the difference in head shape on different people, because the corner is always located somewhere slightly different, depending on who you're working on. I suppose it makes them feel nice knowing that you're doing something bespoke to their headshot. The truth is not just that the haircuts look so much better. You know the truth is that when you start working with head shape, you start really detailing something that suits someone. So if you imagine the hair, when it falls, it molds around the head shape. So if you create something that's perfectly tailored for that head shape, it's going to sit even better. We were talking about this before remember james. That head shape is almost like the undertone that a colorist would think of. So when people do color, they always think about the undertone that they're going to work with, but a lot of cutters don't think about the head shape as if it was undetermined. As in what is this head shape, and what am i going to have to do to change my angle in order to get what i want on this head shape? So if i wanted a specific angle and the head shape sticks out a lot, i might have to go flatter in order to maintain the same shape that we have now yeah. Maybe the head shape is very flat. Therefore, in order to get this angle, i have to go for something heavier, because when it falls, it will fall flatter, so you actually have to think about what shape of head. The person has and then think about the end result. You want to get and therefore angles have to change in order to get that head shape. So i hope that makes sense. But suddenly we go into a lot of detail when we lecture about hair cutting. You know that the hair always molds around the head shape. So you have to think about undertone what the head shape is before you start paddling, because you have to think about what you want and how you're going to get there. So i hope this is making sense guys give us a thumbs up. Give us a. I think i finally found someone who can explain, explain things properly. Thank you. Thank you. If you want to just drop us a message and may after this, we can get back to you and we can have a chat about anything okay, so you know for me. I spent many many years being very confused about cutting many many years and so for me when i started to learn properly with my partner gregory when we things just became clearer for me and easier, and i used to be very scared, doing clients. I used to be scared that i wasn't going to be able to achieve what the client wanted. You know they might ask for something, and i thought am i going to be able to do it. How do i do that? You know - and it was quite scary for me and once i started to understand the mechanics of cutting, and i realized that there was a method of doing things that could give you quality results. Each time like in a way of looking at almost like a science like physics, everything became clearer for me and there wasn't as many questions there wasn't as many times when you thought. Is this going to be right, or is it going to be wrong, so it was a really really nice way of so i think that's what we want to do. You know you really want to do something. That'S easy to understand and effective to use. You know understanding that we're human and we all make mistakes, and where are we most likely to make the mistakes and where are we not? You know, so i think those are really really important. So a couple of questions that have come in um. Can you make one side long one side short yeah, you can i mean it's not gon na be a perfectly square shape. It'S not gon na be a perfectly square shape, but you could definitely we were talking about this yesterday yeah, so you know you can you? Can make one side longer one side shorter, but what will happen is when you look at it from the back. If you connect it across horizontally is because we're doing something balanced if you look at it across horizontally and square, if you have one side longer, what will happen is the back will be at a bit of an angle, so it'll end up looking like that, all The way across which is cool, but it's not going to be perfectly square and again that comes into more of an abstract thing. We teach that in our solo creator, of course, our abstract course a little bit more about asymmetry and creating balance in asymmetry. You know something we really talk about in much more detail, because humans look much better with symmetry. So sometimes, when you put in asymmetry, you have to think, are you making the face more visually balanced or less visually balanced? So it's a really good question and it's something you know we talk about a lot as well. Asymmetric books are definitely something you can work on as well right, okay, so with your elevation, now the same as the other side you're using that corner to figure out where to pull it out is that right, using the back and just coming across so you're working Through nice and square but you're using the back, there's a little bit of a guideline to come across as well and as far as the outlines to this now is this exactly how they're going to be so? It totally depends on you. If you decide to leave the outlines, like this they'll, be a bit more natural a little bit softer. You can then break them more, so they're, more shattered and they're more broken so, depending on what you want to do with that, you can either leave them like that, so more natural, you can break them more, so they're a little bit more shattered or you can Cut them really clean, so you know those proper geometric cut out ones with a very, very clean outline. You can also do that with them, so it really does depend what you want to do at the end of this, whether you want to leave it natural or whether you want to define it more clean or more messy. So one thing by doing internal first, like we are here what you're doing is you're really allowing it to so you're, really allowing yourself to decide afterwards. So when you, whenever you do an outline first, you kind of kind of can't decide afterwards. What you want to do with it, but by doing it the way we're doing you can allow yourself, after that, to decide how messy or how clear you want it. Okay, so question from ashley: what scissors are you using and what do you like about them? So i like these scissors they're, the sucker and the reason i like them is because they're small like nail clippers. So for me, what i'll show you is? They are four and a half a little four and a half, and i like them because i have very bony fingers. So i don't know if you can see the back there between my fingers. So if i'm pulling something up and the hair's in there, what happens is because there's a hole it falls out and then what i do is i cut a clean line and when i cross check it, it's really long because it's falling out so my haircut instead Of being straight ends up being wonky, so what i do is i only cut with that much of my finger because i can't because of the hole there, so this scissor is perfect for me because it fits just in that little place there that i know i Still have tension in if you've got very big sausage fingers get some slightly bigger scissors. Otherwise these are perfect for me and i always find the smaller. They are the more accurate it is. I always think of it like this. If you went to see your surgeon and he brought out a butcher's knife or he brought out a very, very small, little surgical knife, which one would you prefer, probably the one that was a bit smaller, because you know deep in your heart that the smaller the Scissors are the more accurate the head, color is, and that's just another way of looking at it cool. So i've cut the back. We did a nice flat graduation. Whenever i came across and worked something nice and flat horizontally. We then cut the sides in with again a nice flat graduation and we connected it horizontally. So we can see that the corner is placed here within the haircut. What i'm going to do now is i'm going to start to cross check the sides, but what i want to do is before i start cross checking it. I actually want to do a cheeky little bit of disconnection so because the top is going to fall longer over this. What i want to do is, i want to slim the sides down, and so because i want to slim the sides down. I want to do an internal disconnection inside and then i'll come through and i'll start cross checking. So what i'll do is i'll come from here, and what we're going to do is we're going to lift the hair up and we're looking to connect the back and take the front shorter. So, by doing this, what we're doing is we're lifting the hair up, we're leaving the length in the back and we're going to cut the front shorter, so we're creating a short layer inside this haircut, and this is just going to slim the front down, because a Lot of the times i find these haircuts always look better when the face is a little bit, slimmer, okay, so what we've done is we've lifted the hair up and we've created this layer inside now. The reason this is disconnected is because the top hair that i haven't cut yet is going to sit over the top of it and therefore it's going to be disconnected. So what i want to do is i want to do the same thing on the second side and then i'm going to show you how i'm going to connect it internally. So again, just lifting the hair completely vertically and we're just swimming the front, taking the weight out the front, creating this lovely little layer internally. So it was a classic square graduation until this point, so what we have now is what you have to remember is anytime. You cut hair one place and then another place when you look inside you're, always going to find a corner and corners of weight, and i don't want to have weights within this haircut. So what i want to do is i want to sling this. Therefore, i need to remove the corner so, starting from the front, i'm just taking a vertical section, i'm going to lift this hair up and there's the corner. Now this corner is going to create weight. So remember: if you cut one place and cut another place in the middle you're, going to find a corner, the corner is weight and the corner makes the hair stick out and i don't want the hair to stick out. I want it to sit nice and flat. So i'm going to work through these sections vertical sections working from the front towards the back and remember the back is connected, so i'm actually going to end up having less and less hair to cut as i work through this so we're using over direction here. No, this is just kind of on the base um. But what should happen is, i think, you're using a very natural slight over direction forward, just to try and make sure you're not cutting too much. You know just to make sure that you don't want to cut the back off so you're, just being very gentle. Does that make sense guys what i'm saying what we're doing here, we're just removing the corner to just make it a bit flatter there i said you're. So, considerate, sorry, love, yes, beautiful makes sense. Thank you for explaining beautiful thanks guys. So we've got this lovely bit now that we've laid the top and we've created this nice flatterness. So when we take the top and start to create a longer piece to the front, it's not going to be so weighty, it's beautiful, and what i want to do now is i'm just going to keep going vertical and i'm going to remove a bit of this Weight that we have at the bottom, if you remember the first section - is elevated a bit higher up. So what we're going to do is we're going to come across here. So peter has a question and said: would you not have just round layered that area to begin with uh? No, because the problem is, i would have lost the squareness. So it's about keeping the strength and the squareness. So you know, i think, when you're really really good at what you're doing - and maybe i'm not you can go straight in, but for me i always like to create something very structured first that i can follow and then break it individually. So i always find by breaking it afterwards is much easier for me. You know it's like, like. I said if you're kind of doing a messy look with the hair up, sometimes it's easier to do it very clean first and then break it rather than trying to create something messy at first. So this really keeps the squareness it keeps the corner. It keeps the squareness to the side, but it's just created an internal layer and you still have the graduation in the bottom, and you also have a chance to see what the weight is looking like so obviously um. So i think i think, by doing this way, you have a better chance of being able to see how things work. So for me, until i have created the squareness, i didn't really know how much weight i wanted to remove. Now that i can see it visually with my own eyes, i find it easier, i'm a very visual hairdresser as well, and that's why i can't do color, because if i don't see it, i don't get it. You know.

Comments
Amabile Sensback: Thank you ❤ how awesome of you taking time to show step by step haircut ! I appreciate you!
Lisa Rios: LOVE this haircut n style so much, I'm going to grow out my pixie for it! Thnx
Lisa Rios: LOVE this cut & educator!!
Rashin Rasshin: I really love ❤️ it
B A: I don’t understand why the sides weren’t just cut vertically to begin with. Could you explain please? Otherwise, I love your precision cutting! ❤It’s rare to find a hairstylist who cuts that precise anymore. They all seem to be more interested in speed, and then I never get the same haircut twice.
Honey Beary: wow !! ego much? another case of a 'hairstylist' turning something simple into something complex! (face-palm)
Tania Haywood: Waoo bellissimo