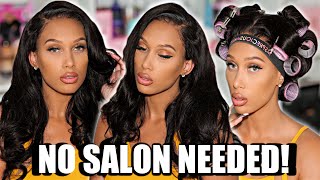
Long Blunt Cut And Swoop Bang Lace Wig Install❤️✂️|Isee Hair Amazon
ISEE Hair Amazon Store
ISEE Hair Brazilian Straight Transparent Lace Front Wigs with Baby Hair 150% Density 100% Unprocessed Pre Plucked Human Hair Wigs
GET IT IN ONE DAY with Amazon Prime Shipping
BEST AMAZON AFTER SALE SERVICE
Same Hair in this video: https://amzn.to/3dA0WpU
ISEE Hair Beauty Store on Amazon: https://www.amazon.com/isee
WhatsApp: +8615603743122 (Wholesale Price Provided)
Contact us: [email protected]
IG: @iseehairamazon
Welcome to IAmBeautifulHustler Channel
Be sure to SUBSCRIBE & TURN ON YOUR ALERTS
CONNECT WITH ME✨
Personal IG: Iambeautifulhustler
Business Instagram:_Beautifulhustler & @thebeautifulhustlerbrand
Twitter:_Beautifulhustl
YouTube: IAmBeautifulHustlerTV
✨SLAY WITH BEAUTIFULHUSTLER✨
TO PURCHASE MY PRODUCTS :
WWW.iBhSlays.com✨
Lace Melt Adhesive,
Melts Belts,
GLAMWAX
and more ❤️
Hey beauties are welcome back to Anam dutiful hostel TV today, I'll be showing you guys how to create a side swoop. Blunt cut, look using icy, hair straight wig and they did sent over this lace front straight wig. In our 22 inch it came pre slugs, which was the good thing, so I really didn't have to do any plucking. The wig was super. Super soft on the lace is transparent and it's nice little parting space saying it has a few combs in it on the tourist inside and the bottom back as well, and today I'm going to be installing this on one of my loyal clients and as I mentioned, We will be doing the side swoop. You know look because I have not done that style on my channel yet so I wanted to bring you guys this video on how to correctly - and you know, style this look and install your wig and everything like that. So I went ahead and operated her off camera and I just took that Ruby, kisses Foundation and level 16, and I applied that when the front end of her stocking cap - and I also applied that same foundation - color using the lighter shade and that level 16 palette And applied it on the inside in the top of that lace and I'm gon na go in with my beautiful Hustler's lace, maybe he self, which is my own brand of lace, glue which are being stuck in the next two weeks. I'M working on my shipment to come in, so you guys can be able to place your orders again and I'm just gon na go ahead and begin to spread out my layers of glue. I will use four layers today for her install and what you want to do is just you know, apply your glue and spread it out nice and smooth that way. It will dry clear quickly and you begin to add the layers, as you know, as many layers as wanted needed when you know whichever you prefer and I'm just gon na go ahead, and do that until all of my layers out one and then I will go Ahead and begin support her lace down into her. So now that I did all of the letters I'm gon na go ahead. While that glue is clear and pull that lace down into that glue - and you want to have them - assist you and hold each side down that way, you are able to place the lid where it needs to be and then go ahead and blow-dry the lace on The heat setting when your blow dryer, which helps melt that lace in you know really really good, so just have them firmly hold it as you blow dry that lacing on the heat setting, and then I also like to go in and take my you know, comb And just comb that hair backwards into that lazy, stem and share the week is applied on nice and neatly and using that extra lace that still on the cab just using that lace to apply pressure to that lace being in that glue. And then, once you pretty much get it at at down, you can go ahead and begin to cut off the extra lace around the ears and off the hairline and I'm gon na work with. You know one side at a time, so you guys can see exactly what I'm doing so. I'M gon na start by cutting the extra lace around the ear and just going in with an eyebrow razor. I'M just gon na go ahead and just you know cut off all the extra lace that is not needed, and after you do that, you just want to go ahead and cut off any extra lace. That is still, you know unnecessary need, instead of you just throwing it down. So what I did with this install is most of the hair that most of the lace that really wasn't needed. I just went ahead and cut it off, but if I did need that lace to cover, like you know any of the her natural hairline anything like that, I did use um. You know more adhesive to tack it down, but other than that and the lace is not needed. You can honestly just go ahead and cut it off and it will save you some product in time as well. So you will see that I really didn't tuck anything down today because it wasn't necessary like it. Like I mentioned. If I needed it to be there, then I will go ahead and tuck it down, but if that actually is not necessary, I just went in really close almost close to the hairline as possible with the scissors and just you know, cut that extra lace wedding off. So I'm just going to UM. You know do this section over here on the side like in the sideburn area and then I will go ahead and repeat the same exact steps to the other side, and that's attacking all of that. Then I'm just going back in with my blow-dryer once again on the heat, steady and just making sure that you know that licensed mess it on. In now before i spread the hair along with holding spray and do the whole melt belt process. What I'm going to do is just take um, you know I'm going to take the comb and just go ahead and part off. You know, like the whole part of the space area and just pulling down my baby hair area, so that can just already be section out out of the way and then I'm going to take my wax stick and apply the wax stick. All on the top of the lace wig everywhere that I will be hot combing and what that glam wax stick does is just get all those flyaways and then also presses the hair out, really nice and silky straight once you apply the heat oil, but your hot Comb and everything like that, so I'm just gon na do that step right now. That way, when I do, you know, remove the meltdown and everything like that, it just a straight: it's a hot comb in an hour and making sure it's nicely. Another thing I like to always point out to when you are using a holding spray, make sure that you spray back. You call them back. The hair is nice and neatly on the hairline after you spray it that way. When you remove the melt belt, the hairline is still me and I just mesh down, so I always comb it down before I tie it down, so it is applied, meet me and I'm just gon na take that and just pull it and just allow that to Dry, so in the meantime, while that is drying off camera, I go ahead and you know flat on the hair, but first before I even get into that, I'm in the hair, I'm just gon na show you guys how I sew down the back so based on The braid down method that you use, you should have at least one braid down to the very bottom. So what I like to do when it comes to, like these lace, front weeds. I pull - and I stretch that week that week down to the last braid and I just stitch across the you know - stitch going sideways across the wig to secure that you know that week is on and it's not going to lift up, or you know flip off. The head, so I'm just taking my needle through that bottom braid and just stitching through it that way the wig is secured to the very last braid at the bottom of the head. So now that I am, I'm done, you know stitching and I let it dry and flat on her hair out, I'm removing that milk bail and just coming out the hairline so that it is nice and supersoft. So what I'm going to do now is just go ahead and you know comb all of that out and then I will go in with my hot comb and begin to press out all of the areas where I apply my glam wax sticks. I can get the roots in this week: nice flat and sleek, so I'm just gon na comb, the hair line outlets again applying more glam wax and hot comb. Everything out to this nice, smooth and flat now to achieve a really nice neat flat and smooth scoop. You'Re gon na have to like wax and hot comb in between. You know the top of that week to make sure that all the roots are laid down nice and smooth. So you here, you see me applying wax and I'm just hot coming in behind the ear, because that's where it's going to fall and I'm just gon na part off sections and really put that glam wax at the root and hop home. All of that out, because you need that whole top area to be flat and smooth in order for your swoop to be nice flat and smooth. So I'm just going to continue to do that until I am satisfied with the results of the flatness of the week and then using my god to be holding spray and my web stick as well and a blow-dryer on here setting. I will begin to shape mold and you know get that swoop, pretty much swooped. So I'm going to UM, like I mentioned, just start to create that look, and just you pretty much want to just comb it and have it falling in the direction that you wanted to go, but make sure you have your part how it needs to be that Way it's nice and neat, and everything just makes things and glow. So I'm just going over my part one more time before I begin to sweep anything and I'm doing like a C curved part, because this is a lace front wig. So I had to do the part kind of higher up for it to kind of you know, for it to look right and it's hoped to be well parted off, and everything like this, so I'm just gon na take that got to be spread. Like I mentioned, spread on my hair comb, it down blow-dryer to make sure it's no flyaways, everything is nice flat and I would begin to swoop it, and it's kind of like a soft, see motion that you want to go for just to get that nice, a Swoop of thing you don't want it to go directly to the side. You actually do one of the between I'll sweep around the forehead. So what I like to do is kind of get to swoop in motion first and then I'm just push that hair behind the ear before I molded that way. I can get pretty much like a guideline of how it's going to look and then once I get that desire curve that I'm looking for, I will go ahead and begin to add more spray and wax and, as you can see, I am using that wax. Stick now to just smooth everything out and give it a nice little shine, and once I'm satisfied where, where the soup is going to lay, I will go in with that got to be holding spray once again, spray it and blow-dry it into place in the goal To the school is having it as neat as possible, so just continue to you know, lay down. Flyaways is new, your wax thinking you got to be, and then once you get a desire to school, just go ahead and grab you a few bobby pins and you want to pin that school down now, depending on how far back you want your school to go. Is on you, but I like to I'm kind of bring the head forward on top of the school and that piece that's down right there that I have on the side. I will be her sideburn for that side. So make sure you do it. You know if you are doing a sideburn on a suicide that you pulled, that hair out first before you begin to school, and I just took a little bit of that got to do spray and laid it on top of where I want that hair to fall Over the street that way it does not move images. You know flows how it was supposed to, and now that I got the swoop done. I'M just gon na go ahead and cut the extra hair on the side and just go ahead and sweep that sideburn into place. And you know the hair stores, I'll close guys and my products, it's just running solo, so I wanted to use. I really wanted mousse so badly for my baby hair today, but I don't have any more so until I can find a story, I can give some fun. I'M just gon na have to just go with the holding spray only, but you know it still came out really cute, so I'm just gon na go ahead now and swoop the baby hair for the other side chop it down. You still got to be spray. In my edge brush and get the baby hairs, how I want it and then I will go ahead and give this hair, and this is a 22 inch we're guys. So I'm not cutting this short, I'm just going to even up the ends and just make it blunt, and then we will get into these final touches. So now that the baby hair is done, I'm gon na go ahead and just grab my steno grab. My scissors and just cut the ends of this wait even just to give you that nice, you know clean look, so I just you know, took my scissors, you just cut it straight across nice. Even in need, I pulled everything twice, the back. I'M their way is even all around and, like I said, not making me shorter just evening up the ears to give it a nice little look and just taking a big flat iron and just pressing down. You know pressing my hair out nice and good and just call me, and then I will. You know of course, grab me some ocean and spread all over to get rid of those flyaways. But before I do all that, I'm just gon na take that same foundation. Color and just take a little brush and just clean that part up line it up, you know make it nice and neat. This is very important, like this really brings out the style when you get that part to be perfect, so I'm just taking that brush and I did not use any black spray because it was already thin. So I just took the brush to you, know, take that foundation and smoothing it up and line it up. So this is pretty much the finishing look. I'Ve only had installed into the baby hairs on this style is really really cute. I'M gon na do this style again, probably, but you know some color. You know stuff like that. You know to hype it up, but yeah. This is pretty much it. I'M just going over the ears with the flower, I'm just making sure everything is nice and me since I apply or Sheen. So I hope you guys enjoyed this little side swoop and baby hair tutorial. We have more videos dropping on a regular. As you guys see. I got a little quarantine thing going on, so thank you guys for Tony needs and don't forget to subscribe to me. Your notifications and I will see you on the next tutorial, bye, guys


Comments
Ope Majek.: Cannot wait for back to school to come and try this style with you! Love it:)
Ncedisa Mtise: you deserve more recognition than you get! your work is amazing!
Jamilla Worsley: Yasssss!!!! What lace? You did the damn thing on your client!!! I absolutely love this!! I would definitely rock this hairstyle
CheekyLovesCheeseCake:): Your model is gorgeous! Such soft, doll-like features
Denise Sanford: Beautiful love when it "don't" look like a wig
KeriaTheBratt: About to try this on me , I love you girly
Cara Thomas: damn I love this lol my next diy. thank you sis
TEE: I love how neat it looks .
Jae Watson: Came through slaying bb. But to your model, she knows that mask worn like that won’t protect her right...
Veladia Mary: Do this style in a Up,Down version
Beautiful YAS: Love this cute & easy style. What Sheen spray do you use?
Amoy Mckinson- Baxter: So satisfying to watch. Love from
Lacey Ann: Very awesome video,four weeks ago I got the same product from eseewigs
sabrina gardner: That is absolutely gorgeous I wish you were in Jersey lol
cocoa baby: best swoop tutorial on youtube
Rochelle B.: Beautiful
Beautifulquira: Yu Made Me Want This Hairstyle Even More
Jdore Rose Hair: Can you post a glueless install?
Elra Leslie: Awesome❤❤❤❤❤❤
yulanda frazier: How was shipping for this hair
Shandell kute: Hey mi stylist hope yuh staying safe .. love always♥️♥️♥️
Nikk-Ann Pusey: Guuuurrrlll. I loooovr ur work. U da best. Love watching u. Much love all the way from Canada
Esther Dover: I'm seeing so many bad reviews on amazon about this hair however, it looks really good when you styled it but I'm soooo afraid to purchase it and it doesn't look like the one on your model. HELLPPPPPPPPPP MEEE PLSSSSSS
jodie-ann burrell: About your melt belt do you do shipments to jamaica??
The Journey Of Thia Miranda:
2X: Sliiiickk
deseraymiles87:
shamoyaiii: yayyyy i’m early