Medium Hairstyles A Line Hair Cut Color Tutorial - Part 1
- Posted on 03 October, 2019
- Medium Hair
- By Anonymous
Medium Hairstyles A line Hair Cut Color Tutorial - Part 1
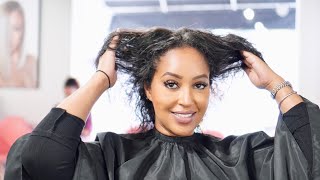
In this video, you will see RaDona show you how to do Medium Hairstyles A line Hair Cut Color Tutorial - Part 1. In this three part segment we have our beautiful client named Shaylee. Shaylee is wanting a total makeover- and that is what RaDona will give her.
Right now, Shaylee has medium long hair that has blonde in it. RaDona is going to give our client Shaylee a medium A Line haircut. THis kind of haircut you are going to section the hair and cut the hair a little bit longer than usual. She is doing that because she is going to color her hair. There is no point in coloring hair that you are going to just cut off later. For this haircut and color, RaDona is going to color the bottom a dark brown and then the top will be blonde, with a deep red that is almost purple. She is just dying the bottom dark because this type of haircut will be stacked in that area, if she was going to weave through all of that and cut it, the hair will turn out to be stripey. In this video, our client Shaylee does not have gray hair, but RaDona does tell you what to use and how to do it to hide gray hair.
To recap,in this video you will see RaDona show you how to do Medium Hairstyles A line Hair Cut Color Tutorial - Part 1. In this video we have our cute client Shaylee. Shaylee wanted a change from what she had right now. This is for someone who is wanting a bolder change. Someone who wants to put in fun colors without going too crazy. This is also a perfect haircut for anyone who is wanting their hair to be shorter, but not too short and something that could be easily grown out. In this video, RaDona shows you a super tip and trick with dying hair. She uses a “special ingredient” to help make the color stay in longer as well as help condition the hair while you are coloring your hair. This will really keep your hair healthy while coloring your hair. This is vital for clients that are like our client Shaylee. Shaylee is always changing up her hairstyle, color, and cut. This special trick and tip will help clients like Shayle be able to do that while not damaging their hair too much. This special tip and trick is the infamous Monat Rejuvenique Oil aka our “gold”. This stuff will really help keep color in nicely as well as help reduce hair damage while coloring your hair; especially if you do it as much as our client Shaylee does.
For products used in this video are first just the deposit ( Volume 10), if you are trying to hide gray hairs you will want to use the Volume 20. The volume 10 will cover all of the roots in the bottom. RaDona puts in a couple of drops of Monat’s Rejuvenique oil into the bleach and hair dye. This really helps keep the dye in your hair longer, but it also nourishes the hair while you are stripping the color out of the hair ( with bleach). This way you can go lighter or darker without ruining your hair. It will help condition the hair while coloring. You will put this in all of the colors. For bleach and hair color, RaDona uses the Goldwell hair line. This is a really good line to use. For bleach, she will use a 40 volume. If you are new to hair coloring, RaDona suggests using a 20 Volume. A 40 volume processes really fast, so if you are wanting to make sure you have enough time to do it all while processing, then going for the 20 volume is the best choice.
Here is the link for Part 2 Video: https://www.youtube.com/watch?v=kxtBo-...
We so much thank you for watching our videos. We value our clients and our viewers and look forward in making many more to come. Videos for those that are older than 60, older than 50 and those who are in the wonderful 40's. Thanks again for watching.
Try Some of our favorite products from Monat
http://bit.ly/2BuHE5Z All Systems
http://bit.ly/2Dpq4NO - all products
http://bit.ly/2BSy6RH - Opportunities to join team
Learn more at our website http://www.boysandgirlshairstyles.com
Visit Our Facebook: https://www.facebook.com/BoysAndGirlsH...
Visit Our Pinterest: http://pinterest.com/BalancedLife100/b...
With you guys today today, I shave with me and we are doing a total change. I'M really excited about this one, so we are cutting off her hair into a shorter range. What'S a shorter wavelength! First up what I'm doing I have pulled just above the air. You can see about a half an inch straight across okay. I am going to just cut this hair off just because which I'm going to go shorter, obviously in the length upon her neck for the a-line. But the reason I'm doing this is because I mean I don't: there's no need to color all that hair right because we're cutting it off, so I'm just cutting that hair off there. Why? I want to do the dark underneath up here. We are doing the blonde and a purple like a deep red purple red in color. Anyway, we are doing it pretty thick up here. I don't want because we are going shorter if I was to leave all that. It'S gon na be stripy at the bottom. I do not want that, so I am going with the four double men back here. With a 10 volume, 10 volume is deposit-only. Okay, she obviously has no great, so we don't have to make great if you have grey you're you're going to want to use a 20 volume. So, like I say this is just deposit-only, which is the 10. So what I like to do is go around the hairline get this all covered. I'M super excited so she's just wanting to change something different, which is really fun because we change right, say we the light. Then we so yeah now we're doing like a purple red anyway. I love to come through get all of this base right here. The other thing I do is I squirt my oil into it. This is amazing that actually helps the color stay in and it helps condition while coloring I have put the oil in all of the colors. So this dark my bleach and my red purple color I'm going to let you guys know about the colors that I'm using I'm using a bleach. I need to go well love love that line very good line, so I'm using the bleach I'm using a 40 volume. If you are just starting, you might not want to use a 40 volume, it might process a little bit too fast. I'Ve been doing this for 22 years, so I feel, like I have a little more control over my time. So that's why I'm using a 40 volume and all of you out there that have been doing hair. You know what I mean. You know: we've all started out with the 20 volume and kind of moved up as far as tiny, wise. Okay. So now that I have that covered, I just come out here and just cover all of the ends and again the reason why I want this dark is because I don't want like strikey. If any of you have seen someone that has had say blonde in the bottom, you know weep down through and you cut somebody's hair off in the back and then all of a sudden strike me in the back then just cover it while you're going and then I have done 10 volume and I have done a 3 double V for the color, which is a violet and a 5 BB, and it's honestly going to be gorgeous. I'M super excited and again I'm just using 10 volume for deposit only okay. We almost have this covered, then we'll get to the weeding earth. Now, with the leading up above, I am going to be splicing the dark and I'm going to be leaving heavy for the bleach. We want a very showy the picture she showed me that she wants. Is curl that, and I always like to tell people you know when they bring in pictures and I'm like hey love this color and if any of you stylists are out there you're gon na know what I mean like they bring you these pictures, these different colors, But they're all curled right, so when it's curled the color is going to look a little different, so I always walk through it with my client. You know: ask them too much: they curl their hair or something like that, because it is a little different. You know what I mean if you have straight hair every time it's gon na look a little different, obviously than when it's curled. So I do like to go over that with my clients to let them know it's not going to look exactly like that picture, because it's curled and it really shows off the colors anyway. If I was, you definitely would do that. Okay. So this is the dark. Now, what I'm going to do is I'm going to splice this whole thing: okay, and what that means is I'm going to color this whole entire oil - and this is the color that 3bb in the fight that will double beat with the ten ball. Just make sure. That'S good and saturated. Obviously, a lot of that's gon na be cut off right. There put the baby's color, but I don't know exactly where I'm cutting okay, okay, same thing back here and turn her, so you guys can see. Okay, now the next session sex section is - and you want to take him - not thick sections - okay, nice, okay and I'm going to weak this thick. So I'm going to that means I'm going to take a big piece, another big piece in another big piece. So there's only like three: can you see how much hair is going to be colored here, see what I mean again, I put the oil into this. Now you guys can see. I want you guys to know this, that you can already see these blonde pieces. Do not color the blonde pieces or they will fall out so Jenna the dark pieces in between. So anything, that's warm on totally leave it out. I just kind of push those to the side, so you don't get them and then what I like to do is just add another oil. On top of that, because if I was to just kind of scoot this to the side and flip it up, those belongs are gon na get in that fleet train. So I don't want to do that. So oil set that on top and then just turn these little corners in so it holds in okay, now same theme, you can see I'm just taking sections and going horizontal around this way and each section I'm taking about three big okay, now remember when this heat Up your bleach will swell so, yes, you want to get up close to the scalp, but not too close, because when that heats up, that's going to expand, so you don't want tiger stripes up in okay. Now this one, you can see, I'm just going to slide these to the site, and then I'm going to flip this one up, because there was definitely enough room there. It wasn't gon na hit that bleach you'll be able to see whatever color they have in their hair, you'll be able to know which ones you need an oil on top of or which ones you can slide the hair on to the side. Okay, so again, there's three three bigger sections and I hold this straight up. Then I bring it down, make sure it's good and saturated. I like to kind of go back and forth, but you know it's saturated good. Okay. So, let's see on this part the one it's just on the ends, I just push those aside and then I can tighten this up here on those sides. Okay, now I'm going to be doing a section of the dark so again and put the foil to the scalp: pull it down, go all the way to the scalp and I'm coloring. All of it remember. It'S call this twice you're going to splice this okay, I go down. I go to the side, just wan na make sure that is saturated. This is a great video for those of you who have been asking about tight of the mid length, thinner, hair, finer, hair. Shady definitely houseplant hair. She does have more of it, but this is. This is a good cut that we're going to be doing after she's colored, for that it actually gives it, especially you that are asking dinner fine here, it's going to give you more volume and make you look like you have more hair. With this cut, I'm going to be doing on Shaylee, so it's actually really good. Cutting nice have been asking for I'm excited, but I thought, since we're changing the color it'd, be fun to see the color and how to get the chunkier look. So when she curls it sorry approach to the Turner more now, we'll do that next time, okay same thing over here and then I'm gon na do one more blonde and then I'll stop and show you guys, like you know where to keep going and stuff. Just so you not to hear me talk like if I need the whole thing anyway. Okay, I always lift this push up. I am pushing down with my hands. That'S when we get that secured tight up to you know her head. Okay, now this next section, like I said you guys, I know I've said this a zillion times, but it's because it's very important you do not want to take thick sections. If you need a like say you want a thicker, brown or red spot, then you would take sections, but you color them separately. If that makes sense, because if you get them thick, you're not going to be able to get down to the roots, obviously is so. It looks like it's getting color right there, because we're not doing a melt or anything here wouldn't matter, but okay, this one, I feel like it's gon na hit, so I'm gon na do that now, I'm gon na fold this up and push up with my comb Line pushing down with these fingers. Okay, that's gon na hold this in tight, so the foil doesn't slip because if you get slippage, you're gon na have tiger stripes all over the place. Okay, so that's what I am doing so I'm doing one blonde one red purple! One blonde one red purple just up like this twice the dark we heavy with the blonde okay. So as soon as we get her color, we will get back to we'll start. The haircut will be super fun. So we'll see minute, you


Comments
Margie Tant: Can't wait to see part 2
Mary Hodges: When do we get to see part 2? I can’t wait to see it
Sharon La Tour: Oh Radona, if you can please hurry with posting part 2. :) Can't wait to see the rest!! :) XO XO
No more War!: Look forward to the next video to see the end results and the cut
Asmaa hairstyle: جميل جدا ❣️❣️ روعه
Tammy Patterson: Omg I need part 2
Corey Acre: Do you get a lot of request's for coloring/highlight's more than perm's or set's??
Vina Nichalson: I can’t see part 2