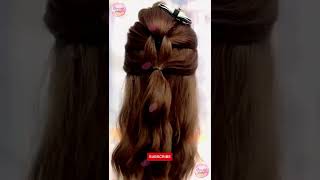
Super Detailed 30 Inch Straight Wig Install | Curlyme Hair
- Posted on 21 September, 2022
- Pixie
- By Anonymous
●▬▬▬▬▬CURLYME HAIR▬▬▬▬▬●
☛☛ HAIR LINK in the video(BUY NOW PAY LATER) :
https://curlyme.com/products/straight-...
☛Back to School SALE Up to 65% OFF, Buy now pay later, 4 or 6 Interest-Free payments➤
https://curlyme.com/?utm_source=youtub...
☛Use my special Coupon: "YOUTUBE" for all products extra 10% off !!!
Hair info: Brazilian straight frontal wig in 30inches
Length:30inches
Texture: Brazilian
Parting space:13x4
Lace: Swiss HD lace
Density: 250%
#straighthair #curlymehair #wiginstall
Follow us on Instagram to win free hair: https://www.instagram.com/curlyme_com/...
My Socials
IG: @kamanijeann
Twitter: @kamanijeann
TikTok: @manijean888
Wig IG: @wigssoldbymani
Email me for business inquiries only [email protected]
Hey everybody Welcome to My Channel and welcome back if you are returning viewers, if you guys would like to see this part two of the bus down middle part jet black 30 inches okay, keep on watching, because I definitely slate this for y'all yeah. Okay, you guys getting straight into it. I got my fresh braid shout out to my cousin for getting me right with 21 braids, okay, but you guys I'm stretching out my cap, so it can lay more thinner and I am cutting around my ears. So we can get started with the spray, because you cannot just spray that spray on there without your ears being out, because it's just going to it's just not gon na go well. So please make sure you cut around your ears, but um yeah, you guys, I'm taking my ebony Wonder lace spray in the red can and I'm spraying that around my hairline and I'm trying to be really still with this. And when I say still, I mean like not moving too much and really paying attention to where I am spraying it. So it can lay like right where my hairline is. You know what I mean, because I don't want it to be too low down like. I was in my last video or too far up. I wanted to be in the perfect spot, so I'm really taking my time with this foreign taking my blow dryer on a cool high setting and I'm blow drying that until it is completely dry, I mean completely dry because when it is not completely dry, it's just Not going to go well for you, okay, like it's going to lift back and that's not fun, to have to redo a wig cap like beef roast so make sure it's dry. I'M cutting off around the cap now just gliding my scissors straight on through because these are sheer. So it's just going to be really easy for these scissors to Glide straight through and cut it off, and I don't know what it is. But with my ball caps, the sides never stay down, so I just took some glue and my popsicle stick and I'm trying to smooth that a little bit of that glue, because I didn't take a lot a little bit of glue around the edges of the ball Cap so that it can um lay flat you guys because yeah they do not be Stand Down foreign, but I basically take my scissors and I cut it directly in the middle in the back and then I tie it up while also tucking my braids up, underneath The cap, so it can stay, put and then tying it in a double knot, not too tight, because that will squeeze the out of your brain and that is not comfortable and then I'll, just cut it off and then boom. My stuff is flat. My cap is flat, but you guys, I just took my Ruby, kisses cream foundation in the shade rd15 and this Mega brush here and I'm just making my ball cap a bald cap. You know what I'm saying making it give scalp. Now I've been using rd15 for a minute, but I'm starting to look at my videos and stuff, and it's like this is kind of light for my skin tone, not super light, but it's not as dark as I'd want it to be. So I might try another shade or another type of foundation for my caps just so I can blend better but um yeah, because the foundation is the key to the installs right. So yeah I'm taking my scissors now that the wig is on and I'm cutting around the ears. I don't really need to like pull years out or clip it back. I just kind of eyeball it and see. Where is my ear, and you know where do I need to cut this lace off so that this can fit comfortably and sit how it is supposed to sit before I glue this wig down? I always have to take my Cipro rubbing alcohol in a cotton pad or a paper towel whatever to clean off around my skin, so that the glue can really stick and that the lace won't like you know, because your our skin is naturally oily. And then we just put that makeup on our cap, so it's probably Leftovers on our skin, which you will see once you clean off your skin with the silver alcohol which you guys, you want to make sure you do that as well. But now I'm taking my Erica J hold me down glue and my popsicle stick and I'm just smoothing this glue around my bald cap, not around my ball cap but right in front of my ball cap, not too far back touching the cap either. But you know you guys see the placement you guys can see. So I'm not even going to try to explain the heart because you guys got eyes, you see where I'm putting the glue but um yeah. You guys. I took about like six seven layers of this because I was going out of town and I wanted this wig to stay on the whole week that I was going to be out there. So I didn't show you guys all the layers that I did but yeah you guys it's basically the same process just taking a thin layer, as it says, on the instructions, that's what you should do with all glue, a thin layer and just spreading it out blow Drying it on a cool high setting until it is all the way, completely dry and not dry but clear. You know you still want it to be tacky a little bit, but you know what I mean so yeah foreign. So now, for this lace placement, I am just seeing exactly you know where the glue is because you can tell when it's dry, where it is and where it's sitting on your skin, especially if your lighting is right. Okay, you can really be able to see this but yeah guys once I see that I press that lace down and I use my fingers and my hands to really get that glue and I kind of push the wig forward. But for the most part, I just let it sit where it's sitting, because that's where it's supposed to sit but yeah, I press that down with my fingers so that it can really mold down and then to help mold it even more. I take my wide tooth, not my tooth comb, fine tooth comb, ragtail comb and my blow dry on a cool high setting again, and I am just pushing that hairline back kind of getting that glue all marinated into that lace. Foreign. I have on my elastic band. Now and I'm going to leave this on for like 10 to 12 minutes and in the meantime, I'm going to take my hot comb and press through this hair just to add some neatness to the wig into the install. You know just just because to pass time by, and you know it helps with the neatness, so I don't mind sitting here and doing the hot comb for this step here. Thank you, foreign, because I was really trying to get this part right like I cannot mess up a middle part. I cannot the bust down my part. It has to be completely straight completely symmetrical and I'm saying, but now that I have that part completed, and I know how that is going to sit. I'M going to take my hair into sections in a hot comb. My hair, I didn't add any product to the hair, while I hot combed it. I just wanted to really press the hair through and hot comb. Every single, like piece of this hair in the front soaking like super flat so like product, really wasn't needed in my head because I'm like I'm pressing through every strand, damn near in the front, so yeah that definitely added on to the flatness foreign has kind of Gotten pressed out a little bit, I'm going to cut off this lace now snatch that elastic band right off and I'm just cutting off this lace. With this razor in a zigzag kind of motion, you know I'm saying cutting as close to the hairline as possible. Y'All I'll be saying you know what I'm saying a lot, because I really want y'all to hear me when I say what I say but yeah yeah, I'm just cutting off this lace and when I cut off the lace, I realized I'm like dang. This isn't as plucked as I would like to be: it's always either under plucked or over plucked with me, like it's never perfectly plucked. So I really need to work on my plucking skills, but the way that I Lay My wigs down and the way that my baby here is it's not that noticeable or you know a big deal so yeah, but anyways you guys, I'm taking some of that Eric And J glue in my popsicle stick and I'm placing that glue a thin layer, smoothing that out and um yes, because that piece was not sticking down. Thank you, foreign. To get this lace to blend more I'm taking my little makeup brush here. In that same cream foundation in the shade rd15 and I'm kind of just buffing that into the lace and yeah once that is done, I take some more of that red ebb and wonder, lay spray, and I take just a little bit and I smooth it out With my fingers - and I spray that directly across the whole entire lace, you know so yeah - I really like to do this with it. I really like how I start to do this, because my lace be laying a lot like seamless and more um. I don't know be looking more natural, like more put together more like scalp, when I take the time to do this step now, and while this lace is laying some more I'm taking, my Cara wax stick and I am going to be pressing out the rest of Not the rest of this hair, but the top and the front of this hair and yeah you guys I like to move really really slow with my hot comb, so it can really press through. I do it so many times but yeah. I stress it to you guys in every video you guys. It'S really. I keep saying you guys, but like I'm really talking to y'all right now, but um yeah. This is a really important step because it gets your lace, not your lace, but your hair to just lay super flat and look so neat like you want your wigs to look neat and put together now, I'm just taking out my baby hairs. Um yeah! I just want you guys to watch this part, because I don't. I can't really explain to you guys exactly what I'm doing here. You guys just have to watch. Oh foreign foreign stick again and placing that exactly where my hairline is behind the baby hair so that I can hot comb these through and it can just look super seamless. That'S the key! That'S what we want our Wicks look like seamlessly, so I keep using that word because yeah we want this to look natural neat all of the above foreign. While I was doing my hair, I was just thinking about how my last install my baby hairs was not my cup of tea and not how I wanted them to look. So. I was really trying to make sure that I like catered to myself with these baby hairs and did them how I would really like them to look. So they are a lot thinner, as you guys can see, and if you didn't see my last video go check that out but yeah I cut the baby hairs a pretty decent length, not too long. Not too short. The baby hairs came out pretty cute to me. So yeah I'm taking my half inch pencil flat iron by kiss and I'm curling these baby hairs upwards and The Sideburns under because yeah. I like how that looks. I like that. Look so foreign like to take my product, which today, I'm using the ORS holding gel um. Yes, the olive oil kind and I like to smooth it with my finger on the hairs, but not directly where the curl part is like, where it's curled under, so that when I do my baby hairs, they can look fluffy and not to have too much of A hold on them, you know what I mean like I like them to look Fluffy at the end, so yeah, I'm just smoothing and fluffy, not fluffing, but carving these baby hairs out basically and using my finger as well to mold everything into place and yeah. These baby hairs didn't take too much effort. They swiftly, you know, got into shape the way I needed them to get into shape foreign foreign. To make this part look super, clean and seamless. Of course, I'm taking this um rat tail comb, the end of it as well as this black light dye spray, that's in the skin and yeah. That'S basically how that works. You just put that on and hold that rat tail right in between the part so that it can look super clean and I'm taking this makeup brush here and using my rd09 Ruby, kisses cream foundation to really get this part. Looking crisp and clean, like I love doing this part, then you just want to smooth it out with your fingers how I'm doing here so it won't look harsh and boom, like you got a nice clean part foreign to keep this part looking clean and laying flat. I'M taking my Tresemme holding spray and my hot comb after I did just take some more of that wax. Stick and y'all seen how flat this got that like and then using the holding spray after with a hot comb like flat so flat so seamless. Thank you guys so much for watching this video hope you guys learned something and enjoyed watching make sure to check the description box for the information on this hair. This wig is from curly me hair and this 30 inches did me Justice on my trip, and I will see you guys in my next one: bye,


Comments
Miss Ivy Maraj💕: If only you knew how helpful you are❤️. I really need some advice I recently started wearing wigs and I usually do the bald cap method and all. It goes well for the first few hours but it then starts hurting when I flinch or squeeze my face I’ve tried exceeding my hair line cause I thought it was hurting due to me spraying over my edges. Idk what I’m doing wrong
Diamond Johnson: Idk if it’s the camera but that foundation shade looks perfect on your skin tone
Gods Gift To Earth: The sides don’t stay down because of the spray u use , I have that problem also when I use that holding spray
Daniellea: U make it look so easy
Victoria Elizabeth: swtg your installs give me life!
DARLENE MATTHEWS: BEAUTIFUL! BEAUTIFUL! BEAUTIFUL!
Fitima Tucker:
Nicole2: Did your hair frizz any due to the humidity? I want some BONE STRAIGHT hair. Thanks
Nicole2: Can you give a link to a bone straight HD pre plucked 5x5 closure wig, that you like? Thanks
SO MARVY: Where did u get your hot comb & are yo strip lashes or minks
KashDior: ❤️❤️❤️❤️❤️❤️
brittneyblows: yesssss maammmmm
Gorchess: What’s the name of the hair spray