Short Disconnected Haircut Women'S | Short Layered & Very Short Pixie Haircut Tutorial
- Posted on 03 August, 2020
- Pixie
- By Anonymous
Learn how to cut Short bob Tutorial for women. Short Haircut with Disconnected
Sharing great cutting techniques and tips
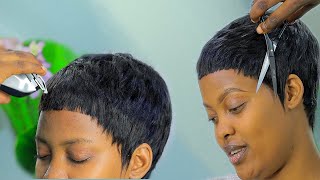
Hi elevate, it's morgan, roy um, doing a haircut for you, some education from my home to hopefully yours. I'Ve got my friend lynn here and we're going to be cleaning up her haircut. She has some current disconnection and because of quarantine, she's done a little bit of trimming on her own that i'm sure like most of you or some of your clients may have at home, and i'm just going to show you how to incorporate that. So to begin, i'm going to start with lynn's hair is wet and i'm going to just section off first, where her undercut begins and so really just making sure that my sectioning isn't taking more than what's currently been cut in lynne's hair. Because although she wears her hair short, she doesn't like for it to look too aggressive, always making sure to leave everything nice and soft. Now, as far as technique goes, i'm going to be using disconnection but going in with a layered technique, starting in the front and working around to the back. So you can see sort of right where all of this shorter hair begins. It'S also been pretty texturized and when we have something that's been texturized, it may not section away as cleanly for you, but the other nice thing is sometimes when you have irregular, sectioning or irregular up and down sectioning you're, going to get something. That'S going to blend better much like a highlight, so i'm just going to start in the front and beginning so that i don't take anything too short. First, just combing everything forward and i'm going to be using lynn's hairline. As my guideline and i like to take that length over the ear so that what it does is it just really shows off the cheekbone, because the beautiful thing about short hair on women is that it really gives us an opportunity to expose their facial features. So, once more and just for anyone, that's tuning in i'm, going to be doing a disconnected haircut here on my friend, lynn and beginning with this disconnection and first off just going through and outlining the length around the face and then from there i'm going to go In at a fingers length, so as i approach this, it is important that i'm using my guideline for the previous section and i'm combing it to the previous. So i'm using forward over direction and also using the fine teeth of my comb and the reason why i'm using forward over direction is that by using the proper over direction, it's going to slowly get a wee bit longer towards the back. I'M just over directing - and so here you can see where there is some of that excess buildup of weight, and what this will ultimately do. Is it's just going to reduce any of the weight in lynn's haircut because she does wear it in in a bob, really a variation of a box bob and then just coming around behind the ear? And you can see my sections are quite vertical and now, with a vertical section, what that's going to do is it's going to help me reduce weight now, if i continue with vertical sections all the way through center back, what may happen is that we'll lose a Little bit of the support for the top of the hair, and so what i will start to do is my fingers are going to work on a slight diagonal as i come towards center back and as i approach behind the ear once again, i'm just going to Comb, this hair forward, i'm just using the tips of my scissor so once more, i'm doing essentially a clean up of a disconnected short haircut on my friend lynn and i've already gone ahead, and i've done the front in here where first i went through and i Just outlined the length and then working a fingers length over directing previous to previous to the ear, and now i'm going to start working slightly more diagonal as i approach center back. I'Ve also got lynn with her head slightly tipped away from me, and what that will do is it's going to allow for me to be able to put my fingers in where i need to be cutting because of the natural shape of the head. This will begin to graduate as i approach the back and for definition of graduation. Essentially it's an angle where it sits longer towards the bottom or sorry shorter towards the bottom and longer towards the top and then just working to previous. So you can see where some of the texturizing is, which is also a great technique to collapse weight in hair. So we have more than one way to, of course, do a haircut and i'm working with an elbow down cutting position so my hand is nice and close, my elbow in nice and close to the body and i'm slowly moving around to center back once more just Looking for my guideline and what this will also do is there's been some previous disconnection. This is just going to blend that through a little bit more before i further refine with scissor over comb and just over directing to the previous, and you can see now that i'm in towards the back. There is more length sitting along the crown and the nice thing about that is it's just gon na give that beautiful question mark profile in lynn's haircut and then one more section and i'll be complete on this side, so just crossing over center back by one section. Over directing again just layering through and then looking to make sure everything is balanced. These little areas in here once her hair, naturally air dries i'm going to go through with scissor over comb to refine, but once more just to repeat starting at the front. For this first section, i began first by putting in my outline using really the cheekbone as my guideline, because i feel like you can naturally really contour someone's face by placing this section or this length in the most flattering length and then going through keeping my sections Very vertical layering and then, as i approach the ear, i actually begin to graduate slightly and then working all the way through to center back. So i'm going to drop down this section here and i'm going to go to the opposite side and doing the same thing on the opposite side. So once more, like i find oftentimes what hairstylists do is we over clean up people's sections and then what happens? Is their haircut becomes not necessarily what they intended? So i'm just going to use like a slight, almost zigzag type section on lynn here, just to blend what she already has, because again she likes her haircut. She doesn't want me to make it more aggressive than what she already has. She feels like how it has been cut in the past really works for her, and i find that with all of our really technical haircutting, that we're doing, we sometimes lose focus as to what our guests actually want to achieve. So, ideally, hopefully during some of our quarantine time, we've had some times to reflect and figure out what it is that we want to do as soon as we get back to work. Some of you may already be at work here in ontario. We have not been given the go-ahead just yet, but hopefully very soon, as we have massage therapists open and so we're all just kind of waiting. So once more just going through and placing my outline and then i'm just going to tip you away for me a bit and then placing my length so again, looking at the cheekbone and lynne has beautiful high cheekbones. Well, everything about lynn is beautiful and just going in and taking to give myself a guideline for my second side in order to keep my over direction the same, i need to work with my elbow up so also keeping in mind that i want to make sure That these first sections are very vertical and i'm going to slowly be moving my body towards center back and, if you need, you can always ask your clients, your model, to tip their head slightly for you. I think it's really important that we have our guests kind of be a part of the process if and when we can have them okay and then, as i approach the ear, so this is my last section. I will then be working more on a diagonal. So just coming through here so, as i mentioned just to reiterate, i'm doing a short, disconnected haircut here on lin and essentially what i'm doing is just blending in some areas that irritated her during quarantine, myself being included. I have a youtube channel that if you haven't checked out already, i was hesitant at first, because i know for a lot of salon professionals. They were not pro coloring, their own hair or even having their clients color their own hair at home. I just know personally how much it affects my my confidence when i don't have my hair colored. I also feel the same when i don't have my hair cut, so i was someone during quarantine. I'Ve colored my new growth twice now and i've cut my fringe. I think also probably twice so when you're going back to work, you know have compassion for your guests that may have done some of their own handiwork. Okay, so i'm just finishing off with my last section here, working just past center back, you can see there's a little bit of length which does happen when we work with over direction. So, just to reiterate, before i go into my scissor over comb so far on lin, we started in the front on both sides working through first by placing in the outline then working with a layer with my sections very vertical. Until i got to the ear working on a diagonal coming through all the way into center, back on the opposite side, fingers very vertical until i got to the ear then going in on a slight diagonal into center back now. For me, i have a tendency to work um on hair when i get to just go from wet into dry. I'M not someone that uses a spray bottle a lot, because i like to see the hair sort of expand dry a little bit on its own, because i feel like it's at that point that you sort of learn a little bit about the hair and so from Here i'm just going to be blending in with slight scissor comb. So then i'm just going to have it straight ahead and so with scissor comb so that it doesn't become too aggressive. I am using a dark blue comb and the reason for that is, i can see lynn's blonde hair through this comb. If i was using a white comb, for example, it might be very hard to see what i'm doing and again, i'm just blending this through a little bit. I don't want to take lynn's hair aggressively too short or take this area too high, and so with my comb, i'm really just working at the shortest piece and then working outward and that's going to help me retain the length that lynn and i both want in Her haircut, okay and then just doing a little bit behind the ear as well and then doing the same on the opposite side. So center back really was where my guideline was so just looking at my shortest piece and then a little bit just behind the ear. Now lynn does have nice light hair, and so hopefully you are able to see um her hair, getting cut on the iphone all right. So then just checking for balance, making sure that everything looks good and having short, hair myself. I know that i like to have it short, but i still like to make sure that it's going to be framing my features properly and really there's sort of an ideal length that most women have lynn doesn't want to take too much off of the front. And that's because of where it's falling on her face is really sort of the ideal length. So, like i said it's just a clean up, it's a trim! So then, just taking with my trimmer, i find the trimmer does the best job of removing those little hairs. That like to sit so close to the ear, and if we take them off with a scissor, we can almost go too high or you can run the chance of nicking your guests, your model, and no one wants to do that. You'Ll notice that i didn't do any clipper over combs from that hairline and that's intentional simply because i don't want to take it too short and i find with clipper over comb. You can um take something a lot shorter than you want to. In this case. There are times where i will use a clipper there's times, even when i will use a clipper and a guard to save time or just for it's the best technique to use at that time. So before i take this down just to reiterate one more time. This is a short disconnected haircut for my friend lynn. I'Ve gone through, and i've used the outline along the front versus my guideline. Then working a fingers length vertically to the ear coming through on a diagonal working with over direction so that i eventually get a tiny bit more length just through the crown so that it'll support and give lift to the top. So i'm saying that i'm going to go into the top and spraying lens hair down just a little bit of water. Well, one of the things that i think, uh, quarantine or kobet has been good for, has been sort of this uh time to take a break for education um. I know that i've been watching a lot of things from elevate. My friends there and i've seen a lot of my friends doing education and i felt very uh honored to be asked to also uh share sort of what i'm thinking about and what i'm doing and uh. I hope you all like it as well. So, as i go into the back here, you can see that there is disconnection okay, and i really want to think about how this length in here is going to translate through the front and sides because for lynn she doesn't want to take it really much shorter Than where it's falling just below the chin, you can also see here where it does come up in length. So i want to think of something that's going to bring that together. Also, that will reduce some of the weight. Lynn has beautiful full hair, and so what i'm going to begin with is actually going in with a layer so not doing anything into my outline right away. So with a layer starting at center. Back, i'm going to choose a length so that when this falls it will still overhang the disconnection below, because if i take it to here, it's going to be way too short. And it's not going to be as flattering so. I'M going to elevate straight up at 90 and then through here i'm going to choose my length, and this is also going to remove any dryness so oftentimes for blondes. We tend to get some extra dryness on the ends. Myself included right, lynn, using those fried bits. Um use wonderful products. I'Ve got some leave-in conditioner in lynn's, hair from the neutral punish line from aveda, which, since it came out, i've been loving, okay, so just over directing so essentially what i'm doing is a layer in the back that start shorter. That will work too longer in order to retain that length in the front of lin's hair. My over direction is always towards the center. So when i'm even working on this side, i'm going to leave my fingertips pointing down, because that's going to help me so i'm not lifting too high and i'm going to comb towards my previous. So my comb is really just on the one side. It never comes from this way because it comes this way. It'S going to naturally come towards me and because i have this wonderful disconnection when i'm over directing, i really will run out of hair quite soon so again, just those pieces there. My cross check is to stand behind and i need to elevate at the same place that i cut it at so going through doing a little bit of cross check. So if it is a tiny bit longer - and you can see that i'm lifting to that elevation all right so then i'm going to drop that down and take a look and just see now how that's really folding or beveling um in towards the round of the Head because we have the removal of weight that we get from the disconnection so now working towards the top so again with lin, she wants to retain length, and so one of the best ways that i can reduce some of the bulking through here is to work. Some disconnection through uh is to layer throughout, so how i'm going to do that is actually start through the top, so that i can maintain as much length as possible and i'm going to over direct this hair back. So this is where, using the last piece from the back as my guideline, i can check to see sort of how short it was in through there that's my hand, so you can see it and i want to remove sort of this hair and through here the Other thing i'm looking at is sort of what type of hair is it um? Is it really dry? Is it most likely to tangle, but i don't want to remove too much so very vertical. My section is okay, so to reiterate, i'm doing a triangular layer through the top, so i've already done the back, and now i'm going to over direct previous section using a little piece of guideline from the back and i'm working with my fingers on an extreme angle. To retain all of my length through the front - and this is going to leave lynn's perimeter all the way through, so that she doesn't have to worry about losing any length how you doing - okay, all right so over directing - and you can even see just on that. Last piece very little coming off, and now i like to take this approach, especially when i have a guest that may not really want to have a lot of hair cut off. And it's going to allow for me to remove bulk, but still retain all of the length so for the opposite side opposite side. I want to approach a little bit differently. Reason being is, there's so little hair on this side compared to the other, because lynn, like myself, i like to wear a really far parting and so often times. You need to consider your parting when you do your haircut, so i'm going to be taking the last piece from the back on this side and i'm going to be layering with a concave so coming up and this time i'm going to really lock my fingers in And i'm going to lift lift, lift, lift and anything that sits out i'm going to remove so a concave retains all of the length through the bottom, but removes any weight. That'S going to be sitting on top now with backward over direction. So i'm stationary also in this place, i'm going to be overdrafting everything back stationary so that i'm not to remove too much and in the very front doing the same and for safety. I'M also going to just do a little tub at the front here to make sure that i haven't removed anything from the perimeter in the very front. Okay, so length has not changed in the perimeter. We still have that sitting in nice and soft. However, now we have a more blended line, that's going to be coming through. It'S not a severe line. Lynn likes her hair to be nice and soft, and now one of my favorite parts. Let me um we're going to go into styling so for styling. Today, i'm going to relax lin's hair a little bit by using the smooth infusion style, prep smoother. I think it's important that we show our guests how they can style their hair without heat, because it's summertime and uh. I know that also as far as um during covet, a lot of salons are not using blow dryers, and so i thought it would be important to show you a way that you could be styling your guests, hair, especially short, hair um, without using a blow dryer. So why i've chosen to use the smooth infusion scallop prep? Is it's just going to relax the hair? I have naturally very curly, hair lynn, and i were talking about that because she's one of the few people that have actually seen it dry naturally - and i was joking - that it's like a dandelion so for myself um. I think it's really important to first use a product. That'S going to soften the hair. Limb has a little bit of curl just in her front hairline, and so i really want to make sure that there's enough product to really kind of soften that and then in addition to my product that has softening, i want to add a product with hold and There'S different ways that i can do that if i don't want to have a really crunchy feeling um, i can go in with something like a spray gel, something like be a bigger volumizing tonic or i could use a hairspray which is just a finishing product um Or i could use a gel, the only thing with gel is it tends to be really firm and i don't think i want to go in with something so firm, so i am going to use my volumizing tonic and i'm just going to spray that hold on A second, so i'm just going to spray that throughout the beauty of this, is that you're also teaching your guests a different approach to how they can sell their hair and it you know, you'd, be surprised if you give people um a chance to try something new. Most of the time people are open to trying something and i'm going to also ask lynn to help me. So i'm just going to pass you a couple of these really lightweight aluminum clips. So if you want to pass those to me, just give you a couple more and so from here i'm going to use my wide tooth comb and i'm going to set a pattern in lynne's hair. So lynn typically wears her fringe, sweat to the side. Okay. So if i want to have something that's going to be more sweeping, i can go ahead and i can set that now. I like to have a little bit of my teeth mark showing because i feel like it just makes everything not look too flat too pancaked. Okay, so just placing my first foot and why i'm using these aluminum ones is they're, so nice and light okay and now keep in mind. I'M not finger waving, lynn's hair, i'm really just giving it an opportunity to lay a little flatter okay and then to have this area lay flat. If i was to leave it down, naturally it's going to kick so essentially what i'm going to be doing is like a wig, wrap, okay or a wet wrap where i'm just going to be taking this hair back and then again just loosely clipping that hair down Now, because i'm doing this um from wet - and i do want it to dry, i will be using a little bit of a diffuser to speed up the process, but you could um. You know like encourage your guest at home. This is an opportunity for her to do something new, okay. So now that i have that in place, i'm just gon na go in with my diffuser. So again, once more, if you were um not on a time crunch, you could just have someone it's a beautiful day in toronto. They could be outside so that you get an idea, not too much. You don't have to wear a problem. Our hair dries just to remove anything that would be itchy. I know i've been using um. The aveda dry shampoo is actually wonderful at removing any little baby hairstyles and i'm just going through, and i'm just checking for temperature making sure it's not too hot. On your head, also just making sure that the air is being guided through, because if you have anything too too flat, it will take a long time to dry. So, just even though i have the hair being held down with the clips, i am just going through and making sure to dry so that i don't get uh marsh from my hood as well whatsoever. So what i will do is, i will make sure, to post what i will be sure to post a finished result of lynne's hair, but for now what i'll do is i'm just going to recap so very quickly, um? This is a short haircut with disconnection on my friend lynn to begin her haircut. I went through first just by placing an outline working, a fingers length towards the ear and then coming through with diagonal sections doing that on both sides, then moving along to the top sectioning away, the crown working with a layered section, so elevating 90 degrees off the Crown working previous section to previous section, so i can retain a little bit of length and through the sides, then working along to the top standing on lynn's left side so that my fingertips are pointing down to where my shortest piece will be and working. From short to long, so my fingers were really angled down in this section in order to keep as much length as possible in the front working over directing to a stationary point so that all of the outline length will drop through once that side was complete. I came around to the opposite side standing in front so that this way again, my fingers are really pointing toward the shortest place on the head and then over directing with a stationary guideline to this point here. So thanks so much for tuning in i'm going to finish off drying, lynn's hair, actually we're going to go sit in the sun and uh. I hope to catch you later and happy monday to you all.

Comments
Nancy Fehner: Great tutorial! I loved your explanations. However, it was difficult to hear a lot of the time. You may want to invest in a wireless mic so that the audio is consistent.
Dana Michalkova: Absolutely precise meticulous job ....only I missed the very final hairstyle on dry hair but I believe that she looks gorgeous! .... her back must pain on that uncomfortable chair ♀️♀️♀️
Doris Atcthley Walls: LOVE THE WAY YOU CUT.IT LOOKS ADORABLE ON HER!!
Anna Gonzales: Thank you, Love the detailed Tutorial! :) Love your work and style.
Joan Gentile: I love this haircut!! Wow!! You do a great job!!
Amanda Witherspoon: Thank you for this video. I wish that they were all like yours. I love when you talk and explain. The other channels have obnoxious music the whole time.
ob55 c10: Absolutely gorgeous,I'd pay 500 for a haircut from you
ALVIN TEOH KOK BOON: VERY PRETTY AND GORGEOUS, THANKS FOR SHARING...LOVE IT <3
Carlos E.: Parabéns pelo trabalho!
Elizabeth Garcia: I can tell your very professional and passionate because caring is key when cutting hair short! Good job
Vivo Phone: Wow beautiful haircut tutorial, like it thank you for sharing
Elizabeth Garcia: Not only that your beautiful outside but beautiful inside!!! God bless you
Janet Woodford: You were very good on explaining in details the way to cut but the sound was terrible! When the camera was close I could her you much more clearer. When the camera was further from you it sounded like an echo chamber! Your voice sounded so far away and muffled. It was a great showing video but not so good on audible.
Ágnes Kölesné: Fantasztikus precíz vágás!
Ana Silva: Maravilhosos
Maryam Hashemi: So beautiful job ⭐️⭐️⭐️⭐️⭐️❤️
Mirta Middi: Buenisimo!!!
Manila S Samek: Thank you very appreciate you .
Gordana Mladenovic: Bravo
Star Seed: My favorite cut yet!
Star Seed: I wonder how this would look with my layered pixie grow out? After i just watched a different time lapse video of growing out a pixie
sharabe siah: Amazing tutorial
fatima jnaid: Perfecto
Paula Betiol: I love it! Thanks for sharing. What's the produts names
Fernando Y Amy: Perfect haircut!
biglouis: Nice technique what is your Instagram name?thank you.
Elizabeth Garcia: Amazing
Estela Luque: Casi no se ve Muy bien,,, lo siento,,, pero Muy lindo Corte
Eden Macapala: What about bob hair cut with a flat head...but i want this kind of hair style for me..
Leslie Kwan: Love this hairstyle
Yklya Ivanova:
Caroline Gillatt: Errr...hello...how about seeing the hair when it’s dried and finished ???
Christi Cagle: Very hard to watch once you got to the top section-- the camera was too close!
Ronni Paints: This was so hard to watch. Try watching at double speed. Do you realize that you explained the same thing like 5 times. It's a video, one time explanation will do. Keep in mind the viewer can replay it over if they miss something.
fatima jnaid:
Glass Flower: Becareful having this done to much you may go Bauld
Barbara Skwarek: Brak czystości w sekcjach oraz w wyczesywaniu ich podczas strzyżenia powoduje że fryzura jest niedopracowana. Pozdrawiam z Polski
The Palmistry & Astrology House.2918: Pl also show the blow dried look
Любовь Иванова: Очень плохая запись,надо постараться сделать красиво
Cartel Jewel: Omg. The chairs have no backs to them. Ouch!
Dede. Terrebonne terrebonne: Great haircut
aide cantu: ❤️❤️❤️❤️❤️❤️❤️❤️
Annice Wheatley: Brilliant
Ирина Муравйова: Стрижка совсем не та, что в начале ролика, мастер ничего фактически не показала.
Kelly Reinhold: Why isn’t the artist’s name credited in the video? She said she has a YouTube channel but we can’t find it cuz her name isn’t anywhere.
Angie O'Shields: Do you have an Instagram?
Saska Liimola: Uuh. Wow. ❤️
Ma. Luisa Cueto: I like this haircut
Denise Saunders: The hairdresser looks like a young madonna.
Alina Kerimkulova: Очень долго говорит
Pabla Perez: Geqe Qeh Mp Me gustó le. Quedo. lindo
thaophuoc hinh: talk too much.... just do it
Norma Lopez: Su cabeza es todo da hay clientes con cabeza plana de atrás
Audrey Yo-yo: 20:56
carmelita Martinez: Bla bla bla apurate a terminar el corte
Yehya Omar: