Lemon Pixie Cut Wig
- Posted on 02 March, 2020
- Pixie
- By Anonymous
Social media accounts
Instagram-jodyjgoodaz
Hair page-hair_by_jodyj
Hey guys welcome to my channel!!!
The name of the makeup I’m wearing is Juvias Place
The unit is from Omgherhair.com
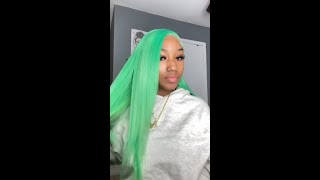
The color I used for this video is Ion color brilliance in lemon and medium brown for the roots.
#pixiecut #ioncolorbrilliance #shortcutlacewig
Hi guys this is your girl, jody dia, and in today's video i'm going to show you how i turn this wig into a lime. Green pixie cut wig, yes, so this is going to be my first time doing a pixie cut, um unit and um yeah, and also in the color lime green um. I was gon na purchase a new week to do it, but i'm like. Why would i because i already have this one? I'Ve had it like for maybe no three going on four years now: um, i rarely wear it and you know, instead of buying a brand new one, i'm just gon na use this one. This one was originally black. I purchased it from omg her hair. I think it was um for a hundred dollars because it was like a 12 inch. Yes, a 12 inch and then i turn it brown and then i turn it into this color. So just like a dirty blonde type of color with a little darker roots. But what i'll be doing in today's transformation is doing some darker roots like a medium brown, darker roots and then again i'll be doing the pixie cut so i'll literally be cutting everything off and just leaving just a little in the front, so stay tuned. So this is the wig after it is wet. So that's why it looks a little trashy and i want to give a big shout out to my girl, jada she's sitting in today. Just so, she wants to learn how to do this, and i want to give a special thanks to her because, of course, guys i'm not tech savvy at all and if it wasn't for her all the editing, all the making of my youtube channel everything that goes Into me, posting a video is all you know kudos to her, so yeah, i'm digging her up today, so um. Now that i have the unit on my head, you want to make sure that you have your razor comb and you have a scissors and i'm so scared because i haven't. This is a big step and i definitely do not want to mess up. So i'm just gon na hold the scissors because remember we're doing a pixie cut, so i'm just doing a big chop. Oh i'm nervous, so i'm just cutting it from here yeah and i'm just gon na continue towards the back and then what i'm also gon na do. I'M gon na do some dark roots, so i'm gon na darken the roots a little and again, as i was saying in my video before this one. Well, not my video before this one in my other, my intro i'll, be using a lime. Green, yes, lime, green! I don't know what i'm thinking but yeah lime green, so yeah, i'm just cutting it off pretty much so that i can use my razor comb to do the pixie cut. So i'm just going on to this side and i'm just cutting it pretty much on my head and then i'll be like doing the layers and everything on my mannequin head and i don't want the front to be short. I want it to have kind of a little. You know thing at the front right here, so the more i cut it down the shorter. I want it to be. I'M gon na be using the razor comb, i'm nervous, so here i'm just using the razor comb. Just to make sure i get the type of layer type of cut that i'm looking for yeah, that's larry, no one jada! Are you praying for me we're doing it together guys? This is definitely an experiment. I'Ve always liked the pixie cut and the other day i was going through youtube. Looking at the pixie cut, and i saw someone that had the neon and i'm like how cool is that that is definitely risky, and i definitely want to try it. So here we go yeah so yeah. This is kind of like how i want the front, i'm just going to go down a little shorter, a little shorter, not too short, though, but a little shorter. And then, if you're doing this, you want to just play with it just to make sure that you're comfortable, because once it's cut then there's nothing. We can do once the damage is done. We can't fix it. You just have to go from here, so i'm just cutting it down and i'll be right back. So at this point guys, i put it back on my head just to make sure that everything is in the direction that i want it to be in, and i'm just continue cutting just to make sure that you know i'm pretty much. Just lining everything up pretty much based on the shape of my face and so far so good. I'M not scared, it's not glued down or anything. So that's why you can see here just kicking up, but so far so good, i'm just continuing to use my razor comb just making sure it's not too short. But then again you know in a layered manner so that even when i cut it down, i can still maybe do a little finger waves. I can just wear it flat or change up the style and stuff like that. So it's a working progress, i'm just using the razer comb to thin it out a little, because here is a little thick, so i'm just using the comb to thin it out and i'm gon na continue. You know doing that until everything is how i want it. Okay guys, so this is the look i'm going for just a little shorter on this side and then a little bit more on this side, i'll cut it down more when i'm styling it, but for right now um! This is what it's going to be until i do everything um again, the color that i'll be using is yeah lemon. I'M scared but excited, and this lemon is from um color brilliance, iron, color, brilliance and again it's a semi-permanent color and it's in the color neon and then what i'm gon na do to to, because i'm going to darken the roots a little i'll be using. Also, the iron color radiance in a medium blonde, just to darken the roots before i you know put the neon green on it. So what i'll be doing now is to get everything ready to do my mixture for the dark roots and then once the roots is set, then i'll go straight on to with my lemon green. I know that we have everything mixed, i'm just gon na use. My little dye brush or if you have something that is smaller, that's more comfortable, then you can use that. But this is what i'm going to use just to apply the dye to the roots, to give them the darker root. So i'm just taking my time and just making sure everything is evenly applied and pretty much you just want to make sure that the dye is just to the roots. Because that's all i want to be dark, it's just the roots, because everything else will be neon, and i got this inspo from this other youtuber she's jamaican and she did it the same dark roots with um the lemon green here and trust me. It was the bomb, so i decided you know what i'm to recreate that with a little different from how she has hers, and i'm just going to do one for myself. So you just want to make sure that everywhere that you want to be dark is coated with the medium brown um dye and then once you have that all in then you just let it sit for a couple of minutes. Um the bottle says 10 minutes. So i'll just cover it and leave it for 10 minutes and once the color is how i want it, then i'll just wash it off before adding the green color to it as well. Okay - and this is how it looks you see - it looks a little darker than here so now - i'm gon na rinse it out literally from my bathroom sink, i'm just rinsing it out just with warm water and i'm literally just doing the ends, and this is the Final look guys, i'm totally feeling this pixie cut. I love everything about it. I loved how the color came out. I love how the roots are darker, but not too dark, because that wasn't the look i was going for at all. I totally love it. You know the cut of how i was so nervous. It came out perfectly i'm just going to turn around so that you can see the back. Yes, that's a 360 of the unit. Again um i've had this unit for over three years, i've. It was originally black. Then i turn it brown, then i turn it blond and then no to this lemon color. So it isn't green. It'S more like of a yellow kind of green kind of color um on the box. It is um, it says it's lemon. So that's the name of the color and it's from ion color brilliance and i didn't do the water method. If you guys were wondering, i didn't do the water method, which is a lot easier in most cases when dyeing, because this um dye wasn't a liquid type of dye, it had some form of it's a cream dye so putting that in water. I don't think the color would take that much. So that's why i decided to just you know, use the brush and just apply it the regular way and then again with it not being liquid it's cream. Then it would be a lot easier to manage because it would be like pretty much perming your hair, that type of consistency, that's what it has, as you saw in the earlier video. So again, i'm just gon na do a little close up. This is the color. It is absolutely beautiful, and then i love how you know the brown roots highlights the color of the hair, and then it just highlights my face. I was a bit skeptical because i was saying the color. I don't know if it will fit me because in the video that i watched previously, that inspired this hairstyle um, the roots were a little darker and then the dye looked and the the lemon color looks a lot different. But i'm totally happy with with how mine came out. I used two off. I bought two of the medium brown um cream dye to do the roots i i use both. No, i end up using only one and then i bought three of the lemon color. I used all three because what happened? I did the initial video last night and because it was dark, i think i didn't let it sit long enough. So the color didn't come out that good. Then this morning, when i woke up - and i looked at it - i'm like that's - not the color i was going for. Luckily, i only used two and i had one left because i only purchased three um. I definitely went ahead back with the color and just redid. It let it sit for an hour and then put it under the blow dryer so that it could dry under the blow dry, because this is not, i haven't curled it flat iron, it or anything. This is just me, you know wrapping it down when it was wet, putting it under my sit under blow dryer and just letting it dry so that it gives me this bouncy type of look and, of course, if you wanted to switch the style up, you can, If you wanted to do something like all back, if you wanted to do like a finger wave kind of style, you can do that. I'M going to play with this more as i get along just to make sure trying out different styles, just making sure you know this here, you know fits everything that i was looking for again this here, i purchased from omg her hair. It wasn't on aliexpress. They had their own website and trust me. I paid like a hundred dollars for this back in the day because, as i said, it's been three years and it's one of the best weeks i've ever purchased. It takes color so good because, as i said originally it was black and then i did it in brown and it took it like a g. I then went a step further and doing it to the blonde color that i had previously prior to me. Adding on this lemon color on it and trust me, it took that perfectly and then again you see here. I took it another level and put it in this color and it came out good as well, so i do recommend them omg her hair dot com, their hair is good um, based on my experience with this unit, and i would definitely recommend them again again guys. Thank you so much for watching, remember to continue to subscribe, sharing the video liking and then comment below what other videos you would like to see and for a lot of persons asking me the makeup that i use in my videos the makeup that i've been using. I'M gon na link it below, because i totally blank out here for a second um and totally forgot what what it's called but i'll link it below the makeup that i've been using in all my videos, because i use a variation of different makeups. But for my youtube videos, i'm only be using a specific type which i'll definitely link below again. Thank you so much for watching and have a great day.


Comments
tista williams: Loving the pixie color❤️
Inspirational by Marie: Omg this is beautiful it suits your face the cut and colour is perfect
Vinesa Beckford: Yesss so cute and different for you love it
Amarla Johnson: Loving it
tista williams: ❤️❤️❤️❤️
Glitzeeify: You are the best!
Kimeisha Campbell:
Richard Reid: