Retro Pixie Curls Tutorial
- Posted on 02 January, 2017
- Pixie
- By Anonymous
Retro curls on my chemo hair regrowth. I am at a pixie length now and finally able to do more styling. This look was achieved using using foam rollers, brush rollers and pin curls.
Learn more at:
MyCancerChic.com
Facebook.com/mycancerchic
Instagram.com/mycancerchic
Product Used
Foam Rollers - http://amzn.to/2hIqKFj
Clips - http://amzn.to/2iyCmfm
Brush Rollers - http://amzn.to/2iUQfko
Styling/Curling Brush - http://amzn.to/2iyLaSm
Dove Men's Sculpting Paste - http://amzn.to/2iUVeBS
Mini Straightener - http://amzn.to/2iX5DB6
Umberto Shine Spray - http://www.target.com/p/umberto-shimme...
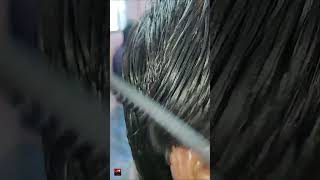
If you want to see how I created this retro curls look keep watching. I started with clean damp hair before styling. I use pure ology strength cure shampoo and conditioner. Today, I'm going to be using the con air foam rollers and these double pronged clips from Amazon. I'M starting by brushing my hair to the side and doing a deep side part. I'M then going in with this comb and separating small sections, starting at the front and the top. I'M then, starting with the biggest foam roller and doing my best to roll the hair along that roller. It'S really slippery! So next time I'm going to be using a setting lotion to help with that and help the foam roller cling to the hair, a little bit better trying to keep that hair as smooth as possible. While I'm doing the roll, because that's going to impact the shape of the curl later continuing with this along the top in the front using those big rollers where my hair will allow it as I'm getting down towards the sides, I'm using the medium size, the blue Ones, because I just don't have enough hair on the sides, there then adding a few pin curls, where my hair isn't long enough for their foam rollers in the back. I also want to use the larger foam rollers to create more volume at the top of my head in places where my hair is too short for the rollers I'm going in and wrapping the hair around my finger to create, pin curls, creating a couple more pin. Curls on each side, just to give it a little bit more curl on the sides, I'll also go in afterwards to make that a little bit better in the back, I'm adding a few more rollers down to the bottom. My hair is really short they're in the back. I did go back in and add to brush rollers in the back, we'll see how those turn out now, I'm using my hair dryer just to dry things a little bit and curl that back under since I wasn't able to fit any curlers in that area. I want to make sure that that dries, how I want it to stay. You could continue to dry your hair with a hair dryer or you could just wait. I decided to wait for a couple hours and here's how it looks. I'M now gon na take everything out. I really like the way the larger rollers turned out. That shows that, as I get a little bit more hair on the top it'll look much better, it's just hard to get a curl on those areas that are much shorter. On the side, I also need to put a bigger roller there in the middle on the top there, you can see it's a little bit flat. I'Ve got these pin curls on the sides. I'Ve got to take out, and these are the brush rollers that I put in just to give a little volume in the back, even though that hair is so short now, I'm going in with this styling brush to brush out the curls and give some additional volume. I'M then gon na go back in and shape those curls with a pomade. Today, I'm using the Dove men's Kerr sculpting paste just using a little bit on my fingers to shape those curls and add some definition. Since the sides look a little wonky, I'm going in with my mini straightener, just to fix a few spots, they're just twisting the straightener to create a little bit of curl there on the side. Also fixing that piece around my ear curling it in using a little bit more sculpting paste just to define the part there on the side now using my dove argan oil just to smooth all those flyaways and make the curls themselves just a little more unified. I'M loving the way that top looks there with the big curls and it kind of sweeps over to the side again just fixing one more part over there on the side by the ears. Those are always going to need a little bit more work and spraying. Some of my finishing shine spray and I'm all finished. I hope you enjoyed this tutorial and the finished look please like and subscribe below. If you'd like to see more videos like this and visit my cancer sheet com for more


Comments
ChicagoSusieQ: This is adorable! I can't wait to try this on my pixie cut!
Usually Nonsense: Stunning!! Super love this shape.
Velma Wallace: Love it!
ALBERTO ZACARIAS: Lovely!!
devin1585: you look wonderful ;)