27 Piece Quick Weave Pixie Cut #Wig Tutorial | Using Outre Velvet Tara 2.4.6 @Allthingswithtip
- Posted on 11 December, 2022
- Pixie
- By Anonymous
#protectivestyles #27piece #quickweave
Hey there, thanks for supporting my channel. Make sure you SHARE, LIKE & SUBSCRIBE!
Donate - https://www.paypal.com/donate/?hosted_...
Cash App - https://cash.app/$AllThingsWithTip
Frequently Used Products/Tools - https://amzn.to/3gtd4il
Outre Tara 2.4.6 - https://amzn.to/3iWmXGn
Qfitt Wig Making Cap - https://amzn.to/3FHoysz
H2Pro Ceramic Flat Iron - https://www.h2probeautylife.com/produc...
Shop Obsessive Tees: https://obsessivetees.com/
You can follow me on Instagram @allthingswithtip - https://www.instagram.com/allthingswit...
Important Links here! https://linktr.ee/allthingswithtip
Grow your Youtube Channel with Tube Buddy : https://www.tubebuddy.com/allthingswit...
#quickweavewig #pixiecutwig #pixiecut
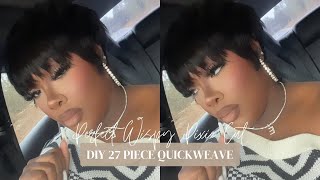
Hey y'all welcome back to all things to a tip in this video. I did a 27 piece, quick wig and if you guys are interested in seeing how I was able to achieve this, make sure you stay tuned. If you are new to my channel. Welcome. Welcome! Welcome and if you are returning welcome back y'all, thank you guys so much for your support. I have reached 1 000 subscribers. I am super super excited, so thank you guys so much for your support make sure you go ahead and like And subscribe, and I will see you guys throughout the video all right guys, so we're gon na go ahead and get this video started. I purchased this um Ultra Tara, 246, 27 piece off of Amazon and just showing you here some of the things that I also purchased with it. I wanted to try to use the clip so that it will hold better just in case um. I didn't actually need them later on, but I am going to use them for another wig that I'm going to create so I'll put everything in the description. Just in case you have questions I'll put it in the description under my affiliate link on Amazon and then you can also check out my frequently used products and tools. So I went ahead and started out with the wig cap, and then I place the um. I just use the grocery bag to keep it from sticking, as I was gluing the pieces down on my head. So this is what it should look like. You should have one wig cap, you should have your plastic bag or you can do a shower cap, and then you want to put your wig cap, your wigs on cap on top high or shape mold to the shape of my head, and then these are all The pieces they come in two four: six, that's two four and six inches of hair. I started out with the four inches in the back and then I use the rest of the six inches, and then I also had some left over here that you guys would see me adding in here. I'M just straightening it out this kind of helps with me, placing it so that it won't get glue on the ends, and then it can kind of lay straight, and then I can kind of see as I'm cutting it as well as far as it Spritz. I use a lot of spreadshaw. I try to Spritz the whole um cap as well as putting Spritz on the track and on the spot that I'm putting the track on. So I don't do this every time, but I try to do it as much as I can remember in order for it to hold in place and have its longevity so guys just keep watching I'm going to kind of speed it up in a second. Until I get to the top and I'll be right back with you guys, okay, so now that I have gotten to the point um just for the short part, I want to go ahead and try to cut this down as much as possible um to the length That I want it in the back. I try to keep the um, keep the top part short and kind of just kind of have to take your time and feel your way through, and then I wanted to leave that bottom. Half much um not much longer, but I just kind of wanted to give it like a little natural look um on the bottom. Just so it wouldn't be so straight and stiff so trying to give it a little natural y'all. This was taking forever. I mean taking forever um. I was just kind of getting tired, but um. You know this is my third time doing it. Second time doing it on myself. So you know it's a learning process and I did purchase a razor, but I couldn't find it um. So hopefully I can find it or purchase another one and then I'll do that within my next 27 piece um, but just keep watching. I hope that you guys are enjoying this video make sure you go ahead and like And subscribe y'all be my newest subscriber. I really thank you guys for your support right here, I'm just putting on some Nairobi and I'm just tying it down as if you would do if you had um a short hairstyle just wanted to mold it. So I dried it and then I molded it to get the look and see how it was looking so far, and I know y'all see that Gap at the top, but just ignore that for now, because I did go back and fix it after I took the Wig off and finished styling on my mannequin, so I went back and fixed that part, so I don't need y'all coming for me in the comments. Please I'm just messing with you guys um like I said this is a learning process, so I am learning and know what to do better next time. Thank you guys for watching continue to watch thanks for your support, all right and as you can see, I started on the top part and I just started using the six inches um, so that was the longest length in the pack. Then I went in with some hair that I had left over. I believe it was like a um either eight or ten inches that I had left over um just wanted to add some color in here, so it wouldn't be so Bland. I want to kind of spice it up a little bit. I think color looks great on my skin, so I just kind of went back and forth and added in a little color, then added in a little black added, a little color added a little black um and and then I just close it. It came with the closure, but I decided to just close it up on my own and I'm just going in here just trying to cut it down. This was so much hair, so I needed to thin it out and, as you see when you get to this process, you can, if your wig is mostly dry, you can go in and take that piece off so that you can make sure that it is fitting Your head and then you can get it as flat as possible, but you do want to kind of leave that on until it completely dries or if you have a mannequin head like I have here, you can put it on the mannequin head so that it will Not shrink you want it to still be the size of your head, all right guys, so I'm going in with the curling iron I'm using my new H2 Pro. I am enjoying this iron so far, um still just kind of trying to figure it out with the natural hair, but I'm loving it on my hair. You know and some other um heads that I styled um so just going in here and curling this I did layer it a bit too much a little bit too blunt. I was going more for a bowl cut, but I cut a little bit too many layers in here and it kind of was a little bit choppy, but I'ma get it right. I'Ma fix it um, so just curling it here all over and then I'm gon na go in and style it and then that'll pretty be much it guys. Um. So just continue watching to see how I style it. Thank you all right guys. So this is pretty much it. This is how I styled it and I'm sure I could probably curl it tighter or do it looser, wear it different ways, but this is what I came up with um on the back on the side. Once I took it off again, I did end up cutting those down a little bit because it was a little bit too long behind my ear, but other than that. I am pretty happy with this wig. I actually wore it out the same night and I felt comfortable with it um it did move like the cap, the wig cap that I used. I am going to use that again um, so I had no issues out of it. It didn't slip or anything guys. I hope that you guys enjoyed this video. Thank you so much for watching make sure you go ahead and like And subscribe, and I will see you guys next time. You know what it is stay blessed. Peace! Thank you.


Comments
Xoxo_KaleahaBraids: Looove it ❤
Jesse K-9 Scent Detection Training: Beautiful Smile ma'am ❤