Feelgrace Wig From Amazon Styling | Affordable Amazon Wig (Short 99J Ombre Wig)
- Posted on 30 April, 2020
- Pixie
- By Anonymous
Check out my first impressions of an affordable human hair wig purchased on Amazon. This is a honest review of a unit I purchased. This is not a sponsored video but the link listed is an Amazon affiliate link which means I make a small percentage (at no cost to you) if you choose to purchase products.
Here's a link for my full review. I will update here after I wear the wig for some time.
https://itsterreana.com/affordable-ama...
VIEW WIG HERE: https://amzn.to/2W6hzCQ
WIG STAND: https://amzn.to/2XoQsCi
WIG HEAD: https://amzn.to/3cPCAHT
If you enjoyed this video please consider subscribing HERE: https://www.youtube.com/c/itsTerreana
WEBSITE:
SHOP MY AMAZON FAVES: https://www.amazon.com/shop/itsterrean...
TRY AMAZON PRIME FREE (30-Day Trial): https://amzn.to/2XHWeR6
WANT TO MAKE $$$$ ON ONLINE PURCHASES?! Try Rakuten, it's a super easy way to get cash back on purchases. Get a $10 cash bonus for signing up with my link: https://bit.ly/rakuten_itsterreana
MERCH:
https://www.redbubble.com/people/itste...
HANG OUT WITH ME ON MY OTHER SOCIALS
IG: https://www.instagram.com/itsterreana/...
FACEBOOK: https://www.facebook.com/itsterreanapa...
PINTEREST: https://www.pinterest.com/itsterreana
HELP TRANSLATE:
http://www.youtube.com/timedtext_cs_pa...
Take a little time for yourself because you are worth it!
Thanks for hanging out with me today!
XO Terreana
Affiliate links are used, which means I receive a commission if you use that link and make a purchase (at no additional cost to you). My content is never influenced by brands, products received, usage of affiliate links, or brand partnerships.
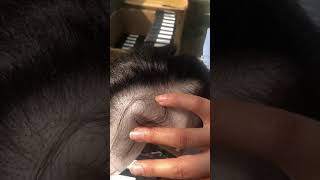
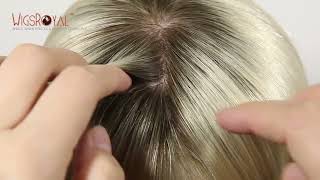
Quick tutorial hi, it's Trina, thanks for stopping by my channel today, I'm going to do a quick tutorial on how I fix up this Amazon wig that I just recently purchased. It is 12 inches and has a very weird haircut, yuck-yuck-yuck, my butt. So I'm going to see what I can do with it, so let's just go ahead and get started. This is the bag that comes in it's just a regular, clear plastic bag, and then it comes with this black netting came with this weaving cap. The color is really pretty, it looks like it was blended, pretty well, and the hair is really nice and soft. This is the inside of the cap. It has a stationary part right in the middle, that's already plucked, so there's, basically just a closure with this wig and the rest are all tracks. So I'm going to go ahead and customize this here's. What the wig looks like close up on the wicks in in the description bar I'll put a link to my website, where I have all the description and how much it was and all of that stuff. So you can check there if you're interested I'm gon na. Go ahead, and I think I'm just gon na do a nice bob on her right out by tilting the wig head down and also sectioning in the back. This will allow more volume here start with my shears slicing into it. I want this back portion of the wig to lay very very flat, so I'm taking my shears and I'm just cutting into it, and I want this at a nice diagonal. I'M just going to go ahead and clean that line up and do the same thing to the other side. So once they get my nice soft line, then I'm gon na go ahead and pull out the next section right now, I'm just cutting into the cut just to make this nice and soft and to reduce bulk. So this down here is my guide, so I'm just going to go right there. I, like I'd, like it's yet go just a little bit higher than that. Add an angle parallel to this line here and then, when they cut pull the hair up. I'M gon na soften this by just cutting into it and I'm just going to soften up the ends a little bit more since there's two different colors and I don't want a weird line. Let'S blend it a lot more, I'm gon na blend the sides here a little bit more by cutting a little bit deeper into it. So far, so good, that's blending really nicely do the same thing to this side now. So I'm gon na basically keep doing this until I get to this portion of the wig check in and make sure it's, nice and soft, and that my line is nice and even then I'm gon na fish, the rest of the cut with the Clippers and a Little bit more shears, this is where it right now. I honestly don't think I need my clippers. I think it's coming out really nice. So what I'm gon na do is just clean up this line here, but I'm gon na do it with my share. So it's nice and soft. I was thinking about doing something a little bit more blunt, but I think soft is probably gon na be my way to go with this one. I do want to keep some link in the front, but it's just so thin. There'S really! No point yeah, that's much better go ahead and do the same thing to the other side, just with shears. The cut is done when I go ahead and pluck the front just a little bit. It doesn't eat that much, but I just want to try and make this look a little bit more natural. The baby hair situation is really perfect. So anything to make this front part look better. That'S what I'm gon na do. So that's better! I'M gon na go ahead and pull out all these baby hairs and try and figure out a better situation for those I'm going to take my razor and cut these down a lot more. So once I get it on my head, I can finesse these a little bit better over here I'll, go ahead and put this on and style it a little bit more. I'M going to use a black wig cap today got my hair slicked back because I'm just pretty much gon na try this on and that's about it. Here'S a closer look of the cap for this week, I'm going to put the straps put this dress. Okay, I'm gon na put the straps as tight as possible, since my hair is not braided or anything. I'M definitely gon na use the combs in this. These aren't here, which I don't really like. I think I might just fold these back behind my ear. Yeah. That'S a bit better folding them back. It'S like yeah! I like that better. So it's on right! Now I'm gon na go ahead and do my baby hairs and I like how that's looking so I will go ahead and add a little bit of got to be glue underneath so that the hairline doesn't shift. I'M not even gon na wait for it to dry because I'm gon na tie this down. While I do the curls, so I think that's good. Now, I'm going to add a little bit of mousse and just place that on top there it lays really really flat. So I don't even think I need mousse anywhere else. I'M gon na go ahead and tie this down now. My baby hairs are late. Wigs are on it's tied down, I'm gon na go ahead and add some curls turn this AC on, because it is hot. As I don't know what in here and then I will be back with the final look. So here's the wake you guys so I'm gon na discuss a little bit of specs about the wig and I will leave a link below on my website for my full review. So this is just my first impressions, but so far the hair still feels really nice. It curls pretty: well, I'm not really sure how long it will last, since this is pretty much the first time that I'm wearing it. This wig is by Phil Grace and I bought it, of course, from Amazon it was 52 33 and then there's also five percent off I'm just looking at my phone for the specs right now. I purchased this at 12 inches which it is not at all 12 inches. It'S 12 inches a Jase. So what else? It has a four by four lace closure with which I showed you the inside of the unit, it's human hair. It had some baby hairs which were super long and super sus. So I don't know you really will have to finesse this way a little bit. I say for brand new wig users. You could just toss it on, but I like it to look as realistic as possible, also 150 percent density and that's pretty much it. I hope you guys really enjoyed this video, don't forget to check out my website. It'S Tarina comm for more infor about this way check me out on my other social Instagram, Facebook Pinterest, all of the social. Please stay safe and healthy out there, and I will catch you guys on the next one, bye guys


Comments
Mariko Esannason: Ok...yaaasss that cut color and style was on point!