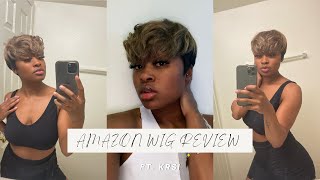
Perfect Pixie Curly Wig Install + 3 Easy Styles | Cenhiee Hair | Amazon Wig | Ty Lashea
13x4 Short Pixie Cut Curly Lace Frontal Human Hair Wig
https://www.amazon.com/dp/B09TDXLYDD/r...
My Boutique
1021xclusives.com
IG @1021xclusives
Discount code: BADD
Clothes Haul from my boutique 1021 Xclusives | Black Owned Business
Follow me:
IG @ty.Lashea
Snapchat Thai.x320
TikTok Naturallee.tee
Poshmark - https://posh.mk/xNyiZQqeAgb
Like, comment, SUBSCRIBE
Business inquires
If you lose hey welcome to my channel, it's your girl, ty, lachey or tysha or ty whatever you want to call me and welcome to another hair video, as you can see from the title, i'm going to be installing this gorgeous pixie wig, that is an amazon Wig, of course, and um i'm absolutely in love with this. If you want to see how this look was achieved, stay tuned, all right, y'all, so, let's get into this unit. This is the packaging, just a plain black box, and this is the unit. The first thing i noticed was that the lace was um pretty light, but still very easy to blend in with my skin tone. So here is the lace and, as you can see, there are three clips up top. There is one clip in the back and there is also lace in the back, which i absolutely love, as you can see like the parting space is very nice as well, so you'll be able to manipulate this wig in multiple different ways. So, let's put her on this is what she's looking like fresh out the package? No customizing, no washing nothing and the scalp is very pretty already. You don't even really need to customize this. I just like to bleach my knots and pluck, but this is a pre-plugged wig, even though it doesn't say it in the description of this wig. It is pre-plucked, as you can see, but i will be going in and just bleaching the knots i won't pluck until a little bit later when it's actually already on my head, but this is what it's giving. I love this hairline, it's very natural and y'all. This wig was so easy to customize. I bleached the knots i think in 10 minutes using 30 volume like one try. That was it so, let's install her. This is what it looks like after i bleach knots as you can tell it's a huge difference. Giving more of a scalp like look, i did over bleach in some areas, but it says don't even worry about it, because it's still gon na look so bomb. So this is i'm just trying to figure out where i want to place it because sometimes i'll be given a little too much faux head. So next, i'm just going to show you guys what the scalp is looking like now, so i am obsessed like look at that you can pretty much part it wherever you want and i'm going to have fun styling this unit so much fun. So, let's get to installing first i'm just going to go ahead and cut the lace into sections i like to work in sections because it's easier to control. While i'm doing this, i do want to go ahead and give you a big thank you to suny. He hair they are, who sponsored me with this wig and the wig will be in the description box down below because says you don't need this wig this summer, so i'm just taking my got to pee styling gel. I like this because it holds better than the spray, but it's not harsh. Like some wig glue, you know. Oh look at woody, say hi to woody everybody, but i'm just going to go ahead and comb it back and, as you can see already giving scalp y'all. I did not pluck this at all at this point, so now i'm just going to take my blow dryer and let that melt in i'm just going to repeat this process throughout the whole wig. So now i'm going to take my god to be spray and just spray it on the edges, before i put on my scarf to lay it down y'all, i'm so sorry, if you hear like static in the background, i'm not really sure where it's coming from, but Again, i apologize. I hope you can't hear it too bad, so i'm just gon na go ahead and tie this and let this melt for a while all right, it's time to cut that laces. So, as you know, you want to cut in a zigzag motion to give the most natural looking hairline. So that's all i'm going to be doing just cutting in a zigzag motion all around the lace. Now that the lace is cut, we need to pull them edges outside. So let's go ahead and get out as much as i want. I wanted to be a little more dramatic with this wig because i just knew it was going to pull the whole look together. So i'm just pulling my edges out and twisting them to get them out of the way y'all. I did not put any makeup on this lace as well. That'S why it kind of around the edges. You can kind of see it a little more if you want it to blend more effortlessly just apply some of your foundation to it um. I didn't think that it was necessary for me because i it will end up looking blended. So now is what i'm going to go ahead and plug which i'm just plucking behind, like where i pulled my edges out. So now i'm going to take my wet line and just put that on my edges before i cut them just so that i can smooth them down and make sure it's like the perfect amount that i want. So after that, i'm going to go ahead and start cutting the edges for the length that i think i like and then i'm just going to go ahead and style. The edges all right. So now it's time to style this unit. So i'm just going to go ahead and take some water and just get my hair damp, and so i can just you know easily detangle it y'all. I did not put a brush through this while i was styling it and it did not get tangled like the whole process. Um and i've had this wig on at this point now for five days, and it has not been tangled like. I could really literally use my fingers if i wanted to so now, i'm just taking some curl cream and putting that in the hair. This is not necessary. I just find that it makes my hair my curly units softer especially shea moisture products. Oh, that was a tongue twister, but yeah. I'M just gon na go ahead and put that throughout the hair and next i'm gon na go ahead and take my wet line. I usually use mousse, but i was out so i'm just taking my wet line, not that much because i still wanted to give it like volume and everything didn't want it to get weighed down. So that's all i'm going to be doing to style this unit. Now that i got it laying how i want it to be, i'm gon na go ahead and take some powder and lightly press it along the hairline to make it um. Just you know, look a little more melted, a little more scalpy scalp. So that's uh! The last step of applying this wig all right. Sorry, if you hear music in the background um, my channel is playing music downstairs, but this is the final look of the hair. I just did a quick and easy styling of it. I think i am going to try to do like a few more styles to it, so i might add that to the video as well so yeah, this is going to be the second way that i style this wig and it's going to be so sticky cute. So first i'm just taking my spray bottle and getting like the portion that i'm going to be twisting up. I'M just going to be getting that wet. So i can easily run my comb through when i'm parting and i'm just going to part off just a like medium sized section so that i can start to twist baby why'd. You have to love me love me like that. So now that i have my medium size section already sectioned out, i'm going to be dividing that section into three sections into like you know, small sections for my twist, so all i'm doing is literally a two strand twist. If you are not sure how to do two chance twist, you can always look that up on youtube or if you would like me to make a video like a detail video, i got you just. Let me know down in the comment section below, but i'm just going to be doing some simple twists and then tying that back with rubber band. I'M going to do three of these, so you'll see this about three times: baby why'd! You have to love me love me like that. Love me like that. So now i'm just taking my spray bottle and getting the rest of my hair damp and then, of course, you know i'm going to take my wet line just so that i can define these curls a little more all right, so the style is done. The edges is laid, so i'm just taking my got to be just to re-secure that lace and i'm just spraying it along the edges. I'M gon na take my scarf and let that you know re-melt and everything and since we did go ahead and section this into three parts, i'm taking my makeup and i'm gon na go ahead and like highlight each part just to make it give. You know you already know, give it a little more scalpy scalp. So that's all i'm doing here. I'M just going to go ahead and apply my powder to each part, and this is the final look. It'S absolutely giving it's giving summer flirty fun young. I love it! So i hope y'all love it too. Let'S get into the next style, so i'm just taking my spray bottle and getting them twist out my hair, because we about to slick her down like slick slick slick. I would like to call this like the wet look. I don't know if you've seen girls on youtube, do this but yeah. I love this look and i thought it would be perfect for this wig. So i went ahead and drenched my hair literally drenched, and now i'm combing through it just to make sure you know we can get it as smooth as possible. Look how smooth it already is, though, oh my goodness. So that's all i'm doing here. So you already know gon na take my wet line a lot a lot. So it's like a lot a lot, a lot, because you want this to be sleek sleek. So i'm just gon na go ahead and start applying this through my hair and just finger combing. It all the way through and smoothing down until i feel like it's smooth enough for me to like, create like a, i would say, kind of like a hard cast, a smooth cast. So now i'm going to take my brush and start smoothing everything down just get it nice and smooth as possible just to make sure i have enough product and everything in it just to you know, make sure it's as slick and sleek as possible. Now i'm taking my got to be spray and just spraying a generous amount all over the hair, because y'all know got to be is going to make your hair stay wherever you want it to stay, so i did go ahead and spray my brush as well, so That, when i am brushing through i'm not brushing the product out, i'm just brushing it in next, just taking my blow dryer and pretty much getting it as dry as possible, i really get the top as dry as possible. The ends um take a little longer. So i'm just getting the top dry and making sure that it is a hard cast and you about to see the results is. When i tell you, i absolutely love this like look, how sleek, shiny beautiful everything - and i did post this on instagram, so go follow you girl. I have it on the screen, but yes, as you can see, there's so many versus house styles to this wig so make sure for sure you shop in the description box below. But yes, this is what it looks like with just a little bit of curl cream and then some gel. I prefer to use mousse. But i don't have any right now, but i think that this is the perfect pixi wig curly, just very cute, perfect for spring and summer time. But yes, so i highly recommend again. This will be linked down in the description below and if you made it all the way to the end of this video, i just want to give you a big. Thank you make sure you hit that subscribe button because it helps you grow so much and we'll see you next time. Bye,


Comments
Uniquely.A: Short hair looks really good on you girl I love it
MyLifeAsAnnalu: You did great hun
K-ZAM: How many inches is the wig? Please