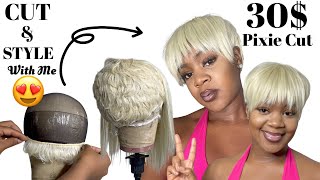
Quick Weave Mushroom Cut Removable Wig Tutorial Style Detailed No Curling Razor Pixie Cut
Items Used
Indian Tara 27 Step
Velvet 2,4,6
Dome Cap
T-Pins
Mannequin Wig Making Head 23 Inch
Ion One Stroke Flat Ion 1 Inch
Wig Making Supplies List
Salon Tools
Affordable Wigs
Website
Let's Connect
Instagram Felicia_Slater
Facebook Felicia Slater
Business Inquiries
Booking www.feliciaslater.com
Hello, hello, hello: this is your girl, miss felicia, inspire. Today we are here with another tutorial today we're going to be doing a removable, pixie cut mushroom just before we get started. I want to thank all of my new subscribers and, if you aren't, subscribed, make sure that you subscribe to my channel and hit the notification bell so that you can see all of my notifications. First, okay: let's get started to begin with, i'm going to apply a dome cap to my mannequin head, i'm going to be using the indian tara one, two three 27 piece in the number one: i got it for 9.99 from my local beauty supply store. Now i'm going to be using the six inch out of the velvet taro 468, i'm going to be using the six inch on top to close in the quick leaf. So this is how your 27 piece is going to look in the box. It'S going to be your 1 2 and 3 inch hair. So i'm going to put a um plastic cap on the um on the mannequin just to protect it from the glue. Then i'm going to begin pinning down the dome cap in place so that you can begin laying your tracks on the mannequin okay. So when you're applying the dome cap, you are going to need some t-pins and you can get those off of amazon or you can go to your local beauty. Supply store, you're going to use those to pin that cap down, because the plastic cap will make it harder to put the dome cap onto the mannequin head. First, i'm going to start off using the two inch tracks out of your 27 piece, because you want to give yourself more leverage to deal with just in case you need to razor cut anything. You want to give yourself more room to cut like they always say you can always put hair on, but once you cut it off, that's it you, you can't put it back on so make sure you give yourself more room to mess up or if you have To cut anything, add anything, however you're gon na. Do it just make sure that you give yourself room for mistakes, so i'm going to lay this first track down and i'm not going to push the um track all the way to the edge i'm going to leave about a half an inch of the cap out. Simply because you don't want your tracks to lift up and you don't want the you have to keep in mind that this is an elastic band around the edges, so you don't really want to glue too much and then it gets stiff. So you'll do a couple. Rows, um from side to side as if you were doing in the u motion and you'll do those first couple tracks um in the two inch and then you'll go to the one inch when you are gluing your tracks. You want to make sure you apply enough glue so that it can adhere to the the dome cap. You have to keep in mind that the dome cap is really thick, so you don't want your tracks lifting up after you went through all of the trouble of laying the tracks down so make sure you blow dry the tracks enough, so that they don't move, and You make sure you put enough glue on there so that your tracks don't come up or they don't slide. Just before i speed up the video, you are going to continue to go in a umotion from ear to ear, you're, going to make sure that you lay your tracks down in a u motion when you get to your sideburns you're, going to lay them down, but You'Re going to use your two inch tracks for your sideburns or you can use some of your three inch to kind of lay them down. If you want them longer, preferably i like the two inch when i'm doing a actual client, but on a week i did see that that was one thing that i wanted to go back and do the next time around. When i make another unit like this one, i'm going to use the three inch so that it can give me more room to have longer sideburns. But you will see that later on. But i did went ahead and speed up the video, because at this point you can pretty much um do the same motion. It'S going to be repetitive until you get to the top you're going to go in a circular motion, but you'll see when you get further in the video. But here i'm laying down the sideburns and, as you see, i'm laying them kind of going towards the face. It looks as though it's going towards the face, but in actuality those are going to be your sideburns on the wig, so make sure that you use longer pieces in that area and make sure you lay those straps down closer to the the edge of the um Dome cap, so that it can be long enough when you get ready to put it on if you are enjoying this video, please make sure that you subscribe to my channel and make sure that you hit that notification bell so that you get all of my notifications. First, please make sure that you leave any comments and also hit the thumbs up. If you like this video share it with your friends and if you want to learn more, you can leave me any requests i'll. Make sure that i put all of my contact information in the box below so that if you want to leave it anonymously, and you don't want anyone to know what you want just feel free to contact me email me, i want to hear from you. If you have any suggestions, i want to hear that as well, and we are almost to the crown of the wig, but on a person it will be the crown of the head and, as you are, laying those tracks from side to side, you are going to Make sure you are um starting those tracks as though the hair is falling towards the face so that you can cover the um edges of the dome cap, so make sure that you're doing that and we are still using our tracks in the two inch. At this point to make sure that your tracks are laying flat, you will have a little bit of space when you are laying your tracks. You don't want your tracks too close. Where is bulky so just in case, if you happen to cut, and you expose some of the tracks, you can have room where you can add in a track to cover another track, so make sure that when you lay your tracks, you don't put them on top Of each other, and just because you're using 27 piece doesn't mean you have to lay them you, you don't have to lay all of the tracks. It'S okay! If you don't use all of your tracks, you're making sure that the quickly you lay as fat flat as possible, so don't put your tracks too close together or you will get that bulky. Look now that we are in the crown of the head. We are going to begin building volume, so i ended up having to add in some more hair. I got some three inch that i had in the closet, so all i did was add in some more volume to my liking and you don't necessarily have to do this on yours, but it's going to be from b for me personally so to my liking. I like a lot of volume, so i'm going to add in extra pieces to give it more volume. When i go in to cut it, it'll have more layers and the more hair you have the more thicker it is. The layers show even more so i'm going to add in enough volume so that i don't have to worry about curling this at all. Right now, i'm going in with the three inch hair and i'm adding in extra volume. I want that volume to sit up really really high and i want to give it a dramatic mushroom. Look. Everybody don't want that dramatic, look but me personally, i love it. The more volume you have in the top and it just tapers down it. It looks awesome. So if you love a lot of volume, you can add as much volume as you like. So when you go in with the tracks in the front, you'll do the same thing: you're going to go in a! U motion you're going to go from side to side until you meet in the top, then you'll begin going in a circle to close the quick weave in, but also be reminded, make sure that you use enough glue so that it doesn't lift and you don't want To have to go back in and replace any tracks, you don't want to have to go in and glue any tracks back down, so get it right. The first time put enough glue on there the first time, and you won't have any problems right now. I'M using my six inch here - and this is going to be your last length - that you're going to use to close the quick weave up and at this point you can um double your tracks and i've double mine, because i like to go ahead and make it Thick and it get, it makes your time go by faster when you go ahead and double the tracks being as though you won't lay these tracks as close together as you would, if you're doing a 27 piece, you don't want to have any big gaps either, but You want to have it spaced out just enough so that you're covering the cap and you're not actually um, making it too thick either. So it's kind of you kind of make the proper adjustment judgment so that you can have it all making making it look great. At the same time be you will be using a way to comb to comb and style this hair. So you want to make sure you don't have any gaps, because you you space your traps out too much and you don't want your tracks too close where it's too thick. As you begin to close in on your quick weave, you will see the circle getting smaller and smaller on this particular quick weave. I will be using the closure that came with it, but right now, i'm still doubling my track and you're just going to go around in a circle and make sure that you have those tracks kind of close in this area, so that you can make sure that You have um none of your tracks, showing whenever you put that closure in and you can just hold it down comb the hair down, so that you can see where you need to put that closure, and this is how your closure will look. You can trim off the excess lace and kind of make sure that you don't leave any on i'm using my flat iron, the ion one stroke, one inch flat iron and i'm going to flat iron that closure just to make sure that it's flat as possible and All you're going to do is glue it in and you're good to go at this point, you're pretty much done, laying tracks all you're going to do you're going to get your razor comb and you're going to begin shaving down that hair. Make sure that you are light-handed, because you do not want to put any gashes in this weave and you want to make sure that your transitions are very very nice. You don't want any lines, and you want to make sure that it shifts very, very smoothly, so make sure that you just take your time and shave. It down. Make sure that you pull that hair out and cut the ears off, and this will give it a a nice look. A nice custom look so make sure that you pull the hair out at a 90 degree and cut it here. All you're doing now is taking your rake comb, just kind of combing the hair in place to show your layers. So that's all you have to do at this point now, i'm going to remove the wig from the mannequin. All you have to do is just pull the plastic cap out of the wig upon going to pop it on and begin customizing the unit to my face and cutting everything to my liking. All you have to do is thin out some of the bang area and on the sides so that you can give it a quick weave. Look, you want it to be undetectable that this is the weave. So all you have to do is just shave down and give it all you got and everything that you want it to be. It will be so make sure that you shave it down. The power is in the wrist, so all you have to do is use your wrist to shape the unit into whatever you want it to be comb. Those layers where you want them to go, and i promise you you will get the result that you want. All you have to do is just apply. Your finishing touches, get your trimmers cut that bang, so that everything is all even and that's all you have to do again. I want to thank you so much for subscribing to my channel if you haven't already make sure that you subscribe and also leave all your comments below i'm going to include all information to get you anything that you need as far as getting the weave. If you would like to get some weaving, you don't have it in your area, you can always get it online or even you can go to my website and you can purchase from me. But again i do want to thank you so much for watching this. Video hit that notification bell to make sure that you get all of my notifications first and all you're doing just go ahead and just shave the back down some more give it a nice edge up and you'll be done. You


Comments
Iesha Orosso: Girl you saved me from cutting my real hair lol lord knows I don’t wanna start all over when I’m rowdy for a new style !
Nancy Robinson: This is so cute I'm going to make me and my mother one. You explained it so well and it looks like it grew from your head. Love it
Cassidy DonShae: You did that! Thank you for this tutorial
Antoinette Cagle: Love this look did it on a client of mine for the first time , she needed something quick and this was it!!! Thanks
The Bad Gyal !: Thank you so much for the tutorial . I’ve been needing this .
Beautiful Natural Curls: Absolutely gorgeous!!!! Those final pictures were
Leah Watson: Great job this came out really nice and you made it fit your face so nicely❤❤❤
April Smith: More wig videos Please! You are BOMB with doing them!
Khrysteeon Hayes: OMG!!! I love it! I'm inspired to make me one! Lol
Danielle Reid: Looks good the cut is sleek simple yet stylish gives that beauty salon look for the cost of nothing
Lovely.I.Am.: This is so damn pretty!
Grooming with Tyera: This style is taking me back. I’m getting some Pam (from Total) vibes! Love this style
amanda williams: Beautiful! Thanks for sharing.
Andrea Johnson: Yeah...I could never! You killed this!! Beautiful.! You scared with those clippers near your eyebrows! I woulda ended up cutting mine clean off!...messin around with some clippers! No ma'am!!! I love this on you, though.
AnnMuazu: This is so beautiful
Prolyfic She: You killed this look! Love it!!!
Sunflower Bae: Yesssssss ! I love it girly
Charlene Fletcher: Love this look!! New Subbie
Margie Lang: Wow I love it!!
Angie B: Thank you I needed this.
MyFelicia1999: You slayed this omg perfect!!
J J: Love this
Sarah Miller: Absolutely beautiful i am no expert when it come to hair but my daughter is gonna see if she can make me one
Kerlyne Alexander: Looks so good,
Lisa Dixon: Love it
Antoinette Mackey: Love it!!
Kellee Mcfadden: This is to sharpe. Thank you
Antoinette Hughes: Wow I love this very neat
Consueila Brown: Luv it
¡ohwell!: Baby you made it look too easy .. imma try it cause it's so cute
Letita Ritell: Beautiful easy to follow
cmore361: Loved how you explained everything but I just had a question in regards to the hair. You said you were using the 2 inch then the 3 inch but the pack come with 4,6,8. Would I need to buy 2 sets of 27 pieces to get one with a 2 & 3inch?
Phyllis Hayes: Great job thanks for sharing
sherene Joseph: Beautiful
Lannie Thomas: Really nice
Precious 1980: Beautiful
USee San: How do you keep the back/bottom flat? Without it looking like NeNe short haircut
Lovetta Jones: thats a cute summer hair style thanks you did that
tash kailani: Love your work…neat
Everything AnjelicB: Why am I SHOUTING?!!!! I’m doing mine tomorrow. You killed this
Debbie Kakkesz: This Is Fireeeee
Starr light: I LOVE IT
Nesia Lynette: You did dat!!
Latanya Kitchens creations 💎: Could you make this same unit for me ? Please!!!
Madaleine Mombo: waouh l like it❤️❤️❤️❤️❤️❤️
Andrez Martina: Heyyyy honey lumps congrats on ya success
teddybearpain83:
AGENT#007: Thank you
Margie Lang: Can I buy a wig like that from you? I live in chicago if so what’s the cost? I love that !!!!!
Dinella Williams: oh yeah definitely need you to make this for me
Ahmad_gamingz1234: Can u make this style using another cap other than the dome,it’s so hot for my liking. It’s so beautiful and I would love to make it.
ShanneyPooh318:
Linda ola: Beautiful style is all of the top hair 3 and 6 inches please respond
Nadine George: hey cuz I love this how can I book
Edlie Murphy: Is it better to glue in or sew in?
Denise Duncan:
Naturally Gifted: I gotta try and make me one! Can you make me one?
Onj onb: Cute!
Starr light: She’s magic y’all
Landunett Young: How much do your charge to make those
YOLANDA HALL:
Marshari Jones: This my first time a making a wig how will i know it will fit isnt the glue gona shrink the cap
Starr: Fantasia vibe
Jacqueline Frazier: I promise you! If I did it, it would not look like this.l
sherene Joseph: Were can get that hair to buy please
Mrs Stokes: Mrs. Felicia what type of cap is that again
Shamara Scott: How can I purchase this wig
quentina tennie: GUUUURRRRRLLLL!!!
924MUSIC: Learned so much and is that hair human I’d rather work with synthetic human hair scares me like ewww this was on somebody head I don’t know? How can we tell which hair is real or synthetic?
Person405: ✅✅✅
Angie B: Sis don’t play
Master-n-Teach Virgo:
Tameka Shontae: What is your website?
Margie Lang: Are you in Chicago?
JESUS CHRIST SAVES: The Gospel of salvation of our souls: For what I received I passed on to you as of [first importance]: that Christ died for our sins according to the Scriptures, that he was buried, that he was raised on the third day according to the Scriptures, and that he appeared to Peter, and then to the Twelve. After that, he appeared to more than five hundred of the brothers and sisters at the same time,
Sad Vato: Period
KolorLey: Kings?? In Columbia??
JESUS CHRIST SAVES: Dear God in heaven, I come to you in the name of Jesus. I acknowledge to You that I am a sinner, and I am sorry for my sins and the life that I have lived; I need your forgiveness. I believe that your only begotten Son Jesus Christ shed His precious blood on the cross at Calvary and died for my sins, and I am now willing to turn from my sin. You said in the bible that if we confess the Lord our God and believe in our hearts that God raised Jesus from the dead, we shall be saved. Right now I confess Jesus as my Lord. With my heart, I believe that God raised Jesus from the dead. This very moment I accept Jesus Christ as my own personal Savior and according to His Word, right now I am saved. Amen.
Tammy Jones: Cutie