How I Reconstructed A Pixie Cut Wig/Making A Pixie Cut Wig/ Beginner Friendly
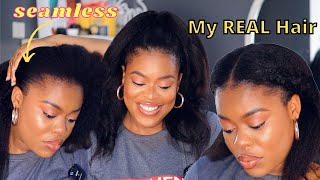
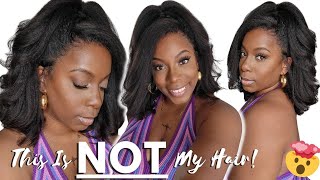
So guys, today we are deconstructing this wig and you know just going to go ahead to reconstruct it again. So this is what the before of the hair is looking like at this moment, and this right here guys is the after of this week, so guys, if you haven't subscribed to this channel, subscribe like and also share to family and friends, and it would always too Much of a time, let's get straight into this tutorial, so guys right here guys this is the week we're going to be working with. She is old. You know, she's had a lot of uses by the owner, and actually you can see that it wasn't well trimmed. As you can see, you know there are some mistakes here and there and it was brought in just so that i can fix it, and i'm going to do my best here, not really like a perfect job, but then i'm going to do my best. So i had just one job to construct and constructed, and that's what i did i went into the constructor and the only thing i saved right here is the front towel and yeah. That'S exactly what you are seeing. This frontal and every other thing went and then for this i'm going to be using the mesh car, but i always like using mesh cover. Why? Because it gives enough ventilation and allows blood circulation in the hair. So i actually just prefer to use that. For my clients, i place this on my mannequin and then for the excess guys, i'm going to go ahead to pull down all the excess to the band area. Why? Because this is a pixie wig and i needed that cup to be very, very fitting. You don't want to give room for your excess or give room for you know where the cup will actually not fit on your client hair. So you want to make sure that that cup is fitting. So all i did was to drag down the excess to the band, and then i went ahead to sew it and guys i sold it actually off the camera just so that we're not wasting time here. You know it's just a simple um exercise can actually find a lot of that on youtube, and here guys is you know these stitches, i'm just showing you guys what it looks like so guys. Next guys, i'm going to go ahead to put on this tape. Just so that i can get my tracks together and then getting my tracks together, guys i went in with half an inch, unlike you know the regular one where you have to go in with maybe an inch or so these aren't in half an inch away, because I really wanted it to be flat and you want it to be flat if you're doing the same. So if your your, your your wig, is double wrapped from the factory on to go ahead and using it and make sure it's just one left just so that you're having this really flat. And here guys i got a lot of tracks at the end of today, and now i'm just going to go ahead to expand those tracks just so that we're having a good job. This is well self-explanatory. Really need to. You know explain this place, so you can just go ahead and enjoy it and i'll see you guys if i need to see, as you guys can see, that i actually didn't do a good job with this and tracks white, because it's not really straight so yeah. You can actually see it's not a perfect draw, but then guys actually gave me what i wanted. So yes, that's also okay for me and then guys i'm if a lot of people would go ahead and use glue. I don't usually use glue for my work. Why? Because i want to give my clients the you know, opportunity to know to revamp their people wash it if they need to or whatever they want to do with it, and then guys. That'S exactly what i'm going to go ahead and use my shoe to do this and then i'm using actually 100 grams for this and yeah. I didn't really need on where to see it. I just went in streets because it wasn't the website from factory which was just as simple as that, and i went in with it one step at a time. You know this. I went in actually with the straight stitch. It wasn't, you know complicated, it's just simple, and i just went straight in with that, and here guys this is exactly what it looks like after i was done swinging down. You can actually go ahead and use a blue, but i personally know i'm done with please. I just want to you know, give a little touch of professional work. Just try to get perfected the work i do and guys right now. What i'm doing is to section this hair. So i sectioned it into two, the first one, as you can see, i'm going to paint that right here, it's from one eyebrow back area to the other. Just so that you know it's giving you. You know that vibrate and that's actually like a closure area. So i just went into right now: i've actually trimmed this three times so here i'm just cutting it down just so. I see what i'm doing this is like the first cutting, so you want to give yourself room for mistakes so that, at the end of the day, you can correct your mistakes and address you, because when it comes to cutting once you've cut this actually nothing, you Can do about it so here right now is the second cutting. As you can see, i'm feeling it step by step gently there's no rush into this job. You want to make sure you're doing the right thing if it needs to be trimmed. If it doesn't need to be true, you don't trim it, and then you want to make sure that everything is actually in a position where it needs to be. If it's in the middle, it needs to be in the middle. If it's the left hand, side needs to be the left-hand side, because once it cuts, that's just it so this work is like a very, very serious work that you need to give your 100 attention. So right here guys i'm going to be doing the frontal area, and here i'm just going to cut it just slowly and gently and at the end of the day i decided to give it a little layer at the back just so that we have a little Of a movement a little bit of drama a little, you know a little of something extra to go on with the hair and that's exactly what i did and then guys for the front area. I just went in to give it some point, cutting to make sure that it's slanting down not really in the same direction, but you can see it's just you know. One side is longer than the other just so that there's enough movement and trigger to go in with and then to style. This hair, i went in with the style mousse just so that i'm seeing the work i'm doing and i just combed it down and make sure it's out appropriately and then, when i was done, i didn't even allow it to dry guys. I don't know why. I didn't maybe i was rushing and not having enough time, but then yes, guys i went in and i straightened that down give it to the style i needed and this actually the frontal area. So i needed to make sure it's clipping right. I had to go in with the wax thick to make sure the style is popping so guys this is just me trying to you know, style this hair, to give it some movement to give you some waves to make sure you know i'm getting what i wanted And actually guys, i treat this again for the last time, which is like the thought time when i was done, but i think i took off that clip just made to adjustment by the size left hand, side the right hand side just to make sure all excesses Are out and that's exactly what we're having here just make sure we have some movement and yes guys. I think i did a good job. Let me know in the comments section, if you think i also did a withdrawal list. Let me know guys and yeah guys. I'M just going to give it a little of spritz just so that it's not you know it's staying rare, how it's been styled and not in other directions. So, yes, guys. Thank you very much for watching this tutorial. I hope you enjoyed it and i hope you like share and also subscribe. Thank you guys for your support and i'm going to see you guys in my next one bye,

Comments
Joy Akanet: Well done dear ❤