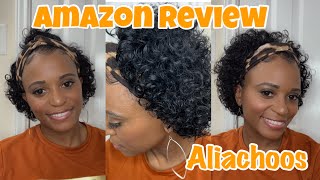
Curly Bob Headband Wig! |No Lace, No Glue| Easy Install
I ***Welcome Back***
In this video I'll be reviewing this curly bob headband wig! Headband wigs are great and easy way to switch your hairstyle. All info will be down below! Let me know if you try this wig out, and how it works for you!
Like Comment, and Subscribe for more videos from me!
*Make sure to watch in 1080p!!!
*Comment ANY video suggestions you have!!!
LINK TO WIG- https://m.mslynnhair.com/headband-wigs...
MORE HEADBAND WIG VIDEOS:
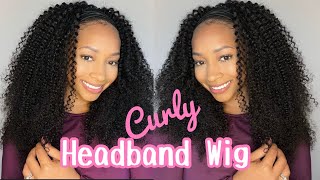
CURLY HEADBAND WIG- https://www.youtube.com/watch?v=42Q47n...
BODY WAVE HEADBAND WIG- https://www.youtube.com/watch?v=EryCCO...
SUBSCRIBE SUBSCRIBE SUBSCRIBE!!!
#headbandwig
Social Media-
IG:@goldendia_
TikTok:@aadiaa_
Twitter:@Courtney_adia
Hi welcome or welcome back to my channel so in this video, as you can tell by the title today, i'm going to be trying this curly bob headband wig. So this time, i'm starting off with my hair in braids, as you can see, usually i do like a slick back ponytail, but i wanted to show that you can have braids while doing a headband wig and having braids is a more protective way to wear this Style so i have my braids in and i'm starting off using my edge brush and my got to be gel um. I used this gel first and i switched up to another something later on, because this gel wasn't like holding it right. I don't know like i needed the actual like pomade something this was not holding it and my hair kept curling back up. So you'll see me later use something else, but i'm using this for now and i'm just doing my edges how i normally would. I wish i pulled out a little bit more hair from the braids, but this was a decent amount of hair to work with now. Like i said earlier, i had to switch over to a different edge control and i use my edge booster. I need a new edge, something because this one is so like it kind of leaves my hair flaky and like a white residue around my hair. So i don't like this one anymore and i need to find a new one, but i'm using this and i'm doing my curl thing in the front of my hair and yeah. You guys can just finish watching me. Do my edges once that's done, my edges are looking how i want them to look, i'm going to go ahead and pull my hair back into a ponytail, a low ponytail and i'm pulling the hair like up i'm using my wig cap by the way. Also this wig cap and i pulled my hair in the ponytail going upwards and i put the wig cap on and i'm just adjusting it to how i want it to be. So. This is what it looks like with the wig cap on my hair. In the back is not too bumpy, it's like a small bump, but it's not too obvious. So this is what the wig looks like um. It came in this ziploc bag and then this pink bag. This wig is from miss lynn, hair and i will put the link below in the description box below so you can see the hair also. It comes with like this net uh wig cap thing in there, and then this is what the wig looks like comes in a separate bag, and it also has this headband with it. This headband, i didn't use this headband, but it's a nice headband to use. This is what the wig looks like outside of the packaging. It is a 14 inch deep, curly, headband wig and i believe the density is 150 and this is in the color dark brown. On top of that, when i took this out the bag, it didn't have any type of smell to it, or anything like that. This is what the front of the headband wig looks like, and the headband wig is pretty sturdy like the headband part of it is sturdy, has the velcro. It has three clips in the front here and then it has one clip in the back. When i ran my fingers through the hair, i didn't have any tangles any shedding or anything like that, which is good for starting off now to put the wig on i'm just putting the wig on like how i normally would um. I use the clip in the back first and then i'm clipping the sides second, and then i put the headband part on with the velcro in the back. This is what the hair looks like when i got done without me, putting any type of water or anything in it. It was a little flat and like too flat for me and my liking. So i put some water and some mousse in my hair. Then i use my brush and i kind of need to use my brush, but i tried to use it to add some definition to the hair since the hair is so short um. I kind of could have just finger detangled, my hair, but i wanted to see what the brush would do. So this is what my hair looks like, while it's still wet - and i didn't like it so i brushed it out and i shouldn't have brushed it out because you know what happens when you brush curly hair. It got really frizzy and puffy, and eventually i went back and i fixed it. I didn't really show how i fixed it, but i added some water added, more mousse and i kind of just fluffed my hair out and let it air dry also without brushing it. I took some hair and i finger coiled some pieces with some water and the mousse, and the last thing i did was take some scissors and i kind of cut around the bob. Some pieces were a little bit longer and stronger than the rest, but i wanted it to all be even i hope i explained it well enough. I didn't put any of this on camera because at first i didn't like the wig, and i wasn't even gon na post this video, but i did some stuff off camera and i ended up liking it. So if you have any questions, you can ask me in the comments down below, but that is all for this video hope. You guys, like the video and everything i showed and if you did make sure to like comment subscribe for more content and more videos from me and i'll see you in my next video bye. You

Comments
Courtney Adia: Make sure to Like, Comment, and SUBSCRIBE for more content from me!
Nya Journei: Great video I just bought a headband too I love it.
Sharik: So cuteeee!!!!
Mslynn Hair: Honey, thanks for your beautiful sharing !Did you order from this link https://www.mslynnhair.com/headband-wigs-human-hair-wigs-3.html ? As the link you left I can not open it.