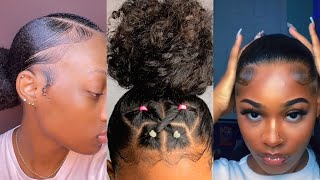
How To Make Headband Wig Tutorial | Using Straight Hair On Sewing Machine | Diy Headband Wig
How To Make Headband Wig Tutorial Using Straight Hair on Sewing Machine| DIY Headband wig
If you want to learn how to make wigs on a sewing machine, click the link below for my online wig course.
https://www.uwazhair.com/collections/o...
To get same wig, click the link
https://www.uwazhair.com/products/sara...
here is the link to the wig cap,
https://www.uwazhair.com/products/wig-...
To shop this wig and bundles
This headband with is available on my website (www.uwazhair.com) and it called Sarah Unit
C O N N E C T W I T H M E
•| IG @uwazmakeup @ https://www.instagram.com/uwazmakeup
•| IG (Hair Page) @ https://www.instagram.com/uwazhairz
•|FB @ https://www.facebook.com/uwaz hair and makeup
•|Twitter @ https://www.twitter.com/uwazmakeup
•|Tiktik @ https://www.tiktok.com/uwazhairs
B U S I N E S S:
For Business Enquiries / Makeup Bookings
•| Email: [email protected]
•| DM: @uwazmakeup on IG
Filming & Editing
•Canon 750D
•1 Neewer Ring Light
~Final Cut Pro
Hello, everyone welcome back to my youtube channel if you're new here my name is uh and if you've been here before welcome back in today's video, i am going to be showing you guys how i made this amazing hairband wig on a sewing machine using a straight Hair from owa's hair so guys, if you're here and you want to see how i did this and stay tuned and keep on watching, and i hope you enjoyed this video if you do don't forget to give the video a thumbs up without further delay. Now, let's dive into the video okay to start, i'm using a 22 inch canvas head with a lace cap and um. In my previous videos, i have used a dump cap and also a match done cap. So i just thought it's right for me to use a lace cap today and if you ask me, i prefer this lace cap, because it's very structured, so you know where to place all your things. So yes, that's! Basically, what i'm doing, and i'm also using a three 16 inch bundles straight hair bundles from was hair i'll, leave the information of this hair in the description. So you can go check that out and i'm also taking this stretchy hairband from super drugs. So to line the caps i'm using a sharpie so last time i use a chalk, but this time around, i use a sharpie. As you can see, my lines are not very straight, but you can make yours as straight as you want. Okay, now to do this. I am kind of going into the sewing machine to double my weft. I have done this. I'M fast forwarding all this, because i've done this in my previous video, where i slow down and kind of explain in detail. So if you haven't seen those video i'll leave a link here, so you can go check that out and see how i double my weft. You can see how neat this a doubling of work is. So basically i teach you in terms of what setting you need on your sewing machine so now um to start stitching and i'm just going to place this down on the sewing machine and pin it down and my first stitch it's at the back. So i'm just making sure that it's clear for you all to see remember when you're stitching you have to backstitch and forward stitch from the beginning and also at the end. You do the same as well just to lock everything in and try as much as you can to follow your lines, the lines you've drawn. It would help you to ensure that this and it's not lumpy, it's not folding and also do not stretch your cup. Don'T stretch your sewing and the the cap, the mesh cap or the dump cap that you're using don't stretch it just make sure you're following the line and you're sewing on straight. So that's that's, basically the secret. But, however, if you like to learn how to use a sewing machine to make your wig even a closure, a frontal wig, let me know in the comments and also i have i'll leave all the information in the description. So you guys can go check that out. I have an online class where i teach people how to use a sewing machine to make wig. So i teach you from the basics like um how to set your sewing machine. The settings you need to put your sewing machine at and also the tray to use things you need the types of sewing machine that is good for you to make a wig. So if you are there - and you want to learn how to make a wig check that in check the information and description, so you can see here, i'm just showing you how flat this is. This is basically what you should be aiming for: making sure that everything is flat in length flat, otherwise you're going to have a lumpy head. You don't want that, especially now that this is straight. You don't want it to be lumpy. If it is lumpy, it would show guys it will show. When is the curly hair it doesn't really matter, but with the straight hair or body wave hair girl. We don't want to see those lumps okay just as much as you can to make sure it's flat and you're, not stretching don't rush, there's no need to rush okay, it's time to attach the headband. As you can see, i use a sewing machine as well without using a needle first. So all these things, i will teach you in um in my online class, how to stitch down and what setting you need to put your sewing machine. As you can see, i am stitching i'm stitching straight from the sewing machine and i'm making sure that i'm not rushing, i'm not stretching the cap and i'm doing it section by section you see when i get to the end as well. I double back stitch and forward stitch a couple of times before i take it out. So at the end, i always leave a space before i apply the lash and the last track, so after stitching stitching down the band, i'm going to attach the last track so that i can cover that gap in between this there's the hairband and the the tracks. So you don't see no space, that's basically what i'm doing i'm applying that i'm stitching that down now, so you can see what i'm doing right now. Okay, now here's the finished wig. I have gone ahead washed and conditioned and then straightened the hair as well. You can see how flat and neat that frontal is as in no frontal, you know what i mean that headband looks on on the wig. Also. I also attached the vacrum on both sides, the head and the stuff that so that's what it's going to help you to secure the band down at the back. Okay, now it's time for me to cut the band. So this is the band i've drawn. I brought the camera closer, so you can see this is the band we are going to be cutting off because we want this thing to be flat like we don't when you fold the bands over the hair band over you don't want to see that cap excess Cap so you're going to cup cut from where you started. Attaching the cap and to the other side as well so you're going to take your scissors, make sure that you secure this down with the sewing machine or with your needle you've kind of stitched. It down tight if you're, using a needle you've done it well before you cut okay, otherwise everything will unravel okay. We don't want that. Okay, so i'm just cutting that off. I know a lot of people were asking me this question. I try as much as i can to answer the question in the comment section, but it was still not clear to some people, so i decided to do this video to show you guys how i cut off the essence cap in front after attaching the hair band. So this is where basically, i'm cutting off. You can see right now. This is what i cut off, i'm hoping that i've explained it as much as i can. If you think i have. Let me know in the comment section: okay, guys, i'm trying my best to make sure that i explain everything as clear as i can possibly do it. So here is the finished wig. This is how it looks you can see. It looks amazing. I love this hair. It looks flat, it looks in fact incredible. I don't even know what what to explain it. It just looks fabulous. I actually wore this hair on wendy williams, show i'll see if i have the the screenshots of it and i'll attach it here. So you guys can see. I was on the wendy williams, show the picture audience yes, so i was wearing this wig and it looks amazing. Okay, guys here is the inside it looks you can see, there's no lump, we do. This is what we should be aiming for if you're using a sewing machine aim for this and as much as you can try as much as you cannot to have gaps, you see the inside looks flawless so guys, and this is about it. Let me know if you've enjoyed this video if you've enjoyed this tutorial. Let me know in the comment section and also if this video has been helpful to you. If i've answered all your questions, i know a lot of you had questions in my previous one. The curly one that i done if you haven't seen that i'll leave it here, so you can go watch that as well that one i went so much in detail in terms of doubling your wealth, everything i went into that and a lot of people asked me A question about where to cut so i hope i have answered all your questions. However, if you think i haven't leave me a comment, and i would i'm sure to you and reply and also answer the questions to the best of my knowledge. I hope this video has been helpful to you and i hope it's been useful. I hope you're going to go out there and make your own hairband week. If you are going to. Let me know in the comments section as well and also and if you've actually enjoyed this video - and you like this video, don't forget to give this video a thumbs up and also, if you have not subscribed, hit that subscribe button and click the bell notification. So you are notified whenever i upload new video or new tutorial. Thank you all for watching, and i will see you my next one bye where we call nigel, can you know


Comments
Ladybird2767: Can you also show your expertise in making a u part wig please!
NEKESA WANGILI: You make this look so easy. I will sure try this.
Ladybird2767: You have been the best in showing how to make a headband wig on the sewing machine....well done!
Relationship Builders Forum: This is amazing. Thank you for sharing
bibia mb: I love this video... thank you so much for sharing it.. i am now your new subscriber. I would love to learn more on how to do it with a swing machine.
Florence Amaraegbu: This is so neat and beautiful. Thanks for sharing. Am new here
Uwaz Corner: Wow, great video! I love the hair
PjSaid's Lifestyle Channel: Very nicely done! I'm not very good with the sewing machine
Sharon Howell: Great job. I am trying a wig on the dome cap. Thanks for sharing.
Desiree De Jean: YES INDEED I would like to learn to sew a wig by sewing machine. Thank You!!!
santi samoski: This is so beautiful
Desiree De Jean: I Thank The Most High God for my Mother teaching me to sew.
Rose Aiko: Nice hair, i love it
Roselyn Adjei: Hi... please did you flip the headband after cutting off the extra cap?
it's clarice: Thank sis i will try it's clarice here from Jamaica
Junior Chaves o Picasso de Yahushua: *Hey ma'am *
DJ IVERYDAVE-MUSIC master boss: Nice video friend that hair fits u too
Vanessa CM: Where can I find the black headband?