Bomb Detailed Curly Pixie Cut Bob Wig Install | Wowafrican Hair
The Cute Curly Pixie Cut Bob is from: https://www.wowafrican.com/
►► : https://www.wowafrican.com/curly-pixie...
▷▶ | $ + ◀◁
$90 OFF over $549, Coupon: BF90
$65 OFF over $429, Coupon: BF65
$35 OFF over $299, Coupon: BF35
$15 OFF over $169, Coupon: BF15
-------------------------- --------------------------
Curly Pixie Cut Bob Indian Hair Lace Front Wig [CBW47]
Length: 8-10 inches - Density:180%
Free Shipping Worldwide for orders over $89
☆ Coupon code: Duchess15 Discount: $15 off All Wigs ☆
----------------- ----------------
Glueless / Beginner Friendly - Yes √
Bleached Knots - Yes √
PrePlucked - Yes √
Ready To Wear - Yes √
100% Human Hair - Yes √
------------ & ------------
WowAfrican Official website:https://www.wowafrican.com
Link to Hot Sale HD lace 13X6 Wigs: https://www.wowafrican.com/shop/lace-w...
: https://www.instagram.com/wowafrican_o...
: https://www.facebook.com/wowafricanwig...
#wowafrican #bobwigs #bobstyle #shorthair #cheapwigs #pixiecutbob
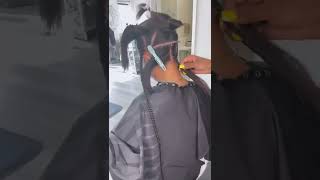
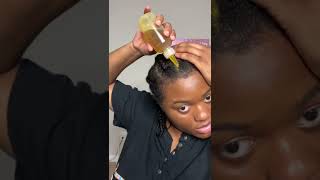
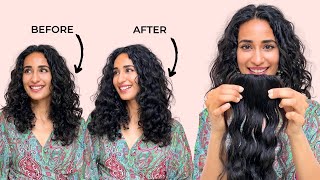
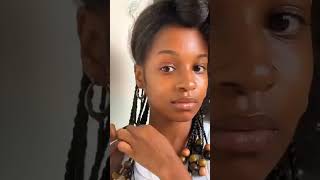
Hey y'all, so for that beautiful install you just saw today we're using wild african hair and, of course, in the package. They send us some goodies, a brush comb and the instruction manual. So for this hair, since it is a curly hair, they did spray some elastin on it, so i did have to co-wash the hair prior to use. So the hair that we're using is a super cute, curly, pixie cut bob and it's an indian hair lace front. Wig, it has 8 to 10 inches 180 density. It is a beginner friendly wig, so the knots do come: pre-bleached, pre-plucked and ready to wear with 100 human hair so to get started. I'Ve already braided her hair back in the typical braid pattern that i usually use for most of my videos. So i'm not gon na go over that again, but i am basically spraying her hair with the free spray and slicking her edges back because we do want those hairs to go all the way back so that when we put the cap on, we are not interrupting Her natural hair line when we start to apply the glue, so what you want to do is you want to spray the free spray along her hairline and go ahead and blow that out on cool. So now i'm going to go ahead and wipe her hairline off with some um 90 alcohol or 99 alcohol and just clean her hairline um before i start applying any type of glue or anything. So yes, i you want to go ahead and push the wig cap. All the way back on top of her head so that you get a nice good stretch and what i'm doing is basically making some holes for her to be able to see clearly and her ears to come out of that wig cap. So now i'm gon na go along her hairline guys and i'm going to make sure that i am putting the got to be glue along her hairline. I don't want to go to make my own hairline, i'm just kind of go with the natural flow of hers. So this is the best way to um get the best foundation for your wig cap. So what i like to do is i like to do a nice stitch um off the cap, as you can see, i start from one ear and go all the way around to the next and, as i'm looping, i'm kind of doing like an under loop to Where the thread uh goes under that braid, and so when i go in and cut the lace or um cut the cap, i i have a nice finish and the cap is not like all over the place. So what i'm doing right here is a skin test. Just to see which color matches her skin tone the best before i apply the ruby kisses in color 10. I think so we're using color 10. um. So before i apply that i want to do a skin test to make sure like the color matches her skin. The best - and i want to take that wig as well and apply that same color in that way, especially if the wig is a transparent lace and not a hd swiss lace, which this wig is not so um. The next thing you want to do is you want to cut that lace or the cap off, and you want it to be as close to her head as possible as far as her skin so be careful. When doing this, you don't want to cut your client's skin, but you also want to get it as close as possible to her skin to where there's no lifting or minimum lifting um. If none at all, you know you're aiming for none, but you know uh. What i'm doing here is pushing some back, because i did spray it down a little bit further than her hairline. So when i push it back, i'm just trying to get it close to her hairline as possible so that i can get a nice sleek finish all right. Now, i'm doing just like a fit test to see how the wig is going to fit over her head. Um and then i want to go ahead and use the cap line as a guide to kind of part out her hairline closest to the cap. So i'm going back in and i'm kind of wiping the makeup off with some more alcohol - and the next thing i want to do is protect her skin because she is my model she's constantly coming in and getting her hair um installed and she has very beautiful Skin and we want to keep it that way, so what we do is use a skin protectant before we add any type of adhesive on the side of her head right. There you saw what i just did. Basically, i the the cap got pushed back and to avoid getting the glue in her natural hair, i'm gon na just kind of like jump it right onto the skin, because you know there's nothing really. I can do about getting the cap back once it slips back. There'S it's almost impossible to get it back in place. So that's what i did there and you want to use if they're going to be wearing this wig for some time you want to use multiple layers. I typically use three to four layers because she does wear this for at least a week or two and we don't want it to come off. So i like to add multiple layers and what you do is you wait for it to dry when it dries? That means it turns clear, and then you want to go in with your second third and fourth layer and um. Wait for it to be clear before you add the next layer, you also want to wait for it to become clear before you even start to add the wig onto it. Okay, so once you have secured the wig as best as possible, you want to use an elastic band to uh melt, that lace into the glue and um that elastic band does help that. So once i have the elastic band on, i typically when i start to style the hair, if it's like a straight hair and start flat, ironing it or whatever, because you do want the elastic band to be on there for quite some time so that you get A maximum hole for the lace, so what i'm doing now is basically, i am going to cut out the excess lace and excess hair that um did not get glued onto her natural hairline. So i'm just parting it out, so that's easier to cut off and when you're using a scissors, you kind of want to go in a jaggedy zigzag motion, uh to cut the lace off. If i was using like my um eyebrow razor or something like that, it would be a much easier process, but this scissors is what i have right now. So that's what i'm going to use and you just kind of cut that in like a zigzag motion as you're going along their hairline. This is going to give it a more natural look. What i'm doing now is. I am cutting out the baby hair along her hairline, and i mean i like to do them a little short because i just think shorter baby hair makes for that. A more natural look and i'm using my very small curling iron to curl that baby hair up and that's going to allow it to um, lay in place or kind of curl better once i start to lose it down. So i'm going in with my mousse and this process, you do want to move pretty quickly because the mousse does lift the hair um the lace up of the scalp. So you want to move pretty quickly with this process and laid down with a head wrap all right guys, so it was pretty easy to style this hair. I just basically took my spray bottle and wet it completely, and then i went in with some mousse. You can use any kind of curling mousse and you will get a very defined um curl pattern. So this is what i did um to complete the style and once i take the headband off, i am completely finished again for this install y'all. I used the wow african hair. This is their curly, pixie cut bob and if you want 15 off for purchasing this wig or any wig on their website use code. Duchess 15, that's d-u-c-h-e-s-s, one. Five
Comments
Styles By Lovey: The curl definition is gorgeous perfect length. You slay the install the Duchess way
Mary B. Deans: This young lady could wear a paper bag She is so beautiful and this wig fits her to a tee. So pretty and so natural looking ALL HAIL THE QUEEN
A Taurus Woman: Duchess this wig install is and the model looks beautifulLove it
rachel thomas: That looks so natural. Really pretty
Jackie Randolph: Love it short and sweet but very beautiful too ❤
Elise Laughlin: Beautiful!!
Carmen De Long: Gorgeous!
Cassandra Turman: I love the way you talk,so clam and elegant. Beautiful job
Yashannkia Yasharahla: Your models are so beautiful…..naturally beautiful
R M B: I like your work and Channel.
Анюта Полещук: Как всегда, супер
Lele_bxby3: those cornrows are really neat
Donnie Lindon: Beautiful person stay safe yall.
Plush Furr: Yassss sis YASSS QUEEN gorgeoussss
Martha G: Amazing soooo marvlous very talented. duchess ❤
Kitchen Lab: Full support and full watch video
Because_I_Have_To:
Latrisa Morris:
ms_jblessed:
amine6576: Cv cklick aponner pour moi selvoplet