How To Cut Hair (Pixie Haircut)
- Posted on 16 October, 2020
- Pixie
- By Anonymous
Basic how to
Salon Tutorial
SHOP FOR THE MATT BECK SCISSOR V1: https://freesaloneducation.com/produc... SHOP YS PARK COMBS:
Attribute
License Creative Commons Attribution license (reuse allowed)
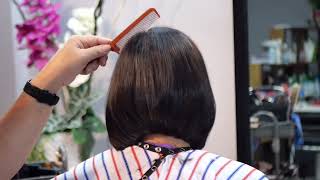
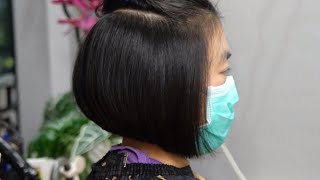
Welcome to today's video we are gon na be going over a pixie cut, a pink pixie, actually uh, it's gon na be an undercut pixie, so nice disconnection on the top we're going to color it pink. At the end, i think you guys are going to really dig this video. So today the sectioning is going to be pretty simple. I start at the parietal ridge and i work my way back so looking for that recession. Point um! You want to make sure the top section that you're sectioning off is not too wide. It can really throw this haircut off also you're trying to make some texture live on top of the head. If you go too far down on the parietal ridge, then hair will start hanging over in the final look. So a nice rectangular shape goes right down to the middle of the crown area and we section off that top. Now, i'm using the paul mitchell pro tools express ion dry, it's the turbo light dryer. So it's a brand new dryer from paul mitchell. I'M going to use this to blow dry the bottom portion of the head, so after you shampoo, i always like when i go with my clippers. Not to go in with the wet hair just helps kind of get everything into the clipper better and also keeps the hair nice and smooth and works out any calyx. So you just go through and you cut it really nice and all the hair is laying the right way. So i'm using my andis uh, cordless clipper um and i'm also using a two guard to start out and that's really just to remove the bulk. It'S also really where i want the hair to end at about the parietal ridge so um, i start by just taking out all that bulk uh just makes it easier for me. Some people like to start with that short section. First leave the long hair in there. I like to get most of it out of the way, especially if i'm going to cut the whole thing at a two level anyways. So i work my way through working. The clipper back and forth key thing with using a clipper guys is just to make sure that you don't just go in one direction: um, because hair kind of does grow in multiple directions, even though we do that blow dry to prep the hair. It'S still good to go back and forth in different directions to make sure you get every little bit possible now i jump all the way down to the zero guard, and this is a trick that i want you guys to try when you're working in the salon, Especially if you're not a barber, i'm not making this video for barbers. If you are um a hairdresser and you're not used to using clippers um going in using your highest clipper first take the bulk out then go in with your lowest clipper and draw your line around the head shape. This is something i've really been working on. I have had some barber friends come in and film some videos, so i learned some things uh. I really like working with my lower guard all the way, creating that line and really just drawing an outline of where i want the shadowing to be in the haircut. So we're gon na do a lower fade, so i want the the weight to kind of come down just at that occipital bone area, and then i clean the rest off at a zero guard. Now this is mary. I'Ve done multiple cuts on mary. You guys have watched them on youtube for sure um. She really wanted to go nice and short. Showed me this really short haircut, so i thought it was really cool being able to go in and try out those fading techniques. So now i jump to a one guard and that one guard's going to be fully open. So you'll still see a line following the ridge of the head. But you notice that that that line really hugs the head shape and that's what you want, because you want to really accent what her head shape is. So i work my way through there. One guard fully open you'll, still see that line because we're going from a zero guard to a one guard open. So there is gon na be a little bit of uh shadowing in there. So i'll work. My way through then i'm gon na go in with my ys park, barbering comb. This is available on freestone education. I believe it's the two. Actually i don't remember the number, but just look up barbarian comes on freestand education. You can see this one on there. I use this for my clipper over comb, so i completely close the blade on the clipper and i go through, and i just take away some of that shadowing with that. That'S my personal preference. You could do it with a guard as well, so now cleaning it up this. I got this uh picked this up at the last hair show. I was at in philadelphia um at the andis booth, so i paid my own money for it, but i do really like this trimmer um. So i like it, i like a t-trimmer for all the detail, work. It cuts really nice. It'S got lots of power and it's cordless. I like working with cordless tools. So now i wet down the top of the head. This is where the haircut to me gets interesting right so um, and this is where i think a lot of people have challenges. We'Re gon na make a lot of movements on the top of the head, so really make sure you stay focused, don't worry about pausing it rewinding it and really watching the sectioning that i'm taking. So this first section that i take, i take it right at the crown and then i comb everything down. This is really where that calic area is, and what i want to do is create a line now, i'm getting trying to get a little more creative with this cut um. So what i'm going to do is create a stationary guide. The haircut's going to flow to the right hand side, so i'm taking diagonal forward partings and i'm over directing them to that stationary guide. What that's going to do is grow, not grow, but push more length towards the right ear right. So you'll start to see that line kind of unfolding, so i just keep taking diagonal forward partings, bringing them over and cutting it in my fingers palm to palm so notice. I'M going to comb this out notice that line and the length and it's just an asymmetrical line. It looks really cool on the head and now i'm going to connect it almost like a u-shape and i'm going to start another stationary guide for the top part of the head. So that's what's cool about this cut, i think, because, obviously, if you comb everything over to this side, it's very heavy. But what i'm doing is i'm removing a ton of weight from the very back portion of the head and i'm pushing all the weight to the front. So what that's going to do is give me more hair to play with in the drive cut portion and also remove that bulk from the back of the head. Also, i should mention the scissor that i'm using is my new scissor that just came out it's available on freesaloneducation.com. So if you're looking for a new scissor, it was manufactured in japan by hand by mizutani. I'M really proud of this scissor. I was involved in the entire design of the scissor, so it's every spec that i love how it fits in my hand and everything. So i know you guys will like it as well. A lot of thought went into the scissor all right, just finishing up everything. Still keeps coming over to that stationary guide and now you can see that weight buildup, that's not an attractive look, but that's not how she's going to wear it she's going to wear it off to the complete other side. So that's where that weight will go away. Now i'm going to connect this line all the way down to the front forehead area, so i just comb everything over and i keep bringing it over to me until i run out of hair, so there's no hair that will reach to this side now doing this. If you think about it, i'm cutting it horizontally, so i'm really focused on that shape and how the angle is going to go from a horizontal line aspect. But when you look at this shape, if i would take the same exact thing vertically, it would be a very collapsed shape when it goes to fall to the other side. If that makes sense, so we're really collapsing the left hand side of the head and pushing all that weight to the uh right hand side. So now i continue that line um all the way across over directing everything back and just connecting it together and then from there. I'Ve got my guide and now we're working with the heavy part of the head. So that's why i say that this is interesting, because a lot of people just cut their line then go into a ton of texturizing techniques, take out the bulk, but nothing really has a rhyme or reason to it. The reason i'm now elevating the hair is because this is the heavy side of the head, so i want to elevate it. I switch to a point cutting technique instead of blunt cutting, because i want to add more texture and take out some more weight on the lines that i'm creating and i'm over directing everything back. So i do that. I blow it dry and then what i'm going to do is go in and color it and then, when i rinse out the color and i blow dry one more time, then we'll go in and do our dry cutting techniques so reason paul mitchell pop xg. It'S a fantasy color, i mixed pink and red and hot pink. Like i mixed tons of peach all together, we wanted to make a pink color that just was a little earthier looking, so it wasn't just like a really bright fantasy color. It was a little bit softer, so i think you guys will like the end result, so i just paint that on that's fully scalp to ends just painting it over the fact that she's already got blonde hair. So you want to make sure if you're going to do color like this, especially lighter pastelly kind of colors on your guests, make sure that they're, nice and light they got to be at least a level 9 to really get the right effect. So mary we've been bleaching her hair for quite a while. She wanted to try something new, so the pink was kind of a nice fit. It also will fade out. So then it will fade out and also tone her hair, so you'll see but check out that the kind of smokiness to it um. I really love the movement and everything. Now i go and do some dry cutting techniques start out with point cutting, because i really wanted to break up the lines that we created on the top. So we did some pretty blunt lines over directing everything back to that stationary guide. So what point cutting does just goes in and softens those lines, and then i go right across just above parietal ridge and i pull some of the hair down. This is hair that probably is going to fall off to the side, let's just say so. What i want to do is just soften that, so i comb it down and i work my scissor a half closed and i just kind of take some teeth out of it or gaps. I just create uh air in that shape and i go in with paul mitchell, invisible wear and i spray that in it's a texture hairspray. So i create a ton of texture. It'S got a slight um me, i'd, say a medium hold and then i go in with my iron. It'S a paul mitchell. Pro tools, smoothing iron i go in, and i just flip out some of those textured pieces to really show off the shape notice that the shape really follows her jawline and expands into the back, which really gives her a nice flattering shape to her head shape. So hope you guys liked the video remember check out my scissor on freesalon education.com. Thank you guys so much for watching. If you have any questions hit me up on social media, everything at free salon, education, thanks for watching

Comments
skervin and Glen gaming: awesome
hafiz rayans world: Wowwwww