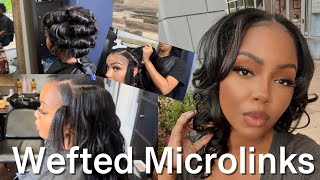
Pixie Cut|Skull Cap Wig For Beginners. Step By Step Tutorial.
- Posted on 06 July, 2020
- Pixie
- By Anonymous
My first time of fixing a pixie cut (skull cap) wig. A step by step tutorial for beginners from start to finish. The wig was achieved without the 27 pieces hair.
Items used;
Two stocking cap
A razor comb
Hair glue
Nova extra hold hair spray
Scissors/razor blade
Best quality human hair
Yavin hair or premium too
In this video i achieved um the pixie cuts wig or the um skull cup wig, like we popularly call it here in nigeria, and this style was achieved using the materials listed. I first of all started with wrapping the hair with pulley tin to avoid glue hair glue from sticking to the manukin. Oh god, this was where my problem started. Uh the money king or the clamp, will not just hold. The first mistake i did was to try to clamp this to the chair and it did not work it kept coming off and the chair kept rotating it couldn't stay, the clamp will not stay, it was really frustrating, i must say but sure. Well i continued. I went in with the second stocking cap i used to actually i just started to fit and then went continued with placing the hair weft with glue applied to it, placing it to the mannequin head or the cup here. So what i did basically was to measure out the hair that um fits or that the hair needed um play and apply glue. The clamp will not just stay. That was the problem. It will not just stay, and i just i just i just got tired. I needed to do something but shower like continued. I went in with so what i did was you apply the glue measure out the hair needed apply glue to the hair, using your holding spray spray on the um cap and we're going with placing the hair weft to the end to the cap. So so and so on and on i went, but this was not just working for me. You could see this style. I did not like the style, so i had to start all over. So what i did was i removed every hair i placed before and then started this time. I used a pink to secure the cup to the mannequin head, sat on the chair in hopes that that would reduce the rotation of the chair and continued this time. But still i wasn't satisfied, although i got this style this time. The style worked like, as i was, placing the hair on the hip cup on the mannequin. It went it worked for me like i was getting this bra and the style i was getting it right. Everything was going according to plan so far, but somehow i wasn't still. I wasn't comfortable and i felt something needed to be done, so i had to get a table top which i did here. I got it from a carpenter in my area. I went downstairs and got this from a carpenter in my area and then it worked for me with this. I could easily fix the hair and everything was just moving smoothly, so here i'm placing the hair around the um and cap. At this point i start to go round and round and round, and i don't measure out the hair anymore - i don't cut it, i just kept going round and round so what you do basically is just um apply the glue spray, the hair with the spray, who Am holds free and just keep going round and round and round and round like so, as you see me doing this video at this point, i'm applying i'm using a longer hair because i needed the hair to be a full fringe hair like i need it to Be uh, what's it called? Is it uh to have a bang in the front or something? I think that's what it's called shy. This was what i needed. So i'm going in with a longer hair and just like before i'm going round and round and round with the hair, apply glue and keep going round and round nothing extra. At this point, i'm well i'm progressing at this point. You just keep going round and round anybody can do it at this point. You don't need to be hair pro to be able to get this part of the hair of doing the hair. You just keep going round and round and then the basic normal apply glue and then continue like so so guys. I would like you to support me by liking this video commenting and clicking the subscribe button. Please um! Let me know what you think in the comment section about this hair. Thank you and this hit the glue i'm using for this hair. You need to be very patient with it. You need to press and press and press before it sticks. I don't know if it's the glue i got or something so here i'm almost done with the hair. It'S just a little space left right there. So what i did was i took out a little piece of hair weft folded. It together applied glue and placed it in the hole to cover it opened it up, and that was it. It didn't show in this video. So sorry about that. So here now i am going in with um cutting the hair, so i am cutting the hair using eraser comb, and here i needed the back to be very, very flat, so i'm going in with cutting the hair. I i really took out a whole lot from the back, because i needed it to be flat and this hair is not between seven piece hair, which is a lot more easier to work with this one is like deja vu in nigeria. So it's what i could find, i couldn't find it in seven piece hair. So i'm trying to make it work for me. So what i did it was to just kick. I kept chopping chopping up the hair, um chopping, reducing the hair, reducing the hair, any point where i feel um the hair. There is not needed. I reduce i reduce i check. I will comb check the shape and then continue to reduce. So this is the hair. After cutting most of it, most of the cutting was really done at the back the front. I didn't do so much because i needed it to be full and to have a bang in the front at the front, so i continued like that. So what i'm doing right now is to remove or take out fly away hairs, as i feel are not where they are supposed to be using a scissors and um my um razor comb. I continued like so and then this is the final look. So let me know in the comment section what you think um: how do you think i did do you think i did good? Do you think i did bad? Is there something i should have done differently, because this is my first time of trying this style? I would like to hear from you in the comment section, so this is the hair and tada. Yes, yes, i think so at this point i needed to straighten the hair. I needed it to be a bit flatter, so i'm going in with the my hair straightener to straighten the hair. So while the head, the hair straight nice heating up i'm applying water to the hair to dampen it, and at this point i'm going in with my diy hair protectant, i'm going in with my diy hair protectant to get the hair prepped for straightening. So i'm going to go in now with this hair straightener, i'm going to start straightening the hair. I didn't really get stall straighten the lower back, because the lower back the hair, the lower back - it's not grabbable grabbable the style, but the hair, the back it cannot. I cannot grab it. I couldn't grab the hair at the back because they are very short hair. So i what i did was i grabbed any hair. I could grab any hair, my hand could grab. I straighten, so i straightened the entire hair. I stitching from the back to the top and it was not easy. This whole process took me a very, very, very, very long time to complete and you, if you for you to complete this process, guys you need patience. You really really need patience and it wasn't easy. The my hand felt it with the heat from the hair. You know you have to grab hot hair as you go and you know you have to straighten like you have to hold the hair with the heat you have to straighten it like two or three times or even four times before you drop it, and it's on My hand, it's always picking it up, it was not easy, my hand felt it was sure i was able to complete the hairstyle. So, like you see in the video i kept going and going with the hair straightener, the heats almost wasn't here, but then gotcha. I continued i finished, so are you still here guys? What are you still waiting for, like my video subscribe to my channel and click the bell button for to be not so you get notification of new video or new vid for new videos, get notification for new videos or new videos. I don't know it's trying to understand, you'll understand what i'm trying to say, so i kept going and going like so and at this point i am almost done with the hair. I'Ve straightened every part, every side of the hair stretching the sides and the front, and it's just the top now remaining. So i'm going in with this hair straightener and i'm straightening that part too don't forget to comb you comb before you use the hair straightener you comb it out. First then, use hair straighten out buckling with this, because there is glue attached to the hair there. So you keep on going and going like so and finally, i am done with the hair, and this is um what it looks like i i i think i did a good job. I didn't do badly. I did. I did not do badly. I i think i did not do badly, but i would like to hear from you to know what you think about what i did do you think i do dwell. Let me know in the comment section so at this point i am very, very tired and i didn't get a chance to wear the wig, but this is what the wig looks like after fixing it. Thank you guys and bye for now.


Comments
Charity Stainless: Incomplete video, u didn't trim d front and u didn't show us how it look on ur face