Step By Step | How To Do A Traditional Sew In On Yourself With Leave Out *Detailed* Arabella Hair
- Posted on 27 July, 2022
- Pixie
- By Anonymous
As always, thank you so much for watching xoxo Today's video will be focusing on how to do a traditonal sew in on yourself. This is something I haven't done in 5 years so it was very interesting lol, but still turned out cute. I
Installment is available & Choose 4X PayPal payment
Shipping from US: 2-5 Days Fast Delivery
************** #ARABELLAHAIR OFFICIAL ************** ╱
The hair I'm using in the video:https://bit.ly/3Pv7LM8
Hair info:raw virgin hair bundles straight hair in 20''
Exclusive discount Code: "AYTB" save money
—————————————————————————
HOT STYLE RECOMMENDATION!!
Top.1 Selling 13x4 #TransparentLace Wig➤https://bit.ly/3vrqXCv
[NEW Trend] Balayage Highlight color wig➤https://bit.ly/3oihj0R
[Ponytail&Bun]360 lace wig➤https://bit.ly/3v7sDRd
13x4/4x4 transparent lace Water wave Bob wig➤https://bit.ly/3PpwVM0
Popular&affordable Piano highlight wig➤https://bit.ly/3cxunN2
Popping Peekaboo Bob wig➤https://bit.ly/3zkuDrO
#arabella hair social info:
Youtube: https://bit.ly/3Ou6vZe
Contact for promotion:
Email: [email protected]
WhatsApp:+86 18937456160
Connect With Me!
Instagram|Tiktok @lesshhab
Make sure to subscribe and like this video! Also add me on social media
Check out my Amazon storefront link if you’re interested in other wigs & products:
https://www.amazon.com/shop/influencer...
DISCLAIMER:
Some links may be affiliate links where I receive a small commission from you clicking on the link and purchasing anything I have listed. No purchase is necessary.
Shop my wig collection SHOPALESHAB
Website link : https://shopaleshab.com
Instagram : @shopaleshab
Email: [email protected] for sponsorships, collaborations, and business opportunities.
About Me:
From: Virginia
Age: 24
Camera: Sony ZV-E10
Sign: Gemini
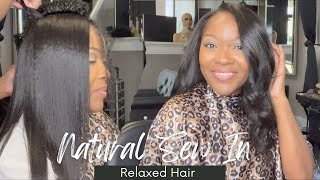
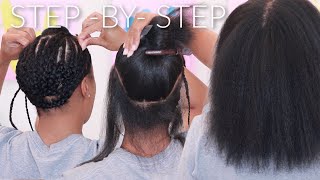
It was just such a great era and i just feel the wind blowing through my scalp right now, and i just wonder why i continue to put these wigs on my head when i could be doing this. What'S up y'all welcome back to my channel, i'm alicia. If you're new and today's video is going to be very much different because we're doing a sew in these are three beautiful bundles from arabella hair that was sent over to me and we're going to be doing a traditional leave out sew-in so make sure y'all keep On watching to see how i did this, it's been five years y'all since i had a sew in let's go, make sure y'all go ahead and hit the notification bell, so you can be notified because i am going to be posting like a part two to this. So i can cut layers and put curls in y'all are always asking me how i do my layers, so i'm going to make a dedicated video just to that from start to finish so yeah, you need that notification bell. So you can know when that video comes out, because i put my videos out whenever so i'm going to be telling y'all step by step, how i got my sewing to look like this, so the first thing i'm doing is sectioning out my leave out here. I wanted just a little bit of leave out so enough to cover up my tracks, but not too much, because i'm very much natural i've been natural for four years on and off for more than that, but four years since the last time i had one and Yeah, that hair is gon na, be poofy and i'm not trying to have to deal with a whole lot. So i'm gon na leave out here, but yeah um, because i have my nails on y'all bear with me with these braids. Now i can cornrow and i can cornrow pretty damn good. If i ask if you know, if i do say so myself not to do my own horn or anything but like i can braid pretty good um, but when i have nails on yeah it ain't it. So just bear with these cornrows they're, not the best that i can do. I literally cut my nose off after this but, like i said, sectioning out the leave out here, and this is what it's looking like. I went ahead and just pulled my hair back on both sides, so i could braid down that leave out section and know what i was working with and i wanted to use this shine and jam. This is the braider shine jam honestly, don't feel like there's any difference between this and the yellow one. It was the same to me, but i just used the shine jam, so it was easier for me to grip my hair, considering that i had the nails on like i said, so what i'm doing is just doing an easy braid pattern: i've braided all my hair In a downward motion and connected all my braids onto the back of my hair and then i sewed the braids up, i really didn't care about. You know the braids being super small, but for future reference, if you all are doing this sewing or you're following what i'm doing, try to do smaller, braids, smaller braids makes it easier for when you're sewing your hair on, because you have more to sew to when You'Re doing a sewing you're sewing to the braids, so the more space you have in between your braids, the less that you have to sew to, which is what happened to me, but i mean i'm managed, but just so y'all don't make the same mistake that i Made make smaller cornrows so yeah y'all can just watch as i go through this part and then i'll come back and explain what i'm doing once this is done all right. This is what i got so far. These braids aren't like the best braids i've ever done. I'Ve definitely done braids way better than this. I definitely can cornrow way better than this way tighter than this, but i got my nails done. I'Ve had my nails done since i went on my trip to dallas and honestly, i don't know how to braid with my nails on not as good as i like to it's something that i have to practice. But you know it's a basic little foundation. That'S all! We need so i'm just gon na do the same thing on this side and then i'll come back and show y'all um the finished foundation and get into what you're gon na need and how to actually get ready to sew the tracks on all right guys. I finished the braid pattern. Let me move this out. The way again, like i said, they're, not the most crispiest braids i've ever done because of my nails, but with practice they will get better. But this is this side and then this is this side, and then this is the back. I don't even know how the back looks so bear with me. My hair is super thick, it's freshly washed, but um. I blow dried it, but i didn't blow dry like all the way as good as it could be because it's hurting like i have not had my real hair out in probably like six months, a really long time and it hurts. I normally don't ever blow dried out. I normally just wear it like slicked back with gel and a bun, so i'm very tender headed. So this is what it looks like i kind of just tucked each braid in and braided them into each other. Until i got to the back so i have five braids five big braids back here, i'm going to fold them up and sew them down in the back to create a little thing right here like this, so i can sew one too. So i'm just going to do that you're going to take any type of weaving needle, which is like these little curved needles, these little curved needles - and i have a few of them. I have about four or five of them. You want to have more than one because when you're sewing your hair in to stop and re-thread your needle can take a lot of time. So i like to use uh like four or five needles and just thread them up. Excuse the noise y'all. I live by air force base, so all you hear is airplanes all the time, but um you want to have four or five needles like a few needles to just thread up in the beginning, so you don't have to keep constantly stopping to do your sew-in. So now that the braids are done, like i said, i'm gon na go ahead and sew these braids up in the back to create a better foundation for the sew in and then i'll come back when i'm getting ready to put the bundles on - and i have Four bundles and they're really full bundles, but i'm gon na try to fit all the hair in there. So it'll be really full. I'M gon na try to fit all the tracks in and i like to double weft, so i like to uh, have two tracks at a time when i'm sewing and we'll go through this i'll, describe it a little bit better once i'm actively doing it, i can Explain it to y'all but yeah. This is my leave out. This is how much i'm leaving out. So let's go ahead and get into the next step, and then we can continue on all right. So i have my needles threaded. Hopefully, y'all will be able to see like a good view of the back, because i can't see what it looks like, but i probably will have to re-thread my needles, maybe two or three times, because i only have three. But i recommend to have like four or five um. I just put a little knot at the end i like to put two knots at the end of my needle um. Just that's in my thread. Excuse me just for security purposes, but yeah i'm going to get ready to go in with the first track. So, of course, like i said, they're all the same length. So this is what i mean by so the wig come on the wig, i'm used to wigs y'all that the track comes with it already folded over. So this is a this is double wefting. Single weft would be to just put each of these one by one and fold them over, so i'm just going to start with them fold it over. I find that it's faster. Some people know how to double up their stuff even more. I'M not that professional. I'M not that much of a pro but yeah, so i like to start from the curled end, so this is the inside track it that was rolled up so um, because this is the end that is not attached it separates just so i can keep my tracks As neat as possible, when i'm doing my sewing and flipping the tracks over and everything, i like to start with this one, you want to start on your edge here and go over to the other side. Now, whichever side you want to start on is up to you, i like to start from left and go to right. I like to take my needle and thread, and i'm gon na, go through the track. The last track here, i'm i actually sew through it and pull my needle through. So it's already on the track, i just like to clip it down, so i have the tracks staying in the same spot. I don't have to worry about it, moving going nowhere when i'm trying to sew at the same time, it's a lot going on so yeah here. I am sewing on my first track in the back of the hair and, of course, i'm going to slow this down. So y'all can see when i get to the front of my head, i just kind of wanted y'all to see the motions and what i was doing again. Don'T come for me in these braids because i know they could be better plus. My hair really wasn't blown out all the way, so it was like super fuzzy, kinda, so yeah anyway, taking my needle and i'm just sewing underneath of the track and through the braid. So you don't want to sew through your wefts you're, just not supposed to unless you're on the ends. You want to sew under the track part. So that's what i'm doing it's up to you, how big you want to sew together or so far apart from each other, i feel, like you know, a good half an inch to an inch is a good enough amount of space. You don't want it too far, because you want it to stay in there tight. So i just go all the way across and i make knots on the ends when i reach the end of a bundle or the beginning of a bundle. That'S the only time i'm making a knot, otherwise you're going to repeat this back and forth back and forth back and forth until you get to the next one. So i'm going to come back when i finish with this bundle. Y'All could just watch as i go through the motions. I'M just gon na go ahead and do the rest of this bundle. Once i get done with this bundle, i'm going to show y'all. Basically, every time i start a bundle, i will do two tracks and then continue on off camera and then show two more bundles. I just want to keep in mind that i have four bundles, usually a sew in for a regular one. You only need two to three depending on the length of the hair but um, so you do not have to put your tracks as close as i'm putting mine, i'm just trying to fit all the bundles in so that's reason why i'm doing them so close. But if you have like two or three bundles, you can space them out a little bit further and um get your full head done so yeah. So i'm about to start the new track, but i just wanted to show y'all the new bundle. I just wanted to show you all kind of what i'm doing now, because this part will not be on that part. So i just clip my track down so it'll stay, but i'm wrapping it. So you want to go back and forth back and forth in the back until you run out of your bundle, but once you get on your last section of hair, pretty much before you run out, you want to start to wrap it around the side. So it's not so bulky you don't have to. I choose to do mine this way. I like doing it this way. Just so i can have um an even foundation, and it's not just all on the back, so you want to go in on your braid here and then once i get to the end, i'll wrap that back and then i'll start my new bundle here we are With a close-up for you guys on how to sew, like, i said before, you're going underneath the track through the braid, and so this is where it comes into play, where smaller braids would make it easier for you, because those spaces in between my hair, i cannot Sew too, you can choose to use a net, but i just didn't choose to do that, because i'm not keeping this in that long, but you're only going to sew to the braids not in between it will make your head hurt. So please do not do that, but sew underneath a little track onto the braid. The only time you're sewing through the actual track is when you get to the end, so you will be seeing me get to the end here. This is why i recorded this part for y'all, so y'all could see me physically go through and make that knot on the end. So once i once i reach the end of this, you will see me talk you through how to make that knot. So i'm not going to repeat that part because i've already said that in the video but yeah just keep on watching and you can continue to see what i'm doing here. I have not done a sewing in so long, so i had to really tap into the vault and remember how to do this. I did not watch any new videos, so if there's any new methods out, then i may not be the best person to show y'all, but but i really wanted to do a quick weave, but i had to do a sew-in for this. That'S what they wanted. So trying to make everybody happy, but there i go making the knot at the end of that bundle, and this just makes it so the end of the end of the track or whatever you want. But anyway, i am doing this because when you go to the end it will secure it as well as if you were to cut the thread that knot would secure the thread in place. So it would not like pull out and loosen your track. So it's very important for doing that, especially on the ends. I only miss you when the all right, so the first bundle. The first bundle is now done. This is my first time brushing through the hair. I haven't had a sew in in five years, five years, yeah, it's giving me like memories, though, because when i used to get my sew-ins, i used to go to this one person before i started doing it myself. I used to go to this one lady, all the time, and it just you know she used to always kill it. She would always do it exactly how i wanted it. I would have a little swoops like it was just such a great era, and i just feel the wind blowing through my scalp right now, and i just wonder why i continue to put these wigs on my head when i could be doing this. Okay, i miss. I miss it, i miss it. I love it, but i miss it, but i love my wigs because i don't miss that leave out. I do not miss that damaged leave-out stage. If there was a better way to do a sew-in, then i would be doing it, but i actually like the sew-in vibes um, maybe even with the closure on top. I like the way it feels it makes me feel more like i have more access to my scalp than a wig, so you know we never know. We may see me doing more sew-ins in the future, with closures glued down, because i like this - i like this a lot so i'm getting ready to go in with my second bundle here. Finally, i feel like it's been a long time coming. Okay, so first things. First, like i showed y'all in the back you're gon na, and this this thread is short y'all, so don't mind it. I want to use the end of my needle and my thread because i didn't put it on there to waste taking the needle here and the end of our bundle and you're going to go through the very edge of that weft and make sure you're going through It not under it, but through it and pull that through. This is just to keep it and lock it in place. So now that i have that i'm going to take my bundle, but anyway lining it up here we are, and you want to go all the way to the edge and up a little bit here. We are take your clip. I have two and once i get to the end, i hold my track just so um i can get that edge, but so under your braid and through your track, and i'm just going to do it like this for visual purposes. So i can see, because i can't see good all right so have my track attached so and you want to make sure when you clip your track down it's tight, so you don't have to worry about your track, slipping and create a knot when you're, starting and Ending a track for security purposes, so, as you can see, here's my needle here's my thread. Okay, so you're going to take the end of your thread here and here's your needle wrap around your needle two to three times one two three then you're gon na push your needle through and pull it through the other side. This is gon na, create a knot and then just push it. That'S gon na create a knot at the base of your thread, or you know your stitch or whatever you want to call it and that's going to just keep it a little bit more secure. So once you go to cut your thread, you will not have to worry about your tracks. Dropping you will not have to worry about them, loosening on you or coming out. So that's the reasoning for that. So once you get going, you're going under the weft do not sew through the weft guys under the web through the braid pull through. Where you have spaces in between, i don't sew there, there's nothing to sew to you have scalp, you don't sew to that part. You only sew to the actual braid, so it's basically like so skip so skip so skip. And if you want to be able to sew there, you can get yourself a net, but we're not doing all that today and you're just going to continue on throughout the head. Now don't be like me and wait until you get here, and you only got this little bit of thread to try to wrap it around because you're not going to be able to so i just pull it as tight as i can. I cut it, but you don't do that all right, y'all touching the third bundle. The girl is tired. I'Ve been sitting here doing this for two hours now, including the braids i've been sewing for one hour i braided for one hour, my cornrows we're almost done close to the top of my third bundle, like i said so. I think i'll be done once i uh get this one started. I won't have to use the fourth bundle. I put them as close together as possible and still could not fit them all, but that's just because i doubled them up. I could have singled them and probably fit them, but i don't want to stay here all day, so hopefully i'll be done before three o'clock. It'S 2. 39. Now i got 20 minutes, i'm hoping that i'll be done. So, let's see all right. So i'm back so like i was saying um either when you cornrow your hair, you can grip it tighter, so you have more of a braid at the beginning. I don't have a braid at the beginning because, like i said, i'm braiding with these nails. Okay did the best that i could do so. If you have more of a braid, you can continue to sew up as close as possible or make you an anchor braid. I just chose not to do that, because i didn't want to make me no anchor braid. I wanted to do this, so i'm going to go in with this little bit of track that i have left here and i'm just going to place a track here. So it's just closer. I like, for my sew, end to be like right, close to where the leave out is at, which would be a reason to have an anchor braid as well, but um. I just don't want to do that, so you don't have to do as i do. You can do whatever you want to do, but that's what i'm going to do. This is exactly what i'm going to do. Try glue ain't, never hurt nobody. Okay, ain't, never hurt me might have hurt somebody, but they never hurt me i'll stay. Now i'm going to go ahead and flat iron, my leave out and i'm just going to be using my turn up the heat spray heat protectant right here. I only miss you when the sun goes, oh holding me underneath lifting slowly thinking, slowly, underneath. Okay, all right y'all. This is the final look, so i'm just going to show y'all the edges. I like to braid my edges up. I don't like to have no edges out when i do a sew in just because my edges are long and they come out anyway, but this is what it looks like flip this back. That'S what the front tracks look like and then my leave out as y'all can see it's like really flat. That'S why i like to go in with that track on the last little bit like that little space that i had, because it just makes it a lot flatter and it doesn't make my leave out. Look as like leave out ish like as sticking out as much so yeah. The hair is really good. I haven't really experienced no shedding, except for when i cut the weft and um, that's pretty much it. It wasn't that bad. Considering that i haven't done um a sew-in in five years, like i feel like it was decent, it came out pretty cute, it looks very natural, make sure y'all go ahead and hit the notification bell, so you can be notified because i am going to be posting. Like a part two to this, so i can cut layers and put curls in because y'all y'all are always asking me how i do my layers, so i'm going to make a dedicated video just to that from start to finish so yeah, you need that notification bell. So you can know when that video comes out, because i put my videos out whenever i really don't have a schedule so just to keep up make sure you do that and also hit that subscribe button. If you already made it to the end of this video and i'll see y'all in my next one, i only miss


Comments
lala: I subscribed like 5 mins ago turned that beall on n got excited ❤️
Ali Pearl Hair: beautiful!
Sonya Jones: Great flatiron !!!