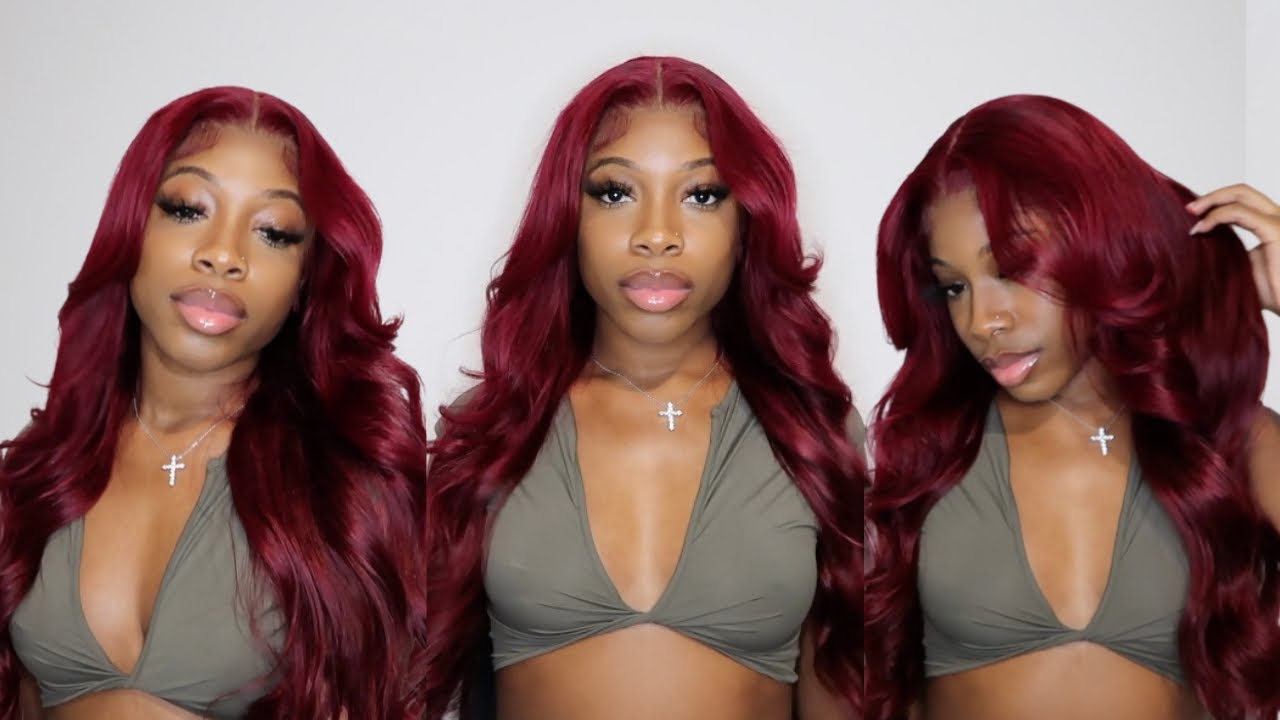
Make A Custom Top Knot/Ponytail Hair Extension By Repurposing Your Old Extensions
- Posted on 11 March, 2019
- Ponytail Hairstyles
- By Anonymous
Recycle your extensions and make a custom clip in top knot/pony tail.
I often wind up with extra or random hair extensions and like to reuse or recycle them.
For this look;
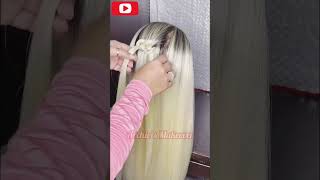
Gather your hair extensions and choose the colors and lengths to achieve the look you want. Remove any clips that are on the wefts. You can easily resew the clips on should you want to repurpose this look as well. We want to create a look that can be worn as a ponytail or a top knot. It should be roughly 5" wide so it can wrap around and hide your own ponytail. This will help ensure a more believable look. I don't cut the width of my wefts as I may reuse them for something else later. I fold and sew them to the size I need per look I am creating. I am not the neatest when it comes to sewing. Wefts and hair are very forgiving.
You'll need hair extensions/wefts, scissors (I borrowed mine from the hotel front desk), needle and thread (I prefer weaving needles as they are stronger), and one large extension clip, and maybe a pencil and a cup of coffee! :)
Part 2 - How to apply, coming soon.
Hey it's Ken Paves here. Thank you for tuning into my youtube channel. It'S an early morning here in New York, and I don't know how you start your routine, but mine is often started with a strong cup of coffee and some hair extensions. So today, in my hotel room before I go to work, I am going to make a special top knot piece for a client of mine. So in front of me I've got a couple bundles of hair all right now. I can think so in front of me. I'Ve got a couple of bundles of hair in the same tone as highlights and notes on my clients hair some of its got clips on it, and some of it does not I'm trying to see what seam look best for her and match her hair. You want to find highlights and lowlights, so this one I really like this is a great, neutral kind of medium light brown with no clips on it already. It'S got kind of fine edges, so I like that. That'S definitely gon na work and it has the amount of length that I need. This is all the hair I'm going to use to create a top knot. Now I have clips over here as well. I think you guys all know these clips what's great about. These is you have a little bit of rubber on one side which helps to keep it stick to the hair and not slide, and they just go flat like this and little combs. You go into the hair and they go flat just like that. I'Ll come a little bit closer towards the end, but this is the comb just like that. I only need one for the top. Not this piece here already has clips on it. So the great thing is I sewed them on. Take them off and I'd like to use just regular, sewing or kitchen or desk scissors, because they'll doll, my hair scissors, so you don't have to have professional hair scissors just make sure that you cut off only the thread that is holding the clip on all right. So got the hair that I want to use here. I'Ve got my thread and I've got a couple: pre threaded weaving needles, so I've got these here, ready to go Mason Pearson coffee. This is how I start my day. Now one of the things really important to keep in mind, not only have I selected different tones said but darker. This is a bit lighter, but I've also selected different lengths. This one is considerably longer this one is about maybe 2 inches, 3 inches shorter, and then this one again is even shorter than those two I like to have the majority of the length to be the longest length. The reason I like to do this is my client has laterz in her hair, but for anyone that has a ponytail, it never really lays really blunt, and even though I'm gon na be wrapping this into a top nut. I wanted to look really natural and I want some of the shorter pieces to flick out some of the bits on the ends, so what I've done, as you can see here, there are now three different lengths and it's later kind of like this. How cool is that so now I don't need to cut it. So if you're, not a professional, hairdresser or you're afraid to cut into the length of what you're creating this is gon na automatically great cool modern way and the majority of the hair. When you get it, it comes, you know wispy around the edges, so that it lays really natural. This piece here seems to be a little bit blockier and a little bit heavier than what I like. So what I'm gon na do is about 3/4 of the way down, I'm gon na twist it it's twisting. It here, wrap it around my finger and very carefully. You don't want to take a lot of hair out, but even with these scissors, I'm just gon na go along the end of the twist. So twisted the hair around here and I'm just gon na go in very lightly and make a few little cuts in random spots. There is fine cuts, so you can see now you see that little bit of hair, but what that's gon na do is actually gon na texturize very randomly not too much move that bulk perfect. I'M gon na use varying lengths and varying colors, and what I want to do is just lay it out on the table and just see what I have. So. What I'm gon na do is just gon na brush this out and I'm going to arrange it on my table by length and color cuz, I'm doing the top nut, and I want to wrap this around like this and have all the variations of color. I'M gon na overlap the color from dark to light to dark your light. So it's a little bit more evenly spread I'm going to start with my darkest on the outside, and I'm going to do this a little bit differently, because what I want to be able to do is wrap this around my clients, hair. I don't want to make a piece like this and then just stack up the dark to light. I want to really be able to wrap it around her ponytail, so I'm going to sew this piece together kind of about a five inch width like this. The reason is, when I put this around her hair with the clip in it, this will wrap around and then the dark will be on the outside, and that will give me a more realistic look. So I'm gon na start off like this and just sew this one piece about five inches and start on the end. Well, it's close since it's one continuous piece I'll fold in the middle and I'm gon na start on the end. What'S open, what I like to do is take one of my weaving hooks. These are the same hooks that I use when I'm weaving, but I go in just on the end. Make sure that you go to all four of the wefts kind of strong almost to the end and then just like. I would, if I was sewing in a track into somebody's braids. Go into the end where it's tied hold your hair back with one finger and then just pull that so now you have a locked base. Super easy super secure. Now you don't really need to work kind of as hard around the hair. You can go through the weft, I will alternate going through the weft and around the wefts when I go through and I create a loop around the weft like that, just like they do in the beginning. I'Ll go through the loop here causes, like you know, creates a little not for when you want to do kind of a quick, easy look like this: what are you gon na reuse, the hair? This isn't a one-time use here for me. I will deconstruct this again and make something else. At the end, these scissors - I actually called down to the front desk and borrowed so I didn't have to worry about my good scissors, so comb that, at the end put my needle to the side and one thing I like to do as I go along just To keep it neat really brush through and then any extra hairs on the outside of the weft past the web. It'S not messy! So now you see that I've created this, but five inches wide. This looks like it could potentially be enough hair, but since I'm doing a knocked - and I know I'm gon na - do this super insignificant and definitely not other colors, I'm gon na potentially go with not the darkest, but in with a medium shade, that's a different length. So you can see much shorter, so just starts to create that variation within this color and then you'll see now when I wrap this around, you get hints of the highlights already looking pretty good summarize so this I'm gon na go just below the stitching of the Weft, on top, so that this doesn't get too thick, it will still create that same great layering. But I need this to be real, flexible and if you go on top and on top and top directly on top, it's gon na create a bit of a thicker band, a little bit more difficult to really wrap around and make really nice at the end. Also so a bit of a each and also a loop to put my bobby pins into, even though I already have the clip here. I'Ll show you that at the end, so now I'm just going to so I'm gon na go like dark light, dark long, short long short and create the look that I want to create. So here goes all of these are kind of working out even for me or kind of working out the same length of my piece. But if it doesn't just fold an additional fold on the end to make it the length or the width that you need actually starting here again, always going a bit lower. Well, it's not too thick of a piece. Keep your hair on girls! Keep it on! Keep your work, neat, kids, keeping me get in there, I'm gon na go in with the next lighter color, and actually the lightest color on top underneath just so, I have something pop through. You know highlight that peek through highlight, so what I'm gon na do now is I decided to go with the lighter color on the inside again stacking these all going downward now to make it all neat and pretty good. Like I said, we got to keep it pretty to go like you can put that on me. Yes, ma'am, I'm gon na take the shortest and lighter piece. That'S going on the inside and I'm gon na put it directly on top level with the outermost piece. It'S gon na make it pretty on the inside outside, just like you guys put it on the inside outside. Nobody gets hurt, and I did not plan this, but I'm super excited about this proud of myself. This one is exactly the link that I need it to be, because what I want to do is kind of wrap the edges around to meet the the bit on the other side. So it looks really nice and burning and lock. So here I'm at the end of the extension. You know the end of the piece that I made here and what I'm gon na do is I've got the thread out here. I'M gon na take this pencil from the hotel. You can use anything you want it. Just makes it easier to make a little bit more a uniformed loop, I'm gon na put the ponytail the pencil just on the end loop around and now not it so going through the loop I like to do that part twice. Just like I said I don't want anybody's hair falling off, especially after I'm showing you this video that'd be the worst how to keep your hair on okay, I'll cut that off in a second look, how wonderful that is now put the bobby pin in there. I want to put a pin in there right now, just on the end, the loop, the same thing on the other side reason I like to do the bobby, pin like this honestly. I'Ve been in so many crazy places with my clients and sometimes not the best light hair piece. So if I did it, just kind of loosely went through and created a random loop, not as easy to see in compromising situations. So, even though I plan on getting my client ready in her hotel, like this, so wrap it around and we have got our explorer bobby pins y'all to the carpet to the red carpet, kids. So here's the piece and with a darker on the outside, lighter on the inside this one for the clip and don't judge, may not look pretty right now, but that's custom. That'S custom! We real pretty when it's on here's the clip the clips gon na point down towards the end again with the metal on the outside the rubber towards the inside. This is the clip, so this is the side without the rubber that goes against your head. That goes into the hair against the head and then closes flat. Now on this side, you'll see it's got kind of this rubber across the power here, it's a non-slip grip and what that's gon na do is keep it really in the hair, really tight. So again, you want to go in to the hair against the scalp comb side against the scalp in into the hair and close shut. This clip, which is pretty great just that great hair just shorter length, and we need to create this look. My best friend of 30-something years and she's so funny she will send me pictures of her and hair pieces. I'Ve made for her going to the grocery store or going to doing whatever. It'S like yeah feel good about yourself. You do you go to the school run. Looking good, everybody else is doing you do you. I got into this selfless I just loved, seeing when she would get herself ready. You know when I was growing up for a family function or something like that. My mom worked three jobs and when she got ready, man yeah cookie was a firecracker. How the five foot tall Filipino Portuguese firecracker kind of self ready, she'd give it to you beautiful beautiful before you put this on beautiful after you. Don'T need this to be beautiful yourself. Your self-worth is not your outward appearance, but your ability to look into the mirror and see much deeper. You recognize your value. So for me, that's why I do what I do. Somebody looks in the mirror and they're like what they see actually see themself. So that's in it kind of clip in the center goes upward into the ponytail bobby pin in the loop wrap it around wrap that around cross the bobby pins don't forget across the bobby pins. I will smooth this out and put a little bit of texture in texture, helps to create hold. How nice is that loop, this around wrap it around. That'S a top knot. If i ever saw one come on, no chopping up, go ahead top knot. What are you talking about? Go ahead knot, okay, so so what then? All those colors come on now look how that came together! I'M late got ta! Go bye, see you next time, thanks for tuning in

Comments
Stephanie Papaleo: You’re such a talented artist!!Coffee and talking about your Mom made my day! Beautiful! I love hair diy! I was hoping to see the top knot on your client!!
Shonda Nomey: Hearing you talk about your mom and how she inspired you is precious! Made my day
M C Torres: Great tutorial. Thank you
Amy Forgione: Your awesome
Ghetto Girl Travels: Nobody gets hurt!