Foxy Locks Clip In Ponytail Tutorial | Hairstyles To Do With A Clip In Ponytail!
- Posted on 26 September, 2021
- Ponytail Hairstyles
- By Anonymous
FOXY LOCKS CLIP IN PONYTAIL TUTORIAL | Hairstyles to do with a clip in Ponytail!
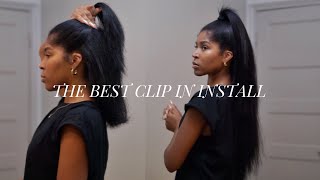
Welcome to a brand new clip in 22 inch ponytail tutorial where I show you the multiple ways you can style your foxy locks clip in ponytail. Including my top clip in ponytail hairstyles such as how to do a low ponytail, high ponytail, medium ponytail & bun. C
TIME STAMPS
INTRO
PONYTAIL PREVIEW
TOP TIP
HAIRSTYLE 1 - Low Ponytail
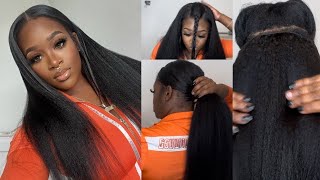
HAIRSTYLE 2 - High Ponytail
HAIRSTYLE 3 - Bun
HAIRSTYLE 4 - Mid Ponytail
OUTRO
OTHER FOXYLOCKS HAIR TUTORIALS
HOW TO: CLIP IN & STYLE FOXY LOCKS HAIR EXTENSIONS - TUTORIAL & REVIEW : https://www.youtube.com/watch?v=fqycJ0...
FOXY LOCKS CLIP IN PONYTAIL Tutorial & Review *DISCOUNT CODE INC* : https://www.youtube.com/watch?v=vn8egt...
Tags
foxy locks, clip in ponytail, how to do a ponytail with clip in extensions, clip in extensions, how to do a ponytail, how to style a clip in ponytail, ponytail hairstyle, diy clip in ponytail, clip in hair extensions, ponytail hairstyles, hairstyles with clip in extensions, how to do a ponytail with extensions, quick and easy hairstyles with clip in extensions, foxy locks clip in ponytail, foxy locks hair extensions ponytail, foxy locks ponytail, clip in ponytail hairstyles
#foxylocks #foxylocksponytail #foxylocksclipinponytail
Hi everyone, i'm lucy and welcome back to my youtube channel. If you are new here. Thank you so much for watching a video of mine. It would mean so much to me if you could subscribe down below and if you're returning subscriber. Thank you so much for watching another video of mine. It means so much to me in today's video i've got another foxy looks hair tutorial and this time i'm going to be using the 22 inch clip in ponytail in the shade santorini. The color doesn't really match. My hair color too well, but once it's clipped in it looks fine. This santorini color has got this deep brown root to it, which was perfect when i was in lockdown and didn't have any roots kind of have my roots coming through again, so it does kind of match a little bit. But back then my hair looked atrocious. So i'm just going to be clipping this in and styling it in different ways, just to kind of show you the best way to style it, but with this ponytail you can curl it, you can straighten it. You can use heat on it. So i think that is absolutely amazing and it kind of doesn't look. The best now probably could do with a wash, if i'm honest, and to make your ponytail last a lot longer. I would suggest using hair oil on it and treating it like you would any other normal hair just to make it last longer so before we actually get into it. I just wanted to give you a quick run through of the ponytail itself, just to make it a little bit easier on what we're working with today and kind of what we need. This is what the ponytail looks like, and it's got this extra bit of hair here which i'll talk through in a second, so this one's deep rooted like i said, and then it's got velcro here and this side as well and at the back here. It'S got this little clip that goes into the back of your head, but i'd also suggest to keep this flat so that it doesn't dig in to your actual scalp, because you don't want that. The way that i like to put the ponytail in is once i've sorted, my bun out you more or less wrap it around velcro it together and then, with this excess hair, just wrap it around, like you would any other normal clipping, ponytail and then just clip It in place with some hair grip, so this ponytail actually comes with two brown hair bubbles like this, which i've only got one today, because i only ever use one and then it comes with two hair grips, but i definitely suggest getting more hair grips from the Shop or something because i always lose mine, the hair grips that they come with just kind of look like this and the hair bubble you kind of get matches the root of the actual hair color. So i have actually had a lighter blonde ponytail before, and these hair bubbles have been blonde just for reference and then a pro tip that i would definitely recommend any of you getting is primark sell these rubber elastic bands like this, just these curly ones, that just Look like this. I definitely suggest picking up a pack of these because they make the ponytail so much sturdier and kind of make it last longer. And then you don't feel like it's going to fall out. So a pro tip, i would definitely suggest picking up a pack of these from primark. They were literally only one or two pounds, but i found them work the best and i also know someone who's tried to create extra height and doesn't have like the hair or the thick enough hair to make the extra height that they want. So they actually use one of those hair bun things. So it's just totally up to you just to see what works for you and what you kind of like. But i thought i'd just quickly mention that my top tip is definitely getting your hands on these hair bubbles because they helped me so much and made the ponytail look so much better. So, let's get straight into the first hairstyle, which is the low ponytail. First item. I'M going to use is the little hair bubble that it comes with, and i'm just gon na scrape my hair back into a low ponytail, just brushing the sides down to make it look a lot better and a lot neater leaving the front pieces down at the Front just to frame my face, i just wanted to do a quick little disclaimer as well that i'm doing this without looking in a mirror. So if you did this yourself, it might be a lot neater, but this is just kind of giving you a rough idea on what hairstyles you can actually do once the ponytail is all secure and in place. You then want to grab the next hair elastic, so it could either be the other brown one that it comes with, or the plastic one that i showed earlier. And then you just want to wrap your hair around so kind of like twizzle. It first and then wrap it around into a bun. This makes the ponytail look a lot more, even and it also stops your natural hair ends getting more damaged from getting stuck in the bun, and i think it overall, it just looks so much neater and it's so much better. Once that's all secure and in place, you just want to make sure it's sturdy. First, you then can grab your ponytail get in the clip at the back making. It lie flat on your head, like i said earlier, just so that it doesn't dig into your head. You just want to keep it flat against your hair. You just want to sort it in place at the top of the bun and then wrap it round so that the velcro connects together just to make it all tight. If you don't do this step, the ponytail will not be secure and will fall out. So once you've got the little excess hair you just want to pull it tight, make sure that it's in place and then wrap it around the rest of the hair, and i just find it easier to kind of pull the hair out the way when you are Doing this, because it can get a little bit confusing on what you're doing and then once it's at the bottom, you can then secure it in place with a few hair grips, and that is it. This is what the finished ponytail looks like once it's all in place and everything i love the look of this, and it makes the ponytail so much longer than when you have it high up to make the ponytail a little more sleek. I would probably suggest straightening it at this point um, but obviously you can kind of just see what it looks like freshly brushed and then you can also like curl. It straighten it and just make it look. However, you want it's super long and i just love the overall look of the low ponytail. So now that the first hairstyle is complete, i thought i'd just quickly. Show you how to take it out properly so that it causes less damage to your hair and the ponytail itself. So, to start off with, you want to take both hair grips out of the hair that are holding the ponytail in place once these are out of your hair. It will then release that little excess hair that was being kept in place, and then you want to unravel the hair and undo the velcro and then just pull the ponytail up from the top just to stop it all getting knotty and all ratted together. Once that's done, you can then take the big elastic out, followed by the ponytail and then that just creates less damage to the ponytail and your hair as well. Now i'm on to hairstyle number two, which is probably my favorite and the one that i reached you the most. So i actually don't have any part of my fringe for this one. But it is the high ponytail which is kind of like the standard, one that people use for the ponytail and i think the ponytail is kind of built for so i'm just gon na start off by brushing my hair up into a high ponytail with the brown Elastic band, i also wanted to quickly mention the hairspray that i use for any flyaways and just to kind of keep my hair all together and held really well is this got to be glued hairspray and it works absolute miracles. Another hair product that is really good is this ultra glued styling gel again from got to be, and it's perfect for edges and if you've got naturally curly hair like myself. The next step is to twizzle your hair around into a bun, like i showed for the lower ponytail, it's kind of like the same concept, but just higher up above your head. So once that's all nice and secure you're ready to grab your ponytail hair extension, remembering to keep that grip at the top really flat against your head, so kind of like pull it backwards, just so that it doesn't hurt or dig in and then again velcro. It. Obviously, make sure that it's velcroed, because this is probably the most crucial step like you - saw it's just kind of popped out again, so if you don't velcro it properly, it will just kind of fall. Apart now, i've velcroed it together, i'm just wrapping the excess hair around, like i did with the previous ponytail and then once it gets to the top. I'M just going to get two hair grips and kind of put it into position. But whilst you kind of do this, you want to make sure that the ponytail is kind of central in the middle of your head, because it is so easy to do this and kind of make it off-center. And this is what the final ponytail looks like i'll. Just kind of move around just to kind of give you a preview and show you what the ponytail actually looks like in and this one is my favorite and kind of gives me ariana grande vibes. I also really like how it looks at the back, but i would probably straighten this if i was to wear it out now on to hair style number three and this time i'm going to turn this ponytail into a bun. So you want to start off by twizzling it round into the very bottom and then wrapping it around the kind of top part of the ponytail. This one is quite hard and i feel like it works better with a smaller ponytail, but i thought i'd just kind of show you this one anyway, but once it's wrapped around, you want to then get a load of grips and just secure it in place. I feel like grips work so much better to secure it in place in comparison to an elastic band, because i feel, like it kind of just misses the parts out and then it just falls apart straight away, whereas this one keeps it secured for a lot longer. So you just want to put as many kind of grips around the whole area of it, just to make sure that it's all in position and looks the way you want it to look. You can then pull the sides down here, just to kind of reframe. Your face a little bit, but i decided mine stuck out a little bit too much because it's naturally kind of curly. So then i just put it straight back behind my ear, but this is what the bun looks like and it's completely solid. I love the way that it looks whenever i do this bun. I always feel like i'm tinker bell and i absolutely love it. Something to also mention is that it can actually be quite heavy on top of your head, but you do get used to it. After a while and it's kind of the same, if you're wearing the ponytail as well, you do need to kind of get used to the weight. Finally, on to the last hairstyle number four, this is the mid ponytail with framing around the front of it. So it's kind of a mixture between style number, one and style number two, i'm just going to take the hairbrush and section the front part of my hair off once that's done, i'm just taking the elastic band and creating a mid ponytail, because this kind of references, The height of the actual ponytail and what it will be like again, making it as sturdy as possible and then i'm just going to quickly go through this. We know the concept by now: you get the elastic wrap it around it into a bun and just secure it in place. Grab the ponytail. Stick it in from the top. Ensuring the metal bit is flat against your head and then velcro it to secure it in place and then wrap around the extra piece of hair. I just wanted to also point out this. One is a little bit messy and i am aware of it, but again i'm using my viewfinder, so i'm really struggling to actually know what it looks like properly. And then you want to take your two hair grips and then just clip them into position to secure it all into place, and that is it. That is how you create the final hairstyle and then just going through with a bit of grips, because i know all my flyaways are actually horrendous because my natural hair being curly and all my baby hairs and everything. But i love this. Look when your hair is a little bit more sleek and less frizzy like mine, but yeah. I love this hairstyle, just as much as the others and for reference. This is the length of the overall hair when it is tied up in the mid length, so they were my top four hairstyles. Please comment down below which one your favorite one is. Obviously you can vary each style to obviously suit you. You probably want like a different kind of fringe down, because i know mine's a little bit pathetic. You could obviously curl these front bits cut the ponytail straighten it style it. However, you want, but these are just the typical ones that i go for. So i thought i'd show you the ears and as for the bun, i think i don't really tend to reach for it, because i feel, like my ponytail - is a bit too thick for it. But when i had my 16 inch ponytail, it looks so much better. But i thought i'd just show you it anyway, but yeah if you did enjoy this video, please remember to like and subscribe down below and i'll see you next time for another video. You
Comments
Sarah Crocker: Love how natural this looks and how many styles you can create with it!❤️
Clare Walch: This looks so natural on you. I'm still looking to purchase one after seeing your previous reviews. The bun looks so pretty, I don't think I've seen you with a bun before but I really like it!
Jess McCarthy: You’re smashing the uploads atm!! omg I really wanna try these style of pony’s! Nothing better a long thick ponytail those curly hair bobbles are my favourite things too a low pony looks gorgeous on you omg can we talk about the thickness?! So good that you showed how to remove the pony tail too! So many reviews/ tutorials Miss this step! I use that same hair spray it’s UNREAL! I NEED to get my hands on these hair extensions deffo Ariana grande vibe!! the bun is stunning too! Just loveeee how chunky it is! The phase framing pony is gorg too eeeek
whisper whispers: Thank you so much for doing these videos, they're really helpful and you look stunning. If you ever get time would you do a video on the colour of these extension showing the root in natural daylight? Xx
Bex Fletcher: Love the bun! You should wear it like that more often. Recon you should do a tutorial on different hair styles but with clip in extensions instead of a clip in pony tail xx
BEAUTY AND THE KIDS: Wow it looks so natural it really matches your hair xx
Caitlan Groves: Love this!! Need to see this!!❤️❤️
Isla Beaton: Your hair looks amazing!
Becky Fletcher: Think my fav would have to be either the bun or the mid pony tail. ♥️♥️
Simple love: I love the natural look beautiful thanks for sharing
Jane Crawford: I’ve just got into using extensions lately, I’ve not used foxy locks yet but I need to
bosbeauty: I love all of the Hairstyles
Becky Fletcher: Also which lip gloss you wearing, might have to steal it!
Natalie Chad: the hair is such good quality
SmartPsych: you have gorgeous hair !!!
Courtney Font-Vanrell: Deffo low and mid
Jurgita Jakstaite: Hi! I wanted to ask what is the name of this color?
Becky Fletcher: Tinker bell vibes
Cetin Özden: Hello