How To: Half Up Half Down Quickweave High Ponytail (Beginner Friendly)
- Posted on 18 January, 2022
- Ponytail Hairstyles
- By Anonymous
Products used:
Hair Glue and Caps INCLUDED
https://www.amazon.com/Including-Secon...
Wrapping paper
Wrapp-It Black Styling Strips (2... https://www.amazon.com/dp/B073X4TVXJ?r...
3 bundles Used all three 18,20,22in
Panstorya Straight Human Hair... https://www.amazon.com/dp/B09BQSX5S6?r...
Wax stick
She Is Bomb Collection Hair Wax... https://www.amazon.com/dp/B07BB54T9K?r...
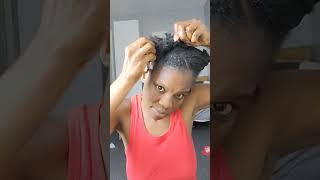
Let'S just can we kill me, i like really appreciate the high ponytail. Can we can we see that? Can we hey guys, welcome or welcome back to my channel, as you can see, i'm back with another video and it's basically a high ponytail with the back? What does this call? It'S called a half up, half down quick weave ponytail, but i love this hairstyle. As you can see hello everyone so we're just going to start off by parting. Our hair did in a center horizontally. You want it to be more focused towards the top of your hair, because we are executing a high ponytail, okay, guys so now that we have uh parted our ways through our hair. We just want to section it off and we are going to braid the back of our hair, which will be the quick weave part in two braids. It doesn't have to be anything special because we're going to put a wig cap on that is coming up in this upcoming, all right and right here, i'm just showing you guys the limit of how far we're going to have the tracks going up in the back. All right right here is a little bit self-explanatory. We are going to be using the hair glue, putting it on the tracks lining the tracks up to where i showed you, the lining and the last clip, and it's basically gon na be lined up like an invisible part, going um vertically, all right guys. So right here we're just cutting that wig cap down and that's where our high ponytail is going to go. You just want to make sure that you cut all of that wig cap off like so, and everything should be good. I do have to add a couple more tracks at the top and cover a little bit on the side, but everything is definitely just self-explanatory right here as well. Okay, so this is an important part. You want to make sure that the top of your hair is as flat as possible. As you can see, i am just doing a run through with the chasing comb method going through my hair one time making sure i get those baby hairs and everything around the perimeter. We want a clean, sleek silky, look when it comes to our high ponytail. We don't want it to be wavy or bushy. We want it to be as straight as possible. If you are natural, i will look into getting curly hair just to match the texture of your hair as well. So i'm just going to let you guys listen to some music, as i continue my straightening all right, because this is a half up, half down two strand, ponytail hairstyle. We are going to section off our two strands and later on, we will add a couple more tracks, just for added smoothness all right. So i do have to add a little bit of blow drying to my edges, because my hair is so curly and so natural that if i put anything on my edges, i have to immediately put the blow dryer on just to freeze that into a place. I don't want anything to be curly, especially my edges, all right, so here i'm showing you guys the wax stick that i purchased off of amazon link that will be in the description box at first. I thought it was turning my hair white, but as it goes on and as you rub, it and brush it in it dissolves within your hair, and it does actually work. Is it worth it? I think that you can go definitely without it. If your hair is straight enough for sure after centering or high ponytail, you just want to braid that ponytail down in the upcoming clip you're going to see that i use the uh papers just to protect the hair from the hair glue. So just braid that down. If you need to add a little bit of weave to your hair for thickness or fullness, you can do that as well. All right so now to the juicy part right here is where i had to learn my lesson. As you can see the crop video, i did not put the rubber bands on my head, which made my ponytail not stand up. How i wanted to you want to make sure that you put those rubber bands in stack and layer them, because that's where the volume of the high ponytail is going to come right now. This is the paper that i mentioned in the previous clip of the protection from the hair glue. You just want to wrap that around and at the end like, as you can see, you want to add a little bit of hair glue to it and then wrap it around one more time. Take the blow dryer and secure that just so that will not uh move at all now you're going to take the end of the track and make sure you hold that on with the hair glue and blow dry it a little technique that i have came up With is you want to put the glue on first? As you can see, i am using the double track method and just wrap the tracks around and, as you rock the tracks around make sure you're taking that blue dryer just to secure that everything will stay, because the last thing that you want is for your ponytail To literally fall off when you're walking down the street so make sure you secure with the blow dryer like so, and everything will be good, so so all right. So with this part, you want to take a piece from the back and that's going to be the wraparound piece. You just want to uh spray a little bit of your choice of hair spare holding spray, i'm using the beadwood spray spray it on. First make sure you comb the piece out, wrap it around spray, a little bit more on and then secure that with blow drying. You want to repeat that process, so you uh comb the piece out spray. It wrap it spray it again blow dry, it that's how you get it to be, you know secure and for it to stay and to not move whatsoever all right. So if you have thicker hair, you don't have to worry about this process, but i do like my hair to be a little fuller in the front, so i'm adding about two tracks on each side: um all right. So this is the finished product before styling. I just wanted you this guys to see it in its raw form. As you can see, i had a little white stuff in my center part, but i'm going to insert a little clip of what it looked like curled i mean i did have that in the beginning, but just as a little closer, i wanted you guys to see. I also did add extra tracks to the back after this video. It was tough trying to record and add to tracks, but just no idea. Thank you. So much don't forget to comment rate and a wonderful subscribe.


Comments
Miah Mcghee: Love how it turned out,How many bundles did you use ?
Marshayla Monique: Turned out soooooo bomb!
Imani Shantel: How long did this hair last ? ❤️
Jasmine Crain: Love it that flat iron is giving wow God bless you ! !!
Caede Moses: HeyHow long does the glue hold ?
Londynn Dixon: Hey this looks so good❤️❤️ i was wondering if u had a leave out in the back if not how was your tracks covered
Kuwkay: How is ur cap staying on girl, I usually see ppl use protective spray. But girl I love how detailed this video is ☺️
Tiki’s Opinions: You did this bout to try on mines today!
JynxLxc: Is your hair relaxed? I love the finished look
Miracle Owens: How long does this last?
Kiana Hutcherson: How long did your hair last?
Kennady Renée: What do you do if you cut your cap too short and your natural hair is showing
Walking in God’s Love: Good job ! Really cuteeee!!
Courtney Carpenter: Love the video! Imma try it soon I hope I don’t fail also you gotta be from Pittsburgh with that accent!!
Brittney Williams:
Prissie Missie: Lovvveeeee
China Dime: No glue protector or got 2 be glued to protect that glue
Shawnda Dick: What kinda flat irons you got cuz honey them work work