How To Do Sleek Invisible Ponytail With Babyhairs | Very Detailed Step By Step Tutorial
- Posted on 10 December, 2019
- Ponytail Hairstyles
- By Anonymous
Hey guys welcome back to channel, I know it’s been a long break but hey, I’m back! Today I’m gonna be showing you how I did this sleek invisible ponytail and I decided to share it with you guys. Its a very detailed tutorial so sit back and enjoy, I’ll be having lots more of those coming very soon. Feel free to like, share and comment your views down below and be blessed!
LETS CONNECT
Follow me on Instagram
Business page: @phenomenal_lengths
Personal page: @phenomenal_tutu
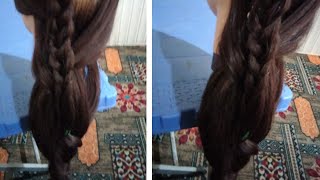
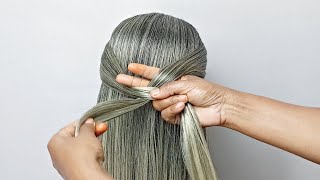
Hey guys welcome back to my channel, so today I will be showing you a very detailed, step-by-step process and how I achieved my invisible sweet ponytails. It is known by a bunch of different names. You can call them. Sleek ponytail extended ponytail, invisible ponytail. It'S all the same. In my humble opinion, anyways, let's get right into the video, Oh fYI. I have a little bit of a cold so three times the time you might hear me sniffling a little bit sorry in advance anyways. So the first thing you wan na do is get your can't hear as straight as possible. Now I will be getting in here um for ironing nearing sections from time to time. You will see me using a hot calling. This is to get her roots straight and then I've gone with a flat iron for the rest of the year now um as you go higher because you I'm gon na be working my way from the bottom, all the way to the top and as you go Higher, especially like the middle of the head the year that the roots is much thicker, it's much fuller there and you want to be able to get from roots to ends really straight. The product I will be using is by ozone. This really really helps we're getting the air any type of hair straight and silky, as still in straight as it can get so now I'll be taking my hot comb, and I will be like straightening the edges in my client as straight as possible. This really really plays a really big part in getting the sleekest ponytail possible. So you want to take the hot comb and just pass it through the edges, like the whole perimeter actually of your clients head just so that everywhere is as straight as possible. I'M gon na be finding her middle part. Now what I usually like to do a little tip, I will usually take like a pic comb, and I put it right on her nose and aim it for this sensor, like I used your nose as a guy, and I will push up until I get like The sensor you want to look at that in a mirror just to make sure it's in the middle and yeah. That'S how I got my middle part. So now I'm gon na just clean that part up and I'm gon na calm the rest of it here into a ponytail while brushing out all of her baby ears. Now for a ponytail, you can do baby, here's you don't have to do it. It'S all up to your client or the style that you're going for okay, so I'm going to sweep all the baby is out her actual baby. Is you know unless a client wants it like dramatic baby hears? I just work with the natural baby hairs and then I will comb the rest of right here into a very slack ponytail. It doesn't have to be tight at all because it's just like a rough track. If you want to call it that to get started with the ponytail okay, for the sake of the video, I've already done one side of her head and now I'm gon na show you exactly how I'm gon na be doing the other side. So I'm super in the baby hairs out and, as you can see, I'm gon na comb all the hair on that side as neat as possible, because you're gon na be molding her here. So you want it as neat as possible and then you guys spray. Some got to be sprayed on a small section, because you're gon na be working your way in sections to get this done right. So you're gon na comment neatly spray. Some got to be sprayed and then you're gon na slowly glide your finger across that section just to mold that part in a little trick that I like to do is I like to comb. It neatly spray the got to be spring blow-dry it for like about five seconds, so you can get it tacky. Now there are two bees: the got to be product. It gets hard pretty quickly, but if you like, take a blow dryer blow dry for like five. Second, it gets tacky, it's tacky, it's stillness, it's like in the molding process, so you can take your comb brush whatever using and go over it again, just so that if you get really really neat and nice so again, you're gon na see me doing the same Thing I'm gon na spray that God to be spraying, Coleman, neatly blow-dry for like five seconds, then comb it again, just so that it can lay very neatly and it come mold like really nice and sleep. How I wanted to look okay. If you follow this process, you will like these steps re. You will not go wrong. Okay, so don't be afraid to ask a client for assistance. My client wanted some afraid feel left out on the sides, as you can see, she's holding it. While I tried to get the corners in, I also used like a regular pig pen, so help guide the hair on the sides so that it's look nice and full. If you don't understand like on the edges right there, you don't want any like spaces in between the here, so I take pic home to help guide the way hair back into place. If it's like kind of a challenge, I use like a regular edge brush to do my entire ponytail like that little brush right. There does wonders, because it gets into all the little nooks and crannies on the clients head so again same steps. All you're gon na be doing comb. The hair neatly, as you can see me doing, take the got to be sprays, spray that sectioning just comb comb it again and then take the blow dryer and you're gon na blow dry. That section, while gliding your fingers in your hands right across that section just so that you can lay nice and neat and flat flat, also is very important. Okay, you do not want no humpy on people, can ponytail so take your hands and collide over the section. After you, you would have sprayed a lot to be free and while you're blow-drying, okay and I'm just gon na work. My way to the back of your hair that you're gon na start from the front work. Your way to the back and just keep following those simple steps and you'll be perfectly okay. Now, for the back of your clients, neck, try to focus the bat to be spray directly on her here. Try not to get any of the not to be spray on her neck, because we're inch rise is going to be right. A solution for that problem would be alcohol. You can just take some alcohol after you've been like done with the ponytail. Take some alcohol and just wipe around the perimeter of here wherever you see like white spots and you'll, be just fine. Don'T panic trust me. It'S gon na work, so straighter got to be sprayed directly on our here, probably like the middle part of the back, and then when you take the expression you brush it up, it's all gon na marry into the ear, so you'll be perfectly fine. Now you're done mowing the entire head. The very next thing you wanted to, which is pretty important as well: you're gon na take the scrunchie off okay. The here is not gon na fall apart, because now it's mold into the thing and you're gon na take some bad to these spray and you're gon na spray it all at that pot. I hear it as scrunched up like that. Upamana the ponytail like that Christmas. So you're gon na spray that exact part and then you're gon na take a comb and comb it all the way out. You have to spread it out to be screwed, because it's gon na be really hard. If you don't so spray they're not to be spray and take the comb and comb all of that out, the top the bottom just comb, it all the way up, then you're gon na take a scrunchie, a rubberband. Whatever is that you're gon na use to do the spine - and I like to use rubber bands because there's smaller and they're not bulky, so it helps the year too late, really nice, on top of it and you'll see what I mean later on. So I take my rubber band and I make the ponytail again, but you want to it's very important that he put the puncture exactly back in the same spot. Bread was the last time if you do not do that and try to move the ponytail higher or lower. The here is gon na start to crap. Everything that you would have molded is gon na start to crack. You have to put the ponytail back exactly where it is in the same exact spot, because nothing is basically gon na work and then you're gon na take some that to be straight and clean up any flyaways and just blows right. There taemi back into place pressure back things up these tutorial on how I did the paper tears, but my hand was blocking it, but I also tried to explain it so edge controlled on up using is itch booster I'll, be applying that product to all the baby. Hairs and then I'm gon na take my comb and I'm going to comb all of the baby ears all the way up. Then I'm gon na take my finger in my pan and I'm gon na be calming the hair and see shape motion. Okay, as you call me on your finger to guide the here as well right behind closely behind the pan, it against you can see so you take the comb with the hair comb, the hair in a c-shape motion comb it out first take the hair comb it In a c-shape motion and then when you determine the size that you want the baby here to be, you take the comb and you're gon na cut cut it off on the end bike riding the rest of the hair back into the ponytail and you'll, see what I mean the comb right there guide in the rest of the hair back into the ponytail. So that's what gives like this wave effect of a baby here on the arm? Clients, edges, I'm gon na, do once more add the product comb it in a c-shape motion. My fingers slowly driving right behind now that you see shape, motion going back to the ponytail and that's it the last one I'm gon na cut it off. You could clean up like the baby hair ball, like I'm doing, but I'm gon na take the column and I'm gon na like dry the rest like the bottom of that baby hair back into the ponytail, and that's what gives it a wave effect. My I was really excited about the growth over here vacation yeah. I did a big job earlier in the year, so she asked me to take a picture and um. She was telling me how it was really a like shoulder-length, but um yeah after you're done doing the baby hears you want to take a rapping strip and you're gon na place. It right above your baby really would have trust me. I'M made you run at the suit and mold while you complete the rest of this ponytail. Now I'm gon na be taking some braiding hair and we want to add that so your clients here, regardless of the length, because this helps the ponytail to stay firmly in place - remember he was gon na be too soft, so you don't want to be so lean And just that alone in the braiding a helps. I have visit some added security so also when you're doing this braid you wan na thank a client. How long didn't want to ponytail to P, because this braid also determines the length of the ponytail or fineness of the length of the year? But this being knows so here, as seen here, she said she wants it alone, so I'm gon na make the braid a little bit long. You also wan na make sure that the brainer you make it's always longer than your client here. It needs to pass a client's here, so I'm gon na be bringing it here like a little bit a little bit of length. I'M gon na put a rubber band where I want it to end cut off the excess here now I'm gon na be taking the here and I'll be sewing the here and to the braid I would have just made now. You first want to attach the needle to here and then join it to the braid. Now this is a very this part. It'S like really really simple, so all you're gon na be doing is wrapping the tracks or the weft around this braid and at the bottom. I like to sew almost every time I wrap you don't have to do that as I go farther up. You'Re gon na see me just wrapping like about three times and then I'm gon na sew them all together. Okay, so you all you're gon na do is just wrap the the weft the tracks around the braid like you could skip a few, just wrap, wrap wrap, and then you saw that to hold that in place and you keep doing that until you work your way. All the way up to the top of the brain with the rubberband is so again just wrap, wrap, and so so what I like to doing it to the top I like to wrap the rest of the tracks around like about three or four times. You don't want to do it more than that, because if ponytail can easily become too bulky, no, that's not a good look. So I'm gon na take my needle and I'm gon na just pass it through whatever that track ends and I'm gon na just wrap it around like a few times just secure it and we're gon na cut off the excess thread that is left after that. Unfortunately, I did not get the flower wrap around for the arm piece that covers the child, because my phone died, but basically gon na do its take some hair from the bottom spray, some free spray and you can wrap it about covering the track only blow-drying it Into place - and you should be perfectly fun - this is the end of the video guys. You'Ll see the end result in a few. I want to thank you guys so much for watching and I'll see you guys in my very next video

Comments
Kay: Love this video . Which color edge booster is the best in your opinion? I have 4b hair
Malika Rupan: Love your work hun. Big up yourself
Clarified Tangles: best ! video i have seen. SERIOUSLY !! can you do a side part next ?
Natalya West: will the buldge part of the hair look too thick if i want to add more bundles to the ponytail
MaraNatha Long: Awesome job. Super detailed . What kind of hair was the ponytail?
Lilian Iheanacho: What hair was used for the pony?
Monet Watts: What kind of hair was used to wrap the pony
Tigress M: Hello how are you? I was on your ig pg and I can't find the link so I can inquire about prices or to book an appointment. I would like to get a Bob
StylezBy ROBIN: Niceeeee
John Lee: Subsribed
Mimi M.: I loved the video but your voice straight put me to sleep