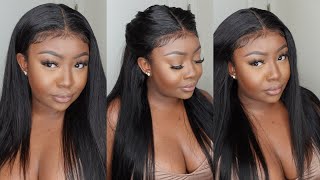
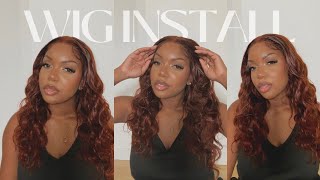
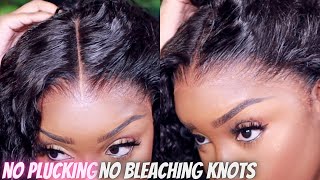
Headband Wig| Easy Installation //4C Hair// Go-To Hairstyle #Headbandwig #Protectivestyles #4Chair
- Posted on 17 September, 2022
- Ponytail Hairstyles
- By Anonymous
Hello beautiful people! waa gwan!!? So, in this video, I demonstrate an easy method for installing your headband wig.
Timestamp included
—————————————————————————
I am really not a big fan of wigs etc. In fact, I adore my natural hair more than I do with wigs or weaves. However, despite my preference, I still wanted something that looked really natural and was quick to install on days when my busy schedule prevented me from getting my hair done. And so, luckily, one day, I saw my awesome co-worker in this same wig. The fact that she fooled me, making me believe that it was her real hair, I was like, "I have to get this wig." However, when my headband wig arrived, it was just not working out for me. I had to play with it and find ways to make the curls pop until I got it to work for me. Finally! I got this headband wig to work for me, and it fooled a lot of people, making them believe that this was indeed my real hair.
With that said, I am thrilled to be sharing my simple technique for styling this headband wig on my 4-C hair, and I hope it works for you.
As it relates to the cornrows that are at the back of my head in this video, they look like a mess. However, that is because I had them in for a while.
—————————————————————————
Products and tools used links attached:
The Headband Wig- https://a.co/d/ic69t1F
Ossion Wax- https://a.co/d/2hiDOw2
Edge control Brush, Edge laying band- https://a.co/d/19WB02K
Mousse -https://a.co/d/fAw1JST
Eco Styling Gel- https://a.co/d/72EAdLk
Wig Cap- https://a.co/d/guMYwfR
Hairbrush- https://a.co/d/dKSfBTg
Bobby Pins- https://a.co/d/hw9dz19
Spray bottle- https://a.co/d/5cwYKAY
Soft brush
Comb
//Recommended video:
▶️ https://youtu.be/5AokntogZmY
—————————————————————————
Timestamps⌛
00:00 Introduction
01:12 Sectioning my hair
02:10 Plaiting my hair
03:12 Securing hair with bobby pins
03:56 Applying Ossion Wax
04:56 Brushing hair
05:05 Brushing edges with an edge control brush
05:56 Putting on a wig cap
06:31 Wrapping hair with an edge laying band
07:03 Installing the wig
08:37 Brushing the wig
10:22 Spraying the wig with water
11:26 Applying Eco styling gel to the wig
13:11 Applying mousse to the wig
14:01 Styling the wig
15:19 Conclusion
16:13 The end
—————————————————————————
//Let’s Connect:
Personal Instagram: https://www.instagram.com/amazinganiq...
Business Instagram: https://www.instagram.com/shopdiquali...
TikTok: https://www.tiktok.com/@amazinganique_...
//About me:
I am Jamaican, I love travelling, music is my motivation, and I am a natural hair queen.
//Disclaimer:
This is not a sponsored video.
Hey guys welcome back to my channel amazing and Nick lifestyle, I'm your girl, I'm Nick, and I just want to pick up all my new viewers and I just want to say to my returnees. Thank you for coming back. It is such a pleasure now guys you may be wondering well, I will be showing you how I installed this beautiful headband wig. So if you want to see how I get the finished, look, if you want to see the process of how I get the curls, how I install it and all then do stick around until the end. Can I just say, keep being sweets, keep being safe and just know that God is working it out, for you just know that everything is going to be okay, okay, guys. So basically, what I'm trying to do here is to get the front section of my hair as even as possible. So I'm going to put one section on the left and one section on the right as we go along this video I'll, tell you or get into more details of what I did so just continue watching to see exactly what I'm doing foreign just showing you. The back section of my hair, of course, and what I did I did put some medium sized cornrows. I did this because, of course, when I'm placing the wig on my head or when you're placing the wig on your head, you don't want it to be bulky, but you want it to have that flat. Look right all right so as it relates to what I'm doing here right now. Is that I'm going to put two big plaits on each of the sections that I had parted at the front, so the section that is to my right and the section that is to my left. I'M just going to part these two sections into two and, of course, like I said, just continue watching this video, so you can see what I'm talking about and why I did this alrighty all right guys. So I've started to plait my hair, but a key thing to note here is that how I'm plaiting my hair, I'm plaiting it as if I were braiding my hair backwards. So that's how you want to do it and that's how I'm going to do it for each of the plots, basically, okay guys. So basically, what I'm going to do is to secure the end of each plot. With a bobby pin, I mean like this is totally optional you don't have to, but I realized that it kinda. You know like keep my hair tucked in. Like I said it's optional, you know. If you do this, you know if you follow me all right. Foreign people, so let's just jump into what I did next, so what I did next was to apply a small amount of rocks on my hair. Of course you don't have to use this brand this brand. Of course I got in my beauty supply store and I'm pretty sure that everything is on Amazon, so guess what I will search for this wax on Amazon and I will link it in my description so, like I said you don't have to use this wax, you Can use anything that holds your hair, so yeah just keep watching to see what next that I do: foreign, okay, beautiful people. So now I'm going to apply some Eco styling gel to my hair. Did somebody said extra yeah, I'm a little bit extra, because guess what you do have to do this like this is totally optional, but yeah. That'S what I'm doing right now, foreign guys. So what I'm doing there is that I'm using my edge control brush to take up a little bit of the walks, so what I'm going to do now is to use my edge control brush to apply to my edges. The reason why I do this is because, of course, I want my edges to appear and feel much firmer foreign. Do you see the magic all right guys so now that the magic happened it's now time to put on a wig cap, please ask me where I have a whole fake British accent. You know, I just think it's cute, so you think it's cute anyways, I'm just putting on my wig cap and notice how I put on my wig cap, so I put it on and I join backwards right. So I leave the front of my hair out. Does that make sense guys yeah yeah, okay, guys so now I'm going to use a edge scarf to secure the front section of my hair 2. 000 years later, we have finally made it. We are finally paid it's we're finally, finally made it all right guys. So basically, what I was doing there is that I was just adjusting the bun that I'm going to put at the back first. So after I adjust the band, I am going to place the wig on my head. However, when I'm placing the wig on my head, I'm going to adjust the back of the wig first and then I'm going to adjust the front. I mean, as this video progresses you'll see what I did and why I did it so continue watching guys, foreign guys. So I am adjusting the front, and a key thing to note here is that you want to be very careful when you are adjusting the Combs that are attached to the wig reason being they can be uncomfortable. So just keep that in mind. Additionally, when I am adjusting the Combs, I put them close enough to wear the wig cap stops at the front but, like I always say just continue watching, so you can see more of what I did and why I did this foreign okay guys. So I was basically detangling my hair using a brush. Of course, you don't have to use a brush to detangle the hair. In fact that was my second time using a brush to detangle the hair. All you need to do is to use your fingers and just comb through the hair. I mean you, don't want to be using a brush all the time, because you know it's here, it's going to shed. So just keep that in mind. Thank you, okay, guys. So, as you can see, I have some water inside of my spray bottle and what I'm going to do is to spray it all over my hair. So I'm going to spray the back, I'm going to spray the right side and I'm also going to spray the left side. So um I mean if I were, to get ready for work on a regular basis or on a daily basis and wear this week to work or wherever I'm going. Please note that I would not detangle the hair first. The first thing that I would do is to wet the hair, and then I detangle so I mean I just you know. I just did this for the video I mean, like I just detangled the wig for the video, so that you can see how it looks when it's detangled, but, as you can see right there before, I even did um spray water. On my hair, I am just using my headband wrap and I'm just placing it around the headband that is attached to the wig. So now I am wetting my hair, I'm as I said, I'm going to wet the left, I'm going to wet the side, I'm going to wet everything, all right, guys so stick around so that you can see how it looks in its wet state. Thank you. Okay, guys, so that's how the hair looks in its wet State, as you can see, it's completely moisturized and the curls are kind of popping okay guys. So what I'm going to do right now is just to take a small portion of the Eco styling gel and just apply to each section of the hair. Like I said, you only need a small portion. You don't want to use too much all right. So, as you can see, I'm just using my fingers and I'm just raking the product through so just keep in mind that when you're, applying the Eco styling gel to the hair, just use your fingers and just gently rake it through. Thank you, okay! So what I'm going to do here now is to gently push back the headband that is attached to the wig. So, as you can see, I just pushed it back. I mean like some persons, they prefer to bend it or you know like wear it out like that, but I prefer it this way because, as you can see like here at the front, it's showing and the way it basically looks more natural, so yeah, that's what I did foreign ly some mousse to the hair and keep in mind that the same way, I rate the gel through the hair. This is the same method I'm going to apply with the mousse foreign, so what I'm going to do is to find a suitable style for the hair. Normally, I would wear this wig in a side part, but as the video progresses you'll see me trying different styles but, like I said I normally wear this here in a side part specifically, because that's the way I like it, foreign foreign. Of course, it's going to shed all here shows really and truly especially curly hair, especially if I have my finger and I have the comb you know going through it. It'S going to shed basically but yeah everywhere. That I go everybody's like oh, is that your real hair? How did you get your curls, and so this is the answer as to how I install the wig and how I Got My Curls. I really hope that this was very informative. I really hope that this helps someone alright guys, so I did made a video on how you can grow out. Your natural hair definitely check out that video and please remember to subscribe. You know share this video so that you can help someone who has been you know searching for a video like this, and I thank you all for your amazing support and thank you all for watching this. Video God bless you all. Thank you.


Comments
Donovan Blairgrove: That's a pretty look i did nor no that u are so talented keep up the good work
Yanneaka Hodges: Need me one of those