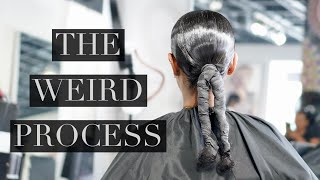
How I Achieved This Burgundy 2 Frontal Ponytail/ Bun - Full Detailed Video
- Posted on 05 April, 2022
- Ponytail Hairstyles
- By Anonymous
Hey guys thank you for tuning in into this 2 frontal ponytail tutorial. This is my first ever YouTube video to please bare with the sound quality of this video. I’m also open to any suggestions you have for the next video.
Follow me on Snapchat ms Instagram for frequent videos and updates
Snapchat - ivymay4
Instagram - https://instagram.com/manebymay?igshid...=
Hair Used
18” 13x6 HD Frontal
18” 13x4 HD frontal
1 bundle of 16” bundle
Products Used
•True Zone 40% developer
•2 packs L’Oréal HiColor - Magenta
•1 pack L’Oréal Marjirel Dark intense red 6.66
•Tweezerman tweezers
•Wahl Ceramic Pencil Hair Straighteners
•Remington Shine Therapy Wilde plate straighteners
•Babyliss tight curls wand
• iC Fantasia heat protector
•Sheer Stocking Cap 15 denier
•Mane by May Tame It Wax stick (own brand)
•Got2Be freeze spray
•BoldHold Extreme Creme
•SheaStyles Waterproof glue stick
•SheaStyles hot comb
•Velcro Elastic band
•Black Neck Strips - before placing elastic band
•Bob’in pins
For extreme lace melt suggestions - I use about 4 of these products at a time
•Vo5 ultimate hold spray
•Vo5 mega hold gel spray
•Vo5 mega hold moose
•Ebin wonder lace adhesive spray or Got2Be freeze spray
#doublefrontalponytail #frontalponytail #twofrontalponytail #wigtutoral #Ukhairstylist #wigstylist #celebrityhairstlyist
Hey loves: welcome to my first ever youtube video in today's tutorial i'll, be showing you guys how i achieved this custom, pin-up style, burgundy, two frontal ponytail, so first things. First, i color the two frontals and the bundles. I have a 13x6 um frontal, 13x4 frontal and some pieces of hair so to achieve the cherry red color, i'm using the no bleach method using just the l'oreal um high color in magenta, two boxes of those and mary gel in the color 6.66 i'll list. All the names of the products down below so here i mix all the dye content into a mixing bowl and then apply it onto the frontals and the pieces of hair. So after i squeeze all my dye into my mixing bowl, i then add the 40 developer into the bowl as well, and then i mix thoroughly if you're doing this for the first time. I do advise that you measure i've been doing this for a while. So i've developed some really bad habits. So now i am applying the dye onto the frontal um. I am using the mixing brush onto the longer shaft of the hair and then towards the roots. I use a comb. This is to avoid bleeding through the lace um. I did end up getting it on the lace a little bit but um, because i knew it was going to be in a ponytail fashion. I wasn't too bothered, but please do not follow that advice. Take your time and go through the hair as gently and as thoroughly as you can without getting on the lace. So for the second frontal i do the same thing. I just repeat the same process do so for the bundles. You want to coat the whole entire hair with the die, making sure that you open the wefts and really work in between those wefts to avoid any blotchiness and any black peeping through the red. So i ended up leaving the dye on the frontals and the bundle for about three hours um, because we use no bleach. It took a while for it to process but um trust and believe. Take your time. Don'T rush this process and you will achieve something along the lines of like a deep burgundy type color. So it's the next day - and i have my beautiful client rachel here for her install. If you follow me on my instagram or my tic toc, you would have seen rachel's face before um. I love rachel, so much she's, one of my favorite clients, um she's, always down to try new colors and new styles, we're always creating something new and adventurous. Um you'll be seeing a lot more rachel on my channel for sure. So. Firstly, i blow dry rachel's hair thoroughly, and then i go in with my curl defining straighteners for her roots, and then i use my wide plate, remington straighteners for the rest of her hair. When doing this process, you want to make sure that you're using heat protector throughout your clients, hair this ensures that the hair is protected when using high heat. My here, you see me gathering her hair into my desired um ponytail height and making sure that it's okay on all angles. So you see me going from left to right and you want to make sure you're doing this so that you make sure that it's in the middle and you're happy with how it looks when gathering hair into ponytails, i like to work in sections um. This is my preferred method: try the method that works best for you and, ideally for me, this is like how i prefer to do my ponytails. I then use my got to be freeze, blasting spray and then spray it on her hair and making sure that it's covering all the places that i needed to cover. However, i don't overuse it, i don't overkill. I use just the right amount, that's good for me. I still want her hair to be moldable and shapeable um, just in case i do make any errors, so um work light-handedly first and then, if you need to add more then by all means, add more when molding her hair into place. I use my blow dryer on core and warm settings, so i alternate between the two. So once i go straight directly onto my hair, it's core heat and then, when i'm working from afar, it's always a little bit hot after i gather her hair into a ponytail. I then split her hair into two pigtails and then wrap them around, and this will give me a good foundation when i am attaching the bundles onto her hair. So now i am applying a stocking cap to rachel's head. I will be doing the stocking cap method when doing two frontal ponytails or 360 ponytails. You want to make sure that you're doing this method. This is to ensure that you can use as much glue as you need to when applying frontals, and it also protects your client's hair. So now i spray the perimeter of our hair and then i use my bold hold um glue and i just go over that. Just wear her hair just in front of where her hair starts. So when i start to dry it and i start to cut in place that place is secure and i don't get any lifting so now. I am sewing a rough circle around the top perimeter of her head and you can use the two frontals as a guideline as to where you should stop the sewing afterwards. You can now cut the top part of the stocking cap which we won't need. Now you can cut the stocking cap around her hairline. You want to make sure that this is dry and not damp at all. So please take your time and use your blow dryer or put your client under the dryer just to make sure that the stopping cap is completely dry before cutting guys. If you notice my dry arms, you didn't notice it please no dry arm slander. On my youtube channel um just ignore those ashy arms. You then want to use a foundation shade or powder shade close to your client's skin tone color. So for rachel. I use maybelline fit me foundation in the color 312.. So, just before i place the frontal, i just want to clarify that i use a 13 by 6 and 13 by 4. The 13 by 4 goes out the front and then 13 by 6 goes at the back. I use a 13 by 6 at the back, because i want a high pony. I use the same foundation shade on her frontal and then i place the frontal just in front of where the stocking cap stops. So now you want to get your client to securely hold the frontal in place. You want to make sure that you let them know not to move during this process um. This will ensure that all sides are covered. All the stocking cap and the hairline is covered completely by the front door, and they will need to hold this in place. Just until you sew the back of the frontal in place. You want to make sure that the back of the frontal is flat and isn't bumpy at all, and this ensures that when you do start gathering the hair into a ponytail, you don't get any of the ripples that can make the frontal ponytail look unflattering. Whilst your client is still holding the ends of the lace, you want to cut the lace around the ears. If you guys would like to see a more detailed frontal application um in a better angle, please let me know um and i will be sure to make a separate video of where i install a frontal in a better angle. So you can see without my arms in the way here, you see me plucking out, hair from the front door that are close to rachel's eyebrows and also i did so in the front as well, just to give a more realistic hairline when applying lace glue onto My clients heads i always work in sections starting from the front and then the sides, and because rachel wanted her hair on for a long time. I added about four layers, as opposed to three. When the glue turns clear and tacky, i then bring the lace to where the glue starts and then using the back of my comb. I push the lace down in for an extra amount. I then cut a small section of lace, and then i go in with my glue for any spots that i may have missed after the middle section of her head. I then go on to the sides: do okay after every layer of gluing. I then use my blow dryer on cool settings, so remember when i said that you should take your time when dyeing your lace, um, here's a prime example i did manage to get some of the dye on the lace and you can see there's a little patch Right, where um the side of her head is, i did try to conceal it as much as i could with um makeup afterwards, but just a little advice be very light-handed when um dyeing your lace, so i did the other side off camera um. This is what her hair looks like now, with the frontal on um. I haven't melted, her hair, yet i'll do be doing that now um. But yes, i always work with hd lace now, because i just love the results, it gives you that natural hairline look without the lace showing too tough. So i really advise. If you're going to do frontal, ponytails consider hd lace, i will make sure to list all the products i use to melt her lace in the description bar below. It is a lengthy list um i do like my legs laid um. So if you want to find out what i used it'll be in the description box below so now, here's the tricky part um. You want to make sure that your client is holding the lace in place to where you see fit, making sure that they don't move at any point um, i moved the frontal just below where the stopping cap ended. I hope that makes sense so not just where the stocking cap starts, but i moved it for just a little bit so that um it gives a better effect of scalp and just like the front portion of the frontal, you want to make sure that the rim Of the frontal where i'm sewing now is flat and not bumpy at all, um so make sure um whilst you're sewing you make sure you spread it as much as you can to make sure it's flat. So then i go towards the right of her nape um. Naturally, hairlines tend to go into a v-line shape when it goes towards the nape of the neck um. So what i'm doing is taking my comb and just carving out a sort of diagonal line to where i um the stocking cap stops and i'll be cutting it ever so slightly to give me that desired diagonal effect. So whilst the front portion of her head is melting, the band goes around the circumference of her head, but please do not. Please do not glue the lace while that band is still on and later on, i'll be taking it off. I just wanted the front portion to melt whilst i work on the back, so so please be mindful um. When you're sewing the frontal onto your client's head at the back um, you client should be able to put their head forward without having the stopping cap or their natural hair showing um. We don't want our client to be restricted by this hairstyle. We want to be able to make it flexible for them to wear so just be mindful of that when i'm sewing the back of the frontal. So now i've got rachel to hold down her hair. I realized that there was just too much hair towards the back of her neck, so i'm just carving out the hair that we won't need that'll be cutting off after gluing. So, if you're doing this for the first time, i do suggest that you use some sort of a marker like a concealer in a dark or lighter shade, just to mark where you would like to glue your frontal. What i then do is glue the first layer then pull down the frontal to see if i like, where it sits, and if i'm happy with that, i then go in with more layers. So i use three layers of my boldhole glue and then for my final layer. I go in with my shay styles waterproof glue for that extra hold. So once i applied all my layers, i got rachel to angle her head at a 45 degree angle, but then i realized that that may have been a bad idea, because i did get some ripples um. I didn't even see the video, but i did manage to resolve it and once i melted the lace with the elastic band, okay, so then quickly, just before we melted the back of the lace, whilst our hands are still in place, um, i just quickly carved out The front of her hair, where the fringe will be so i forgot to mention those pieces of lace where we cut um for the back of our head. We want to keep those pieces because we're going to use that to cover where hair is so, then i use my rat tail comb and then carved out a semicircle and then place it to where her ear is, and i see if i like it, and then I then go with my glue and then i place the piece there: okay, okay, so after gluing and placing the lace, i then go in and sew the top half of that piece of hair so that it's secure in place. So i then repeat the same process on the other side of her head and then i go in with my um bundles to sew in on the top part of my head. So when sewn in the bundles, i find it easier to work from top and then work my way down in the spiral different hairstyles have their own um methods of doing this, some like to use glue, but me personally, i prefer sewing the bundles um that way, If my client wanted to reuse those bundles, she could okay, my so now after i sew in the bundles um, i forgot to record. I did set the perimeter of her head. I then go in and start cutting off the lace that we don't need. So i don't know if you can see, but on the sides of her nape it looks really unnatural and very thick. So i do go in with my tweezers and start tweezing. I'Ve used my hot comb and the blow dryer to kind of make sure that it looks more natural, so i repeat the process of me: tweezing um and flattening her hair at the back on the other side as well um. At this point, we then realized that um time was against us and we had to hurry because rachel had work um. So now i am using my wax stick and my hot comb and then i will start to gather the hair into a ponytail um using my uh. I'Ve got to be free spray and the blow dryer on cool and hot heat. So i don't know if you've covered at this point. I love working in sections um, it's my preferred method of doing hair. It just makes sure that i'm consistent throughout - and i take my time in every section - not rushing anything. Okay, okay, so one thing that i wish that i had done beforehand was straighten the frontals just to make sure that all the kinks were out um beforehand, because i had to work extra hard with the hot comb to make sure that all the kinks and the Bumps were out when slicking the um frontal winter pony so um. I know you can see the little bit of stopping cap showing on the other side um. I do rectify that as the video goes along, so please don't be alarmed. It does get fixed. Okay. One of the useful tips when i'm doing high pony is to allow your client to put their head back slightly and not forward. This avoids the bump that you get sometimes um when doing ponies, so just a useful tip. So initially i wanted to wrap the hair band around her head, but then i realized that i was at risk of um moving the um slickness that i've done. So what i did was attach two bobby pins to the hairband push one of the pumpkins in her pony and then wrapped the hair band around and then secured it in place with the other bobby pin honestly, the bobby pin hair band pack is literally a game. Changer um: this ensures that your hair doesn't move um, it's as slick as it can be, and yeah definitely try it out. So now, i'm curling all the pieces of hair in her ponytail with a tight, curl wand um. I absolutely love the style on um rachel, especially as i start to pin it up. However, i do wish i used a bigger barrel. Initially, i wanted the curls to look like roses, but then i realized - maybe i should have used a bigger wand and positioned them in the way that i wanted to more to give that rose effect. So here you see me pinning up all the individual curls into a bun. I did end up leaving some strands of hair down, because i wanted to give that effortless, bun type of feel without it. Looking too uniform, i'm actually pleased with how things turned out. Given this is my first um pin up hairstyle i've done um, so yeah, i'm very pleased about that. Okay and then use my small one and then lightly do some effortless um baby hairs at the back without doing too much just kind of like effortless messy type. Leftover hairs, okay, so i then use my hot comb to lay her front fringe down and then my big barrel wand to just curl her hair into this lovely type side fringe. So then, after about four and a half hours, we are now done with this look. I absolutely love this look on rachel and here's the back looking good, looking good honestly pleased with how this turned out and cheers too. So we are now coming towards the end of this video um. If you would like to see more videos like this, please subscribe to my channel, so i know that you guys are interested in these videos, um and i'll catch you in my next one. You

Comments
Courtney Larae: This is by far THE BEST double frontal pony tutorial I’ve seen‼️ So in love #newsubbie
tiffanyjackson521: YOU EXECUTED THIS STYLE STANDING OVATION NEW SUBBIE CAN’T WAIT TO SEE MORE OF YOUR CONTENT YES MA’AM I’M HERE FOR IT
Jennifer Rivera: Love this style! Looks amazing on her!
Majeeda Cannedy: You did great! It looked beautiful!!♥️
Ladiedre Bennett: I absolutely love this style its gorgeous I would love this style for my baby shower
Mahogany Monroe: you did that! made every step seem simple and followable! beautiful style on a beautiful client!
Lizzie Mojibade: This looks amazing!
P Chantel: You did amazing!! This was the best tutorial I’ve seen
Verena: I came across this video this morning (4am to be exact) and I love everything about this Channel ❤️
Selena Davis: Amazing work!! Very detailed and your explanation is on point. Thank you for sharing. New subbie
Vernedra Williams: Wow , you did such an awesome job !
Mitchyanu: I love it, you did so good and you’re helping me improve in my hairstyling job
MiMi Toujours: Babe this is amazing . Thank you for posting this, I learned so much. Bless
mercedes walker: This was so cute and creative
neeshablue96: Amazing tutorial!! I was wondering for a client who is adverse to straightening their hair would it be possible to do this style with cornrows as a base? thanks in advance
CXLTURE TEAM: Absolutely love it, can’t wait to see more content!
Casdoesitbest: You did your thing! It came out really good!!
Victoria Dokes: This is SO pretty!
Tam1413: I love the way you sew the bundle in first, and then pull the ponytail together. Genius move!
posh princess: New subbie and im already hooked ! Great work definitely looking forward for bomb work from you ❤
Zubayda Khalif: Love this look!!
MrsReese1125: Hair style came out beautiful. Rachel is absolutely beautiful and love her personality.
Awurama: It looks so good
Ashley Rhinehart: AWESOME JOB!!!!!! GREAT TUTORIAL!!!!
Tiffany James: Omg it's such a lovely style! Reminds me of those 90's Permed Updo's that were really popular in US back in the day
Lola Falana: Pretty color and so neat…Nice job
TheKbear1877: Girl....!!!! I love how when u were almost done she did her lips , lol thats that hold up i know im super bomb finishing touch selfie prep! you did an amazing freaking job!!!! Well done!!!!!!
More of Symoneé : Absolutely love it , What all did you use for this hairstyle ?❤️
HYPNOTICLAADYY: The BEST tutorial, new sub sis ✨
D Harmon: Great job!
Karri Ken: so perfect
Z: Love it
M. Michelle Smith: INSANE! I love this
Charminque Greer: Great video and poor rachael them damn allergies mines was acting up so I get it lovely and beautiful work
BenzPunani Nani: Great 1st video you SLAYYYED This Style
Mari Section: I’m in loveeee with this
Carlette Gray: Gorgeous May I ask do you know where she purchased the frontals from?
Felix Stephanie: How long did it take to finish this look?
Isheka Miller: Beautiful model exquisite hairstyle
Manet Yacine: So cute ✨ I want that haircut for n’y birthday
Patricia Brooks: Wow!!!! You're good at what you!!!
MissLadiiLace: I love this…it’s giving wedding hair
DND-LIFE DIARIES Taylor: I could look at her all day she’s gorgeous
Isheka Miller: This is lovely
Kimberley Reynolds: Love a working client!! Lol Rach with the blow dryer♥️♥️
ImJustCity: Amazing
Musonda Changwe: Girl, why do you only have 399 subscribers??? You better be new cause your work is bomb and I haven't even seen the video yet... #new subbie
Debbie T. Queweah: Please be a more audible next time I love it so much ❤️
STONEY CHI: *FUCKING FIRE* KEEP IT UP MUXH LOVE FROM TEXAS
Saschell Brown: Where do you get the sheer stocking cap to purchase
Justeen Johnson: This come right out
Jo Jo: Ur followings will go up fast I’m only 17 sec in and impressed subscribed too impressive
Isheka Miller: Can natural c4 hair do these styles?
irene stanciel: Really cute.
Yanique Wilson: But how you take this done though not at home for sure...great work though
Carlene Geysha: Your new friend please stay connected . I wish everyone great success, health , love and happiness
Rachel Jones: You are everything
TheKChanel: YASSSSSSSSS!!!!
Jaemie Lee_mc: Beautifully done dear...an u client is beautiful
Crystal Egemonye:
Pink Silky Rose Network: Soooooo on point
Amia .: So to achieve this look all I need to buy is two frontals ?
Mina Williams:
Bryanna Maddox: Where did you purchase the frontal?
Elisabeth Banko: Schöne frau, schöne frisur, beste friseuse
Diamond Leonard: Oh she did that
Fatoukine Diba:
Midnight Love: Are you in atlanta?