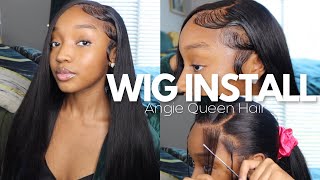
Frontal Ponytail | Angie Queen Hair
- Posted on 12 September, 2019
- Ponytail Hairstyles
- By Anonymous
Hey guyyysss!!! So todays video will be on how i achieved this quick and cute frontal pony / bun using a frontal and 2 bundles from Angie Queen! I absolutely love this hair and how soft and bouncy it is! All together it took me about 45 min to do everything you see in the video including plucking ! The frontal was not pre-plucked but in the video I will show you how to achieve your perfect hair line. I hope you guys like this video ! Remember to LIKE, COMMENT & SUBSCRIBE! Bye guyssss!!
Social Media: @LIFEASLAURENASHLEY
Contact Info: [email protected]
Hair details: Indian hair loose wave 3 bundles with frontal (24,26,26+20”)
Direct Indian hair loose wave bundles with frontal link: http://bit.ly/2Mdyy1w
Angie Queen Hair Official Website: http://bit.ly/2MdKSi8
Top selling Hair: http://bit.ly/2y5lVNR
Angie Queen on Aliexpress:
Aliexpress Angie Queen hair store: http://bit.ly/2Md87Jl
Direct Indian hair loose wave bundles with frontal link: http://bit.ly/2MbbIrd
Top selling on AliExpress: http://bit.ly/2yl95v7
★Get 15% off use code “ANGIEQUEEN15”
YouTube @AngieQueen: http://bit.ly/2ylb5n7
Instagram @Angie Queen Hair: http://bit.ly/2y7KQjL
Facebook @Angie Queen Hair: http://bit.ly/2ylbaqV
#AngieQueen #lifeaslaurenashley #frontalponytail # hairtutorial
So, hey guys, we want to be doing a really quick and easy tutorial on how to do a frontal, ponytail and a bun I'm using this fabulous hair. I got from ancient Queen. So if you want to see how I achieve this look make sure to keep watching okay guys, so here's the frontal straight out of the tag, it's a 20 inch frontal and, as you can see, it's not pre plucked. So it's pretty thick there in the front, and I have two bundles of 26 inches as well as one 24 inch bundle. Now I will be letting you know that you will not need all three of these bundles for this style, but if you choose to use all three, then you go girl. This is how the fronts will look when I first got it straight off the pack, as you can see, it's not reflux at all and it's a very thick towards the front with that straight line, type of hair line with my cape. So this is the front. So after I plucked it, but before I'm loose tonight, if you want to see a more in-depth tutorial on how I pluck make sure to click the link at the end of the video so after bleaching and toning, this is how the front was turned out. As you can see, those knots are now blonde, but they're not too brassy and we have no bleeding onto our hair. My frontal, as you can see, is not as thick in the front as it was when we first got it. No don't mind me my Bo here we will be securing this frontal with my bow hold extreme cream. Now I didn't know beforehand. I wanted my ponytail to have a little part, so I just want to get on a part of it with my comb and then just press it with my hot comb, but that is it. This hair is not flat ironed or anything like that. So, just to give you a quick rundown on what's about to happen, I am NOT putting a specimen kappa. One series are not bleach the knives because I probably you push tonight. You know hey something cat, it's a nice. I can capture that most epic as well, but if you want to do that, you can go ahead and do that, but we're going to first we're going to glue down the front and then we're going to take a needle thread and sort of back. Then we're going to mix this hair in with this ponytail and we're going to wrap those bundles around. So let's go, you can find this pencil at your local beauty supply store and I just use it to kind of outline where I want to either cut my lace on my frontal or where I want to lay my frontal on my head and once again it's A barber pencil and you should be able to find it at any local beauty supply store. So now I'm just became beginning to apply the glue, as you can see, I'm just kind of outlining my hairline and I'm bringing that glue up to the line that I created for where I want my frontal to sit. And yes, I know my forehead and speak. You don't have to tell me, but I'm gon na end up applying about three coats of glue. You can add as many coats as you want, but I found that three makes it last the longest. Oh okay, guys I just wan na head on incident. When you tell up and some other the one I don't know about you guys, there are some funny sounds I like a little ballerina bun excuse my rocks back, but oh yes, I just put it up in this little messy bun. So I'm gon na have to texture. In my links down below, I ended up using two bundles of the. If you hear like a sound, this is my but anyways so yeah. I did it's up using two bundles of the 26 for the ponytail. Now, normally you see people squirrel the hair around the braid. You can do that if you want to extend it funny tail for this, I just wrapped it around. I wrap high upgrade in the bun and then I just wrap some tracks around the Sun and owes it to go. This here has so much volume in it already that you can't see it at all. So this texture right here, I love you - guys, see it's perfect for this, a bun that has these like loose curls, that like hang down, and it makes like the perfect messy bun. So please comment down below. If you want to see me, do some more Styles, where I actually believe the hair on Kajal. No, I live for a good glueless, install okay, but yeah. So this it was our final Raja. Not too shabby Seiberling who've done a front swim in a while because we've been living necklace life. Okay, I hope you guys enjoy remember to Like comment and subscribe and some your friends of my channels, beekeeping friends, just know how we go yeah be next time. Bye guys it's a life with Laura Ashley is the life we love right. Ashley is the


Comments
WolfRae TV: So pretty
SHARON SMITH: DOING DID DONE THAT. BEAUTIFUL HUNTY
Antonio Martin: You are so beautiful
Temia Williams: Yaaas you did that
tauheedah coleman: That's pretty. What kind of hair is that ponytail hair
Simply Kash: Yes boo