Short Hair? Crochet A Ponytail/Messy Bun Hat For People With Short Hair | Cancer Care Patients
- Posted on 08 November, 2022
- Ponytail Hairstyles
- By Anonymous
Let's crochet a Ponytail Messy Bun Beanie/Hat for people who have short hair! Lisa suggested Cancer Care patients This video includes a tutorial on how to make hair from yarn & how to attach it to the hat!
I made my hair with dark brown yarn, but if you want pink hair, grab pink scrap yarn from your stash & make pink hair! Or how about purple? Why not blue or variegated? Oh what fun! Please post what you come up with, in my Facebook Group:
https://www.facebook.com/groups/201803...
0:00 Intro
2:04 Hat tutorial
15:30 Hat trim
25:10 Making & attaching hair
Check out my merch here:
https://www.youtube.com/channel/UC7tYW...
or click on the merch shelf found under all of my videos
My affiliate link for the Canada Book Outlet
Crochet & Knit Books, kits, novels, toys, games
All new at reduced prices
Free shipping available
$5 off your first order
https://bookoutlet.ca/loyalty/referral...
Dee's Creative Hands Crochet's affiliate link for the USA Book Outlet
https://bookoutlet.com/loyalty/referra...
Dee's YouTube channel link:
https://youtube.com/c/DeesCreativeHand...
My Facebook group where you can share anything yarny:
https://www.facebook.com/groups/201803...
My Instagram:
crafty.yarn.owl
My email address:
My happy mail address:
Darla Hunter
PO Box 26083
Maryland Postal Outlet
Winnipeg, MB.
R3G 3R3
Canada
MORE OF WHAT YOU CAN FIND ON MY CHANNEL:
Free crochet tutorials, Beginner crochet tutorials, Yarn giveaways, Easy crochet stitch tutorials, Easy crochet shawl tutorial, Easy crochet scarf tutorial, Easy crochet sweater tutorial, Easy crochet beanie tutorial, Easy crochet hat tutorial, Easy crochet dishcloth/washcloth tutorial, Easy crochet clothing wearable tutorials, Easy crochet cowl tutorial, Easy crochet poncho tutorials, Easy crochet fingerless gloves tutorial, Easy crochet neck warmer tutorial, Easy crochet shoulder wrap tutorial, Easy crochet one piece top shirt tutorial, Easy crochet tank top tutorial, Easy crochet t-shirt tutorial, Easy crochet dress tutorial, easy crochet beach coverup tutorial, Easy crochet bag purse tutorial, Easy crochet one piece sweater tutorial, Easy corner to corner c2c sweater tutorial, Easy crochet Christmas tree tutorial, Easy crochet shrug tutorial, Easy crochet scrap scrappy yarn blanket tutorial, Easy crochet rectangular corner to corner c2c scarf tutorial, Easy crochet one piece off the shoulder top shirt tutorial, How to crochet easy and quick crochet projects, Crochet Christmas gift ideas, crochet birthday gift ideas, crochet friend gift ideas, yarn, yarn reviews, yarn hauls, yarn unboxings, yarn unbaggings, Easy crochet one piece body cardigan tutorial, I always show the happy mail I receive & if the sender has a channel I always link it
#yarntube
#crochethat
#yarnhair
#crochettube
#easycrochet
#easycrochettutorial
#crochetponytailhat
#crochetmessybunhat
#crochetbeanie
#makeitwithmichaels
#scrapyarn
#craftsmart
@michaels
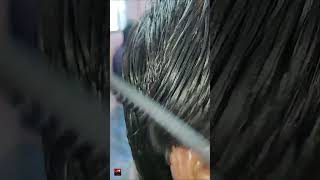
Foreign welcome to crafty yarn owl with Darla today we're going to be making this ponytail hat, and this hat is for people who have short hair, so we're gon na make some hair as well. Okay, so for the Hat, you will need less than 100 grams of a four weight yarn, and this is the yarn I used it's the craft, smart value, yarn that you can get it at Michael's, so medium four. This colorway is gray. They'Re, 198 grams 354 yards. You would be able to get a couple of hats of one of these okay and we'll need uh, six millimeter crochet hook a 5.5 and a five millimeter and a stitch marker and for the hair just grab whatever acrylic yarn you have, you can use any color. You want you can use several different colors. If you want it to really stand out, you won't need a lot. I had like two balls like this and I barely used one of them and I'll show you how to um. You know measure out the lengths and things like that. It'S pretty simple, um yeah so make sure it's acrylic. This one has uh four strands in it and um. Oh, I would love to see, see your hats and your hair in my Facebook group, which is linked below all right. Let'S do this, I'm going to start off with a magic ring. You can do the chain for, if you like, okay, we're gon na chain one and we pretty much have a chain one made there already. So now we're going to make 12 double crochets. That'S our first one! I'M going to mark that first one because I don't want to accidentally go into that chain, one okay! So that's our first double crochet. We have 11 more to make and then I'm going to go right over top of that tail. So I can cinch in my magic ring. Okay, so that's three four! So make a total of 12 double crochets. You have your 12 double crochets made. You can pull your tail tight, close up that hole and we're going to remove the stitch marker and slip stitch into that first, double crochet that we made make sure you count make sure you have 12 double crochets. You want to start out with the right count. All right so now I'm going to chain one I'm going to go back in that same spot right there with two double crochets and we're going to be putting two double crochets into each Stitch all the way around and you will have a total of 24 double Crochets in this row, okay, two double crochets into each Stitch, all the way around all right now I have 24 double crochets slip, stitch into that first double crochet you made and you've completed round two. Let'S go on to round three chain. One now we're going to put one double crochet in that first Stitch and then we're going to put two double crochets into the next, and that is our repeat for round three: okay, one double crochet in the next Stitch: two double crochets in the next Stitch: okay, One double crochet in the next two in the one after that, one double crochet two one double crochet two and you will have a total of 36 double crochets four row. Three we've come to the end of Row three and we have 36 double crochets slip. Stitch into that first double crochet. You made it's very easy to count the rows. There'S one two and three on to row four chain, one and then in row. Four, we are going to make a one double crochet in that very first Stitch. One double crochet in the next Stitch and then two double crochets in the next, and that's our repeat for this round. Okay, again, that was one double crochet, one double crochet in the next Stitch and then two double crochets in the next continue that sequence around this row and you will end up having 48 double crochets on to row. Five. Okay slip. Stitch. Excuse me into that. First: double crochet to close off your rounds and chain, one all right so for row, five, we're going to put one double crochet in each of the next three stitches, one double crochet in the first Stitch, one double crochet in the next Stitch, one double crochet in The next Stitch and then we're going to put two double crochets in that next Stitch, and that's your repeat for row: five: okay, one double crochet in each of the next three stitches one, that's one one in the next one one and then the next Stitch. Two double crochets, and when you're finished this round, you will have a total of 60 double crochets. Now I researched this and the average diameter of a woman's head, and that would be across the flat top of the top of your head - is about seven inches at this point, I'm at six inches, so I am going to do one more row. I do have a small head, though I think mine's a little smaller than the average, but I am going to do one more row and it's up to you. If you want to um yeah, just measure six inches, all right, I'm gon na do one more row. Okay, so we're going to slip stitch into that first double crochet to finish off this row and this row was row five, just Mark that on my cheat sheet row five, so I'm going to do a row six so chain one and then we're going to put It one double crochet in that first Stitch and then we're going to put one double crochet into the next three stitches. So that'll be a total of four stitches. We'Re going to go into with one double crochet in each one and then after that, we're going to put two double crochets into the next Stitch, and that is our repeat for row. This is row six sorry, my ruler is stopping my yarn from turning. So let me just show you quickly. I have I have my yarn on this thing. It'S amazing you work from the outside. You have to yank a little bit when you're when you're, you know working it, but it spins. Amazingly, I got Ali's AliExpress for about thirty dollars: Canadian okay. So let's go back in a solid wood. Let'S go back here: okay, okay, one two three four and then the next one was two double crochets. So continue doing that one double crochet next Stitch, one double crochet next Stitch, one double crochet and the next Stitch; one double crochet in the next Stitch, two double crochets, so that was one double crochet in each of the first four stitches one, two three four and The next one, two double crochets, continue that around now I've completed row, six and I have 72 stitches all the way around and now my diameter measures about seven and an eighth cross. Now, if you think that may be too big for your head, you can take out that row and I'm thinking it might be too big for my head. So I am going to take out that row, but at least you know how to make that row. If you need it right, okay, I'm gon na remove that row. So this is a this is at 72 inches the row six. Now what I'm thinking is be. This is okay. This is going to go on the top of your head right. So if you hold it out like this, I think it may be too big when you start going down, so I am going to take out that Rowan. You have to remember that crochet items stretch right. They stretch, so I'm going to take out that row. So now I've taken row, six uh, yes, row six out and I'm down to back down to six inches. So now what I'm going to do is make one double crochet in every Stitch around and start the next row and do the same thing around until you have the length that you want, or the height of your hat, that you want. According to what I found online, I height of a ladies hat is about nine inches, so that would be from from the top oops. Where am I from the top down to where you want it um the length of it that you want? Okay? So, let's do that! We'Re gon na make one double crochet in each round and we're going to have a total of, because I took that 72 row out we're going to have a total of 60 in each row. So I've chained one so just make double crochet in every Stitch and then slip stitch at the end of your row, like you were doing with the other rows and that's what you do and then your your I almost said top I'm used to making tops your Hat will start to bend down after a couple of rows: okay, one double crochet in every Stitch and I'll come back and tell you how many rows I did and um and what my mind measures for height and this will fit a 21 inch circumference head. So 21 inches around your head roughly on average I have a. I have five rows for the crown one, two, three four five and then I made another seven rows down one two: three: four: five: six: seven and I'm going to put trim on here. So, let's do that, I'm going to switch hooks. I was using the six millimeter I'm going to switch down to uh. This is actually a 5.5 um. It'S just to make it a little bit more snug around my forehead, all right, so I've chained one. Now I'm going to this is a double crochet, and that was the chain one from the last row. So I'm just going to go right around those we're going to make a front post double crochet. Okay, so wrap your yarn. Let me pull this okay, so wrap your yarn and then you're going to go behind the double crochet post and that chain one. We had grab your yarn, pull it through and then just finish off, making a double crochet. Okay, then yarn over now we're going to do a back post, double crochet, so wrap your yarn. I like to hold my yarn on the hook, so it doesn't slip off. Go behind that next, double crochet post pull your Yarns through and then you have three on your hook. Grab your yarn go through the first two grab. Your yarn go through the next two. So then we'll do a front post again. So we're going to be alternating front, post back Post front, post back, post, okay, so we're gon na do another front post, wrap your yarn! Go around that the post of that double crochet grab your yarn, pull it under there and then just finish off, making a double crochet: okay, wrap your wrap! Your yarn hold it on your hook. Go behind the next post: push your hook through grab your yarn, pull your yarn through and then just finish, making a double crochet. Okay. This is called a front post double crochet, the first one we did because it pushes your post forward and the next one is a back post, meaning it pushes your back your post back. Okay, let's do that again front post and then back both so alternate between these for this entire round. Okay, that one's behind here, okay, there we go. So this is what you'll have I'm at the end of that row and we have one stitch left. So that's gon na be a back post. Hey now we'll slip slip stitch into that front post we made at the very beginning chain one now at this point, I'm going to try the hat on see. If I need to make another row well, I tried it on and it's not covering my earlobe. So what I'm going to do is make two more rows of this same front: post back, post, okay, so I've chained one and then uh. We started with a front post uh, yes, a front post double crochet, so I'm gon na put a front post on the front post and I'm going to do the same for the next row: okay, front post and that's a back post. So I'm gon na do a back post and then with the front post I'll, do a front post and just keep them all lined up like that, all the way around back post do a back post and so on, just repeating the last row. Okay, so I end up making one more row, so I just have two rows of those front post back posts all right and then I'm going to make another robot of a different Stitch. It'S one I just learned recently and I'm going to go down a hook. Size again to make it a little tighter under my earlobes okay. So I'm going from, I started with a sixth and I went to a five and a half for these two rows and now I'm going to a five for the very last row. All right so have any of you done the I think it's called reverse single crochet, so I'm gon na I'm gon na do that all right chain. One now um, I'm gon na mark this because that'll be our last Stitch. We go into because we're going to work backwards, all right, so we're gon na go into the top of those front and back post double crochets there and make say, pull up your yarn a little bit go in that Stitch. Pull your yarn through and make a single crochet okay I'll do that again. The next Stitch is right here, your yarn pull up a little bit of a loop put your yarn in there in that Stitch. Grab your yarn, pull it through and then pull through two. Okay, your next Stitch is over here, pull up a loop. A little bit go in that next Stitch grab your yarn, pull it through, pull through two. Isn'T that cool, if you've done it before? Let me know in the comment section: if you pull up a bit of a loop, go into that next Stitch grab your yarn, pull it through and then you're going to pull through two. So it's a single crochet, but it's made going the opposite direction. So, let's take a look at what it's looking like King a twist. Isn'T that neat? I think it's so neat and it's always fun losing learning a new Stitch. Okay, put a loop up! Go in the next Stitch. Grab your yarn, pull it through pull through two. It'S like a single crochet but you're working in the opposite direction. Instead of going left, you're going right, go in the next one grab your yarn through pull through two. I think it's really cool all right. You don't have to do it, but if you want to that's great I'll meet you at the end of the row, all right, I'm at the end now so I had marked that one there. So I'm gon na put um put a what is it reverse single crochet into that last, one that I had marked and then I'm gon na slip stitch somewhere in that first one. I don't know where exactly it is but find a spot and all right. So now I'm going to cut that off and throw it in later and we're done the Hat part of it and now for the the fun part where we're gon na make the hair so fun. Before we go on to the hair, the average hat size, the height for lady, is nine inches. So let's just see hoof mine's, seven wow that ended up being seven inches huh interesting. But the hat fits me and that's what counts right all right. So, let's make some hair uh. What you need to make your hair is a big box or a big book. Something to wrap the yarn around you'll need, of course, yarn and we'll talk about that in a minute, and we need scissors. Now, I'm going to be using this big Cheerio box to wrap the yarn around. It is uh. Let'S see this measure oh and what I did was I tucked in the ends - and I just put a couple of pieces of tape to hold each end in and this measures the highest part of this measures. This is 12.. It'S around 13, a little more than 13 inches from top to bottom side to side was just under 12 inches. So I'm going to use the longest portion and the length of yarn that you're going to have for your hair is going to be, even though we're wrapping the yarn around the whole box. The actual length you're going to end up with is from here to here. So the lengths of my hair is going to be around 13 inches. Of course you can cut it down after you know, even it out, and things like that. All right so show you how to do that in a second um. So the yarn that I'm going to be using is this is just scrap yarn. I think I should have enough with these two balls and this yarn is, I don't know what the fiber is um. I don't. I think it's probably between a three and a four weight, and this yarn has four strands: we're going to be separating the strands. Once we've connected the yarn to our hat and that's going to make our hair, we can brush it. Some some people use those sauce. They'Re, like uh like a rectangle cap brush that has the metal whatever they're called um. What do they call those metal pieces, but anyway, you would brush the yarn with that, but I don't have that. I'M going to be using something else, and it's just uh. It'S just a comb and you'll see that in a little bit, so let's um - let's just do this, so what I'm gon na do is: okay, I'm going to take the yarn and I'm gon na hold it with my thumb up here at the edge of the Box actually I'll do it on this side, because then I won't have to reach so far over. Oh there we go, and then you just wrap it. Okay, just keep wrapping it I'll. Do it this way just keep wrapping wrapping wrapping and then at the end one you know once you have lots and lots of yarn wrapped around it. What we do is just we cut off, cut off our ball and then we're gon na just snip right through all the Yarns, I'm going to continue wrapping all right. So I have some strands wrapped around the box and I'm going to um. I'M just going to cut this right now, but I'm going to do more a lot more and but I just wanted to show you so you cut it and then do it this way you can put your scissors Inside the Box and then cut it like this. Now you may have to do you know a couple of strands at a time unless you have really sharp scissors or you can go under it like this yeah, it doesn't really matter because you're going to be trimming it in the end. Once it's on your hat there, we go okay. Now, I'm just going to move this box out of the way. Now this is the yarn. This is the lengths right here from here to here. Well, you'll, even it up right from there to there is going to be the length of your hair on your hat, and it's going to we're going to connect it to the very the very top of our hat and I'll. Show you how to do that. So this is going to hang it's going to hang like that. Okay, so let me just do some more and I'll be right back. This is what I have cut right now, um, you know these are going to be more than enough. I would say and um so now. What we're going to do is we're going to take one strand at a time and we're gon na you know fold it over so that it's even okay, because it stretched on the box. I guess it was looked longer, but it's still pretty long. Let me just measure this just for fun. You can make short hair if you want. Oh, it's about 12 inches about 12 inches, so even make short hair even longer than this. It'S up to you all right, um or you know what you could do. You could take a piece of yarn and just measure it out to two feet if you want and then just take your ball of yarn and you know, put another links beside it: go down your ball of yarn, cut it off and keep doing that. That'S a darn good idea. All right, let me show you how we're going to attach this. Now I have a crochet hook. Whatever crochet hook is gon na, you know go around there. You take your hat, I'm just going to just going to figure out front. I'M sorry the back. Whichever side you want the back to be on just wrecked my string here. So then what you're going to do is with the hat facing this way. I think that should work and you go into that Center on the very top of your hat, and you can start like anywhere. I'M going to start, you know in this half of it start anywhere. I'M going to start right here, put my hook under the just anywhere anywhere on these pieces of yarn. Are these stitches just hook hook your yarn on there like that pull through? So now you have two strands: pull it tight and we're just going to keep doing that in every Stitch, and then you can go if you do want your hair just to be lower as well. You can go into every Stitch here. No okay, take your next strand. I would normally just lay them all out first, so I just have to grab the yarn and start working with it, so you could put more than just one strand in the same oops in the same spot. This is going to make layers when you go under what you've already done: okay, so yeah! So let's go up here and I'm also going to incorporate this remember. I got this from who'd. I get this from velrita I'll link, link that yarn haul above um, but uh yeah. This is like um. It'S like a novelty yarn. It'S not that soft! It'S gon na look really cool! So we'll see how that goes, and one more here to show you. Oh, you know what that is. I didn't sew in my end. That'S an end. That'S the end from the inside! Oh dear, okay, okay, all right so um, I'm just gon na keep going around hook it in wherever you can hook it. Okay, so continue doing. That. Put as much as you want make it, as you know, make your your fake ponytail um as thick as you want yeah. Okay, I've got a whole bunch on the bottom here of that Circle. Now I'm gon na go up the circle and um fill in that whole circle, so we have a nice thick ponytail, so this is uh just the under layer of it. That'S why I started on the bottom. So now I'm gon na go around here, and this is what it looks like on the other side. Okay, so yeah start going around here, make more your top layers, it's always harder when you're on camera. Ah, and then you can add more more strands later, to make it more full if you want okay, yeah just fill in that whole round area there. I didn't need very much at all. I have this left over and I've all just left over. Why did I think I would need more than you know so much and live, and you learn: okay, it's nice and thick. So now I'm gon na add I'm just gon na add some of this off camera, because it's just added the same way and I'll be back to show you how to separate the yarn and yeah it's gon na look pretty cool all right. Now we're going to split um, we're gon na split hairs, uh we're gon na split the yarn. You can leave it like this. If you want um, I'm going to add this in later, but I already split some of them, and this is what I got so far. I may try to brush it out a little bit more, but what I did was there's my comb. I had I'm using this comb. What I did was grabbed one tried to split it so that we have two strands there. We go two strands and just pulled it apart, okay pulled it apart and then we'll do. You know do the same with each strand, and this is something you could do when you're watching TV or whatever it doesn't take a lot of thought, foreign pull it apart and um. You know I'm going to be kind of combing it later the pieces all together. As much as I can, you know, and you may get some that's going to come off the end - that's bound to happen, but yeah. It'S something you know you can just do without thinking really, while you're watching TV, so um yeah just do that and gon na have some curly locks and the more you brush it. The more it's going to um become kind of hair like maybe, but I don't want to do it too much, because, like it's going to pull off like that, some of it you know no right. Thank you everyone. I hope you enjoyed this tutorial and I would love if you show pictures in my Facebook group and subscribe and share this video and like it. Thank you so much I'll see you soon. Foreign


Comments
Not too Old to be Crafty (Cecilia M): I love this idea. Thank you for showing this. So, I can now have the purple hair I always wanted without upsetting my husband.
Traci Perdue: This is so cool, Darla!!! Thanks for sharing!!! Have a great day!!!
Aida Soto: Super cute ! Thx Darla ! ❤
Rosemary Eveleigh: Thank you for this Tutorial now I can make my hair blond not grey lol Take care sweet Darla ❤
Nova Conetta: This is brilliant!! Loooove it
CRAFT D Girl DARLAS DOLL SANCTUARY: That's really cute❤️
Christine Price: Super cute!
Lisa's Crochet: Very cute, Darla !
Deborah Mashburn: What fun!♥
Gina Loves to craft: Super cute Darla ❤
Debbie Graves: This is very cute. Trying to get better from a terrible flu as soon as I can I will make this
Verna Bradshaw: Cute!!
Hillary 2023: I suddenly feel like I need more brown and black yarns. Lol
TYREESE “TJ” JOYNER: ❤️
Nora Igra: Hi me again with a question who is Reggie that might have discount code for Vilrita yarn? Thank you ❤️ Nora
Nora Igra: Hi what fun i can be the one with purple hair thank you will this entry the giveaway birthday ?
Vanessa Call me V: So I get my purple and blue hair stripes after all lol
Christina Crochets: very cute Darla ha ha