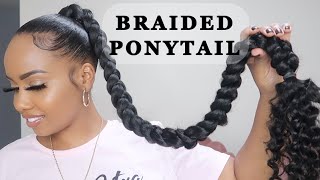
How To: High Sleek Braided Ponytail On 4C Textured Hair | 31 Days Of Hair| Day 8
- Posted on 14 December, 2021
- Ponytail Hairstyles
- By Anonymous
Hey fran !
In this video, I am showing you a video on how I did this high braided ponytail on my client 4c textured hair
Enjoy and remember to like, comment, and subscribe!
Social Media
❤️Facebook : London Tayy
❤️Instagram Hair page :@thelondontayy
❤️Instagram Personal page: @londontayysway
❤️ Amazon Storefront : https://www.amazon.com/shop/londontayy...
❤️ Business email : [email protected]
Location: US -Columbia, SC
————-
Hair used:
Queen b braiding hair : 2 packs : color 1b
Products used in the video:
biosilk serum: https://amzn.to/3DmBdNl
chi heat protectant:https://amzn.to/3olRv4L
ion solutions smoothing spray:
got2b spray: https://amzn.to/3Gw5uv3
ebin edge control (purple top): https://amzn.to/3rRUdkP
shine n jam oil sheen: https://amzn.to/3EM9EOX
Hair tools used :
conair blow dryer: https://amzn.to/3DBxYC4
edge brush:https://amzn.to/2WgCypc
rat tail comb:https://amzn.to/2UHPp3h
babyliss flat iron :https://amzn.to/3ChGkOZ
hair ties:https://amzn.to/3DTmMRg
rubberbands: https://amzn.to/31V9LcQ
plastic kettle: https://amzn.to/3EUQgPX
------------
Music by A$H. - Dope Fiend - https://thmatc.co/?l=DE31C4EA
Music by A$H. - Dear Dream - https://thmatc.co/?l=2FEBD2E0
Music by A$H. - Well Wishes - https://thmatc.co/?l=6BA7478C
-------------
keywords:
jumbo knotless braids,large knotless braids,jumbo knotless,knotless box braids tutorial,how to do knotless braids,large knotless box braids,613 knotless,613 knotless braids,613 knotless braids on black hair,613 knotless box braids,613 blonde knotless braids,blonde large knotless braids,large honey blonde knotless braids,large knotless box braids blonde,large blonde knotlesseywords
sleek braided ponytail,braided ponytail with braiding hair,long braided ponytail,braided ponytail feed in,braided ponytail with braiding hair 4c,sleek ponytail,braided ponytail natural hair,sleek ponytail on,sleek ponytail on natural hair 4c,sleek ponytail on 4c hair,sleek ponytail on thick natural hair,sleek ponytail on natural hair,sleek ponytail on short 4c hair,sleek ponytail on natural hair with weave
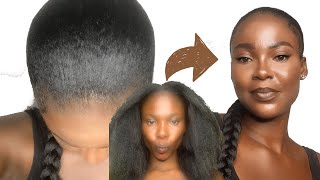
I don't need what wishes everything else is hype i different, but it clearly ain't the same boy. I thought you were for real and i'm so tired of artificial. You say: keep it till. You swear welcome back to my channel. This is lonnie tay coming to you today with another video girl in today's video. I'M going to show you guys how i did the sleek ponytail sleek braided ponytail on 4c hair. So here i am guys i just have about two packs of the queen bee 60. Inch color number two um. I have two packs of those and i'm just going to section a couple pieces off um on the arm of the chair. But what i'm going to do guys for the ponytail i'm going to use one entire pack for the ponytail and then i'm just going to slowly feed in hair from the other pack. So that is why i have two packs, and that is why i just have little sections of hair on the arm of the arm chair so for right here, guys, i'm using both of the heat protectants. Everything that i'm using will be in the description box below and it will be before this video, so i'm using the chi and the ion solutions, heat protectant one is a smoothing spray and one is just like a flat iron spray um. I section her hair off in fourth section. Her hair is clean um. She has slight product on like a little bit of oil on um but, like i said, i section your hair off in four sections and i'm just going to do section by section. So i like to just kind of stretch your hair first, with my hand, have the blow dryer go over it after i spray the heat protectant. Then, when i got it all stretched out, i like to just kind of detangle it and then i'll get the conair blow dryer. That will be in the description box below with a comb attachment. The comb attachment did come differently. It'S like a separate little comb attachment that you can buy and i just attached it to my blow dryer but yeah guys, so i'm just stretching it first and then blowing it out with a comb. And then that is when i'm going to get ready to still press every night. When i go to sleep okay, so after hair is completely blown out, i'm going to use the lustre. Stick wax stick and i'm just going to use that on her edges, just to kind of make sure that when i flat iron, the edges, everything is sleek and then i'm going to use this little quick little um tai chi. I think the brand is tai chi little mini flat iron, this flat iron. Isn'T that great, but you know just something i'm using and then i'm using heat protectant again guys. I always use heat protectant before i blow dry it out and before i so press it out. Okay, so i'm just gon na kind of go over the her little baby hairs with a small uh flat iron and then i'm going to just start with the regular flat iron, which is the baby bliss nano titanium, i'm going to have it on the highest setting And i'm going to um still press her hair. Now i am going to use the bio silk before i suppress, because i want it to you know pretty oily and get pretty sleek um, but her the temperature is not the highest. So if the temperature was the highest would have got way way way: more sleeker, okay, um, but anyways um. So before i flat iron it like i stated i did put the biostick on it and this chi. So one is a serum and one is a heat. Protectant and i'm just going to go into small sections with the rat tail tooth comb go over the roots a couple times and then kind of chase it with the flat iron. Okay, a couple spots, if i feel like our hair, is like super frizzy. I am going to use like a bourbon bristle brush and that's going to kind of smooth further smooth out the hairs on the end, just to make sure that it's nice even and smooth process or even a smooth like layout before i go over with a flat Iron, if that makes sense, all i want is you here with me cause baby: you got what i need baby good. Take it all. Just don't take your time because so now that i'm basically done with that now i'm going to just get that um white stick and that small flat iron once again, i'm just going to go over the front section and then i'm going to just kind of start To brush everything into a ponytail, now i'm going to just kind of do a general point so just to see how high she wants it that was too low for her. She said no girl, let's make it way more higher, so we end up kind of putting it at the very top of her head, which is what she wanted. Okay, so that's all, i'm doing guys just getting the brush and just kind of brushing everything in place. I'M just brushing it in place so that way, i'm able to kind of brush out the baby hairs and the section i want out and as well as start to kind of mold the hair up. Now, i'm not going to use the got to be glue. Um spray, this time to mold everything up, i'm actually just going to use edge control to mold everything up. I really just kind of wanted to i've seen this method before and i really just wanted to see what are the end results. So i think the end results end up being pretty well. The only thing i would try to figure out is how to kind of get rid of those waves that a client may have whenever you do put edge control on, but for the most part guys it gives a very, very, very good hold. Everything was like very solid, like i would have with got to be glue spray um and i'm using the even edge control. So that's pretty good, so i'm just kind of doing it in sections with this edge brush and then i'm just going to kind of smooth in sections until i get done with one whole section and then i'm going to kind of put another rubber band. Sometimes i take the rubber band out if i feel like that should be tight, but guys i end up using two rubber bands at the bottom. I end up using a hair tie in the middle and then two more rubber bands at the top. Just to add some height to it and also to add some stability, because i didn't want to keep taking the the hair bow out and the ponytail out, so i just kind of will add them to the ponytail. Okay, make sure you ask your client to make sure that it's not too too too tight. You know so that way, you can kind of adjust it with that um. Whenever i did complete it with the edge control dough, i did use the got to be glued. Just to kind of give a hardening finish just to make sure that nothing was going away. Please i promise it's my last. Oh baby, you got what i need. Um regrets, no apology, love affair between you and me, but i don't care what nobody thinks cause all. I want is all i can see and baby yeah baby. You got what i need hey, then why the hell do you wan na come to me come to me come to me, but i do. I wish i didn't care so much so is all right guys. So now that i got all the sections what i end up doing basically, i end up getting a pack of hair and you know how they have like the little rubber band that's already attached. I literally just grabbed the ribbon and attached that rubber band to the ponytail once i attached a rubber into the ponto, i have that braiding hair, going to the back, i'm going to split off a section of the braiding hair and hold it towards the front and That is going to be the braiding hair that i wrap around the base of the ponytail right there in front. So, but what i'm going to do is i'm going to just start with the braids i'm going to just use that pack of hair with her hair and then i'm just going to kind of start with that now in order to help you kind of, do it Better, since it's at the top of her head make sure you tell your client to kind of lean back if you need to lower her chair just to make sure you get a really good grip and angle now, her hair is very very blunt. She actually just got a cut because she got her her um, her relaxed ends, cut off so you're, going to just need, like a white stick or some edge control and just kind of put it on her hair to make her hair kind of sticky and kind Of blend in with the braiding hair, but all i am doing guys, i'm just plating, platinum, platen and when i see her hair is sticking out or some hair sticking out, i'm just going to kind of put some um put some of that wax stick or the Edge control on the hair and kind of comb it and just kind of like you know, kind of like rotate it and tuck it at the same time, just to kind of hide it behind the hair. Okay, make sure you do this part relatively secure, relatively tight. So that way it lasts, and it's not like poking out anywhere so guys, i'm literally just going to do this the whole time now, when i get to like the middle of the braid, i i'm then going to start feeding hair into the braid okay kind of, Like you would just feed hair into any other braid, wherever my, where my thumb is guys where my thumb is laying that is where i'm going to start adding hair in in the middle okay, just one side, it's going to go underneath my thumb. The other side is going to be continue to continue with that middle part and braid it to the other side. You guys are going to see what i'm talking about right. There see where my thumb at i'm just going to braid one half in and other half goes to the other part where my, where my thumb was at okay guys, so i'm just kind of adding the hair and kind of continuing it with that see folding it Beneath my thumb and just kind of braid it into that middle piece and just keep going so i didn't know i added hair kind of relatively pretty quick. I thought i started adding hair in the middle, but i didn't so yeah, i'm just going to kind of continue, adding hair guys, that's what it seems like and i'm doing this just for the length as well as for the thickness, because i want the braid to Be thick the whole time you know how you do these braided, ponytails and it'll be like super thick at the top and then very thin at the bottom. I don't want to to have that look, so i just want to make sure i just kind of add hair throughout the entire time guys and if you need to kind of smooth the edge control just go ahead and do that. But i'm literally going to do that the whole time she won't separate really really long, so i'm just going to keep on adding until i feel like it's long enough to like reach the bottom of her foot or her, then thighs wouldn't be this way. I can't love you with my whole heart, but you know that i can't stay foreign is, but i'm right back at the market to return no guarantees all right y'all. So now that i'm done braiding, i'm going to get my client to hold the braid, and i'm going to get that section that i left out and i'm going to put a little bit edge control and got to be spray on it. And then i'm going to use my rat tail comb to comb it out and then i'm just going to kind of comb from the top and i'm going to go towards the bottom. Okay do not do from the bottom to the top. I always do from the top to the bottom, whenever um closest to the braid that you kind of did all right, so i'm just going to kind of smooth comb spray smooth and i'm just going to keep on doing that, keep on doing that. Um. If you do need to stop halfway through and kind of blow dry it a little bit and make sure it gets hard, go ahead and do that um. But i'm just going to keep on going, go and go until i get to the root. When i get to root, i'm just going to keep on wrapping wrap and wrap until i'm out of hair completely. You know you know better. You just need the pleasure, but you just can't get enough all right y'all. So when i'm basically done with that and drying everything make sure you just double spray just to make sure guys you do not want it to unravel. Now, i'm going to use the oil sheen, i'm just going to kind of spread the oil sheen all over. Then i'm going to get the plastic kettle and then i'm going to make sure it's boiling with hot water and then i'm going to dip the braid make sure you just kind of you know dip it moving on up and then kind of keep dipping it dip. It a couple times and make sure everything is sealed together, and everything is good. This makes the braid very, very flexible and movable, and everything like that guys and just kind of dry, the braid and squeeze it i'm squeezing it with one of these hand, towels that i use when it comes to hair um and then basically with the edges. I just use the same even edge control. She didn't want a lot of edges, no sideburns. She just kind of want a couple, little slit edges at the front and that's it guys. That is basically how everything turned out. I hope you guys enjoyed this tutorial um. I kind of got tired of using the um the got to be glue spray, so i said you know i wonder how it will look if i use kind of edge control it, so it did not turn out too shabby. I'M pretty sure that i can approve it, especially you know, find a way to get those waves out, but guys. I think it turned out really really good what you guys think make sure you guys like comment subscribe, and i will see you guys in my next video love, y'all, bye,
Comments
SappFamTv: If only I could wear sleek styles often I wish heat damage wasn't a thing