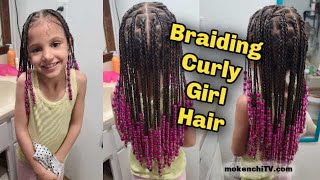
How To : Ponytail On 4C Hair Natural Hair/Silver Natural Beauty#Naturalhairjourney
- Posted on 21 June, 2021
- Ponytail Hairstyles
- By Anonymous
Hello Natural Beauty’s
On today’s video l will be sharing my butterfly bead ponytail hairstyles with you and how l also sleek back this natural hair for my hairstyle
Having a great protective hairstyle for the week is important for your natural hair journey so on today video i will be sharing a step by step beginner friendly video on how to do a great heatless ponytail style on your natural hair its also a great way to stretch your natural hair as you protect it for the week
4c natural hair doesn't always lay down easy so this great routine on my hair will be able to demonstrate a easy heatless alternative way because when theirs a will there is always a way let me teach you how
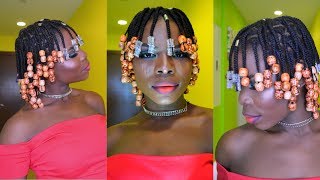
Hi friends welcome back to my video buenas hola como estas bienvenidos for my newbies. That don't know me. I am 4c7 natural. Welcome. Welcome! Welcome! Welcome! I miss you guys. It'S been a minute. It'S been a while i'm so happy to have you guys here and i'm glad that we're back so on today's video, i'm gon na be sharing with you guys how i got this beautiful pony. Bead look! So if you are interested - and you like this video - don't forget to comment like and subscribe and i hope you guys learned something because this look it's cute on any occasion and not only that for a nice summertime vibe, okay. So, let's get to it guys, hello, hello, so for this video i'm gon na be using my water, i have my soft bristles. I got some beautiful butterflies that we're gon na be putting on our hair. Today i love these. It reminds me of the time when i was in new york and i used to wear these very pretty, and i have my butterfly clips as well, and i have some black rubber beans on this container. I have my jamaican black, castor oil lavender scent for hair food and then i also have the african pride shea miracle. Bouncy curls pudding guys. This is not a sponsored video, so these are just my personal items that i use when i'm doing my hair. I do have this scrunchie as well to do my pony, and here we have our scissors just in case. We need to trim anything. I do have my favorite cone if you guys notice, i have so many other colors, but this one it just it just my favorite guys just my favorite, i will also be using some palm rods. This is um blue color and the 12 millimeters very small perm rods, and we also do have our pink one 13 millimeters for this hairdo. I have this beautiful little headband that i'm going to be using in this hairstyle as well, and we have beads of many. So today it's going to be a fun video guys. I cannot wait to have fun. So let's do this! Oh hello, hey guys! Oh i'm so excited to be here. I hope you guys are too because honestly, it's been a while uh, it's good to be back. Let'S start this video, i can't wait to show you what's under this cap, so, let's get to it. I got my pink and i got my blue perm rods that we're going to be using in this video, and i even forgot to let you guys know that i did find some paper to go with these perm rods, because i noticed that the first video i Made with the pearl rods, oh man, these perm rods. What the problem with these perm rods is for me not for everybody. But for me, is that um they have like. I don't know if you could see, but they have these little bumpies bump that get attached to your hair and because of that, i'm not sure. If you know i want to use it without these papers. So it's very important that, for those who people that feel like um papers is needed for their pro run, make sure you go out and buy some of this. You can find this at your local uh sally's. It'S called the perfect paper. The ultimate perm and paper see now, if you can see that, but that's pretty much what it is so we're just gon na put that on our perm rods and then we're just gon na wrap our hair around it. So we're not sticking to no perm rods. Today, okay, so um, i can't wait. Let'S, let's get this going so right now, my hair is oh by the way. Have you guys noticed this beautiful african pattern? Oh it's just perfect. I found this at my local store and you know it just wraps around your nice little bonnet it just wraps around, but for me you know because my head is so small it just it takes over. It takes over. Like honestly, look it's too big for my little hate, but underneath this um bonnet, i have you know my shower cap. I just got off the shower not too long ago. Y'All know me and my shower cap can't let this hair dry for one minute. Then i have my hair done underneath it, so it looks good all right, nice and moisturized saturated we're just going to add a uh. Our shave miracle um pudding to our hair and uh we're gon na go from there. Look at this hair guys, whoo! Look at this hair, my hair is a jungle, so we're gon na take all rings off, because clearly we don't want nothing. That'S gon na snag on our hair, so the rings come off so for the front guys i'm just gon na tuck it away. For now. We'Re gon na work with the front: that's what we we're gon na add some pearl rods in the front to make a cute little bang, because you know i love my bangs, so we just have to have it. I'M gon na remove all the hairs that are already in section. Do a little finger. Detangle right and we're gon na add a pudding to our hair. Then we're gon na go ahead and do our pomade lavender scented um butter. I use it a lot. Here'S our pudding so we're just gon na add some pudding to our hair. Y'All know me can be stingy i like to massage it in there. I already did my um oil, so i don't have to worry about. You know putting oils on my roots, not to worry about that. It'S already nice and moisturized. So after we um after we massage our pudding in it, we're gon na add our palm pomade dying size we're gon na do because from got ta protect our ends. All the way to we're not gon na add too much on the roof. This is my last one. There we go it's nice and moisturized, as you can see, we're gon na wrap it up, wrap it up. So for my braiding area, i'm gon na section right here, but i'm gon na, do a clean part. I'M gon na do a clean part for this braiding area. This is where my comb comes. In there we go just gon na do like a nice little clean part and tuck this away, which is going to be for a ponyta. Okay, we're gon na do a braid and then we're gon na do a twist we're just gon na. Do a thai coil twist and then on the end, we're gon na add a little bit more pomade oil just a little bit, not too much guys and now we're gon na twirl it into coil into a coil nicely coiled and we're gon na do the same. On the other side, i'm gon na do a nice little coil. At the end, there you go another perfect coil, we're gon na throw our cap back on to keep our hair from drying out as we work on the front, i'm gon na put some water we're gon na add our pudding. I'M gon na do a little finger. Detangle: okay, okay, that's detangled nicely now we're gon na add our pudding. We'Re gon na try to remove the knots with our wide tooth comb, since we want to make sure we get the best style coming out of our pearl rod. Now we're going to get our pomade oil put some on our here. This is going to be like a dime size amount to our prayer method. Awesome, i'm gon na go ahead and comb. It once more. Look how manageable this here is guys very manageable comb right through like butter, so now with the same white tooth comb, we're gon na go ahead and do our little parts for our perm rods our papers, so we're just gon na do like a small section right Here clean part, we're gon na tie the rest up there we go and we're going to be using our blue pearl rods for this one. So we're just going to start from the bottom and work our way up. We'Re gon na start from the far end of the pearl ride and hopefully, by the time we get to the front, we'll be ready to move on to the next one. There we go so we got our ends in now. We'Re just gon na row row row your boat gently down the stream we're just gon na. Do that guys: okay, we're just gon na roll with it. Okay, then we just add in the end piece and we got one one down and a couple more to go. Another clean part we're gon na, do it as small as possible, because we want our front to look really cute and really slick, because we just yeah see you see. I have something nice in mind. Okay, just just just follow we're gon na look, we're gon na be looking nice by the time we're done folding, i'm just gon na go ahead and start from the bottom. There we go work our way up we're rolling we're rolling we're. Turning as we roll okay. That'S perfect add in the cap, so i have this last one guys last one. I wanted to show you before we move on so so far so good. We are done with all the front rows. Now we're going to move on to the fun part we're going to move on to the side so guys. If you see here, i had added my beads to my twist. I have the color combination, pink and orange and gold on top and then on the bottom. I have a different combination, so we're gon na do the same on the other side: okay, okay, so first we're gon na do the pink and the gold orange so we're gon na do pink. Oh also, i do have uh a handy little two here, our bead hook that um i'm gon na be able to use on this video. It'S a quicker and most faster way of putting beads on. As you can see, i already have my beads, so i think we have two orange a gold and then a pink so we're gon na be putting our gold and then our pink okay. Here we go see, let's make sure it's correct, perfect, so we're just gon na put it into our twist. Just like this put it. Let me show you a slow motion. Put it in here. It'S in the hair, now we're just gon na oops we're gon na. Try that again put it in i'm gon na pull up pull up our beads and there we go so yeah. We did it right first time, just perfect. Now we're just gon na put a b, i mean not a b we're just gon na put a rubber band on the end here, so it won't come loose on us. We measure it to the side that we wan na put the rope to being in. So we went a little up here, so we're just gon na do that right there there we are just gon na insert the braid into the roofing and we're done now we're gon na do the bottom piece. So we have gold um. We have the blue and the gold and the four pinks. So let's try the blue, it's a gold and then we have four pinks. Then we do the gold. Once again here we go, then we do our blue. There we go perfect, insert pull up, pull through and we're in see fast. Don'T we look beautiful? Doesn'T it look so pretty guys? I can't wait to see the finished hairstyle. Let'S see how it looks, i'm sure you guys can't wait either see pretty simple. Now we're gon na go and do our pony, and we should be continuing with our pink permit, hey guys so for the front. We'Re gon na put a little bit of pomade to our edges like so a little bit more because we're going to be brushing it back, we're going to brush our little baby here. Our little ends again brush the other side. I have my blue wrong band and my silver scrunchie and we're just gon na oops all right guys, i'm gon na turn, as we do this video, because i want you guys to see how i put it on wait a minute. Okay, so brushing our nape. I think we got it good, we got it covered, we're just gon na gather all the hair together, we're gon na do a high ponytail for this style. I have my scrunchie just gon na tie it all up we're gon na make sure it is tight. This looks good right here, doesn't it so you could choose to leave it like this, but i'm going to do some curly coily twist on top and that's where our pink rods are gon na come in so guys, as you can see, my style is almost on The go go. I just left these this part right here for you guys, so you can see what i'm doing uh i started with the pink rods, but we're gon na finish with the blue ones, because i ran out of the pink one i do have enough, but i don't Feel like opening another package is pointless. We only have this two left so we're just gon na start off by combing. Here, combing it out it's already uh ready to go with the oh. There you go um, we're gon na add our paper. It'S already ready to go with. You know it's not wet or anything, but it's perfect for well. Actually, let's just let's just spritz it a little bit with some water at least the ends there. We go pretty much. It'S not dry. It'S it's nice and damp for this style, so we're just gon na add the blue ones. So i'm just gon na comb. This section now as well put our pearl rods cover it up with some papers, put it on here twist and we good too. There we go, and this is our completed style, guys very nice. I'M gon na go under a hoodie, bonnet dryer. Let this dry out. I'M gon na come back to show you guys the results and the curls and patterns and so cute, so guys. I hope you like this look, don't forget to share with your friends your cousin, your coworkers, your mama share with whoever you think is gon na sue. This beautiful hairstyle - and i hope you know if you have a little girl - you could do this hairstyle on her hair, she's gon na look so cute, mostly for picture day and for special occasions. This is definitely something i will give it another shot. I will give it another try, because i am loving it guys. I am loving it. I hope you like it too, so guys. I hope you enjoyed this video that i just made and showed you guys. I really really think that this style will be rocking over the summertime. If you guys try it, let me know i can't wait to see how yours come out. You want to show some pictures of the style. Oh, my god, that'll be a blessing and i'll be happy to look at them and you rock this style girl cause. I know you gon na love it. I love it. So don't forget to like comment and subscribe guys, and i hope you guys can make it for my next video and many more bye. You
Comments
Itsjustsp: I absolutely love your channel queen keep up the good work !! Hair goals