The Most Realistic Kinky Edge Wig !!!! | Realistic Hair Line Wig | Ft Ilikehair
- Posted on 13 February, 2023
- Ponytail Hairstyles
- By Anonymous
hey babes welcome back to my channel
hair info
Used wig: Hyperrealism Kinky Edge HD Lace Frontal Ventilated Wig
Link to the same wig: https://bit.ly/3UxLW03
Extra 25% off coupon code:Rosh25
Website link:https://bit.ly/3VvKxbB
I PART wigs collection:https://bit.ly/3Ha0XSr
Ventilated wigs Collection:https://bit.ly/3VxkjWc
Instagram: https://www.instagram.com/ilikehaircom...
Facebook: https://www.facebook.com/ILikeHair-Wig...
Tiktok:https://www.tiktok.com/@ilikehairoffic...
#kinkyedges #ilikehair
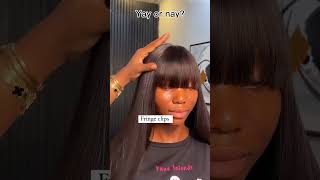
Hey guys welcome back to my channel, let's just get into this wig, it's given natural and I'm so here for it listen. Are you guys seeing the edges on this wig like let me zoom in, for you? Are you seeing the edges it's giving scalpiana it's given natural okay, so I'm gon na show you how I slay and install my 4C kinky hair texture wig. If you want to learn, then keep on watching the wig that I will be installing in today's video is from I like hair. This is what the wig looks like fresh out the box. The edges look amazing. I can tell that I do not need to do a lot of tweeze into it. This is a HD lace wig, so you know, HD lace is going to melt down flawlessly now I do have to bleach the knots, but we'll get to that. So everything you need for the wig is included, so you have your wig cap, your elastic band, your Edge brushes, your rat tail comb. This is what the wig looks like when I try it on my head. It looks pretty good now. The knots are super tiny on this wig. However, I do have to bleach it to give it a more natural look. I'M going to move on to bleaching and I'm gon na take the salon care blue, flash powder lightener, and this is like a blue tone and I mix it with a cream developer number 30 and I'm gon na go ahead and apply this all over the lace. In a thick consistency and leave it on for about 30 minutes now, as you can see, I didn't bleach where the baby hairs were like the edges, because, honestly, I didn't need to I just needed to bleach behind that hairline. So while I let the bleach do its thing like I said, let it sit for about 30 minutes and then I'm gon na wash it out off camera. This is how it's looking it looks. Amazing, I'm gon na go in with my blow dryer and start blowing out that hair and I'm gon na take some Chi hair serum and I'm just gon na apply this to the hair, to give it a nice shine before I straighten it now I want to Keep some of the texture in the hair, so I'm only going to run my flat iron through it once and I'm just going to take sections by section - and this is what the hair looks like. It'S giving you know: silk press or relaxer blowout and I'm gon na go in with my hot comb and, as you can see, I'm not gon na hot comb. The edges I'm only hot combing, the top of the whip, because the top of the wig, the hair, is a little bit crimpy and I don't want it to be crimpy on the top I'm going to go in with my tweezer and start tweezing, the hairline a Bit, I didn't do a lot of tweezing honestly guys I did like probably five minutes of tweezing and then I went in with my curling iron drop a little curl in it, but then I brush them out because I wanted the hair to look like it. Just has a lot of volume which it does have a lot of volume. It'S like 180 density weight, so she is given volume. Next, I'm going to go in with my liquid foundation and I'm just going to apply this all over the lace. This is just going to help you to match my skin perfectly when I apply that Wick. So, yes, I already have my wig cap on and I'm going to go ahead and apply some foundation on that as well. Just to cover my hair, because you know my hair is black underneath and I don't want to see my hair peeping through got ta make it look like Skin So pop that wig on girl. So this is how she is looking and I'm clearly here for it now guys I've been wanting to try this kinky Edge wig from time. I'Ve done a kinky wig before, but it wasn't a frontal. It was a closure. So it's my first I'm trying the frontal and I've been wanting to try the frontal. So, as you can see, I'm just cutting away all that extra lace and I'm just gon na comb the front of the edges away from the face now I will say that the edges come down pretty low on me and I do have you know kind of A small all ahead - and I don't need all that hair on my forehead area. It'S just gon na look really weird on me, so I'm going to cut away a bit of that lace right now, like a bit more just so. The wig fits my head properly and the hairline looks good like it suits my head, but yeah the wick, the hairline does come down a bit low um. I think that's kind of a good thing if you want to bring your wig down a bit lower, so yeah, I'm just going to go in with the scissors and cut away all that extra lace time to apply the wigs. So, as you can see, I'm actually using makeup wipes to get rid of all that extra makeup on my forehead. Listen, I hate applying my wig when I already have makeup on, but I had places to go today so yeah. I had my makeup on so I just went in with some skin protector because I always apply skin protector before I apply any kind of lace glue to my skin. So now I'm gon na go in with lace, glue and guys um all the products I'm using is my own coming very soon. I know I've been saying this forever, but I promise you it's coming soon. So yeah I'm just applying the lace glue on my forehead area and I'm gon na do two layers of glue today, um yeah, so I'm doing two layers of glue, so I'm just gon na apply some more glue to the forehead area and use my red tail. Comb just to spread that out like butter. You want to make sure that the glue is dry clear before you pop that wig on or else it's gon na look really weird, because you can see the white glue, sticking out and yeah. It'S just not going to be a look, so I wouldn't whip my blow dryer and on a cool setting, and then I'm just going to to pop that wig on just like that slide it on my head. Alright, so the wig is on I'm gon na go in with the right tail, comb and press it down. Try not to use your finger as much as I do, because you know your fingers have oil in it and whatever so it might not make the glue. You know melt down like it's supposed to that's why I use the right tail comb but yeah. Sometimes I get carried away and use my finger. So now I'm going to go ahead and just do the same thing on the side as well apply some of that glue on the side, and I did the same thing where I apply two layers of glue: wait for it to dry, clear, spread it out with That comb now, as for the comb when you're going to use the comb to melt down your lace wig, you want to make sure the comb is clean by the way. So I always go ahead and clean my comb off by using makeup wipes or using alcohol to clean the comb, because you don't want to get the glue all over on top of the lace, because again, that's just not going to be cute. So yeah I'm gon na go in with the blow dryer and melt it down. Moving on to the other side, I'm gon na go ahead and apply the glue, and I kind of speed this part out, because on honestly, it's literally the same thing. I'M doing on this side and if you're near your wigs, you can check out one of my more detailed wig application videos I'll link one down below but yeah. I like to apply my glue in sections. I feel like it's a lot easier for me to do it that way, and it's a lot easier for you guys to learn as well. So yeah the wig is glued down and I was not sure if I was going to do a center part or a side. Part honey. I'M kind of a side part girl, but I feel, like the center part, is also growing on me. So yeah I'm just gon na comb down those edges and you know they're, looking really nice and really natural and I'm here for it. They literally look like my own edges. So now I'm going to go in with my melting spray and there's a lot of melting spray on the market, but again I'm using all my own products and they will be available very very soon. So I'm just applying that to the edges, and this is just going to make sure that the wig is on completely melted down to Perfection and then I'm gon na go ahead and tie it down and I use the stocking. You can also use use a satin cloth or elastic band to tie it down to melted, and I left it on for about 10 minutes and then I'm going to take it off and voila. She is looking melted like I said. I want to keep the edges As Natural as possible. All right, so I'm gon na be doing a side part. So I'm just gon na go in my comb and part it I'm. Obviously you know feeling this wig. I'M really feeling it. I love the hairline on this wig. I love the natural texture of it, so I'm gon na go ahead and I'm gon na go in with my hot comb once again girl. Let me tell you: it was hot like that hot comb touched something it was burning, so be very careful when we use a hot comb. Okay, I'm gon na go in with some hair wax just to make the wig look a little bit more flat on the top, because she was sitting a little high. Like looked like a hat, so I had to like you know, press it down a bit but yeah. This is pretty much the completed. Look. I really love how this turned out. This is my first time when I like hair wig, so make sure you check out other reviews on this hair and yeah. I love how it turned out comment down below. Let me know what you guys think. I think the lace looks amazing on this wig. It'S definitely given HD and I love I'm living for the texture by the way so yeah I added some hairspray just to give it a bit more volume to hold my non-existent curls but yeah. I was here for it. So I'll see you guys in another video. Very very soon I love you guys, thank you for watching and supporting my channel bye.


Comments
Ashley L: I don’t wear wigs but every time I watch you install one my confidence is at 1000% and I think I can do this! When the video is over it’s like “Girl Na!”
Kie RaShon: so pretty! Love how you laid this
Graciously Blessed: Thank you, Ms. Rosh Posh. This was a great tutorial. ✝️
ALL BEAUTYBYJACQY: The hair is beautiful and I can't wait for your own products to come out. I've been waiting for a long time..
Mo n: It's about time these hairlines got up tonspeed with what pressed hair looks like - love this install
Godly Beauty Ministries: Loved it sis! God bless you ❤️
BlackPinkSoul💕: This is a winner!!! ❤ cute per usual!
Shereese Blackman: I'm so feelin' the natural edges
Youmna Amir: Amaaaazing ❤❤
Frazzled Haloz: Beautiful
Carlene Clark: Loving this ❤❤❤❤❤
Юлия Каштанова: Привет из Москвы, Красотуля Ты. Желаю тебе и твоим Прекрасным Доченькам и мужу Здоровья. Люблю Вас из России.
Clarity_Culture: I love this hair !!! ❤can you sell it to me !! Love it so much ❤❤
Mo n: Why does that hot comb pass remind me if the time my hair dresser burned off a little bit of the front of my hair one quick pass
AsiaMarii: I’ve never seen an orange scalp or a darker scalp everyone’s scalp is lighter then what ppl do for wigs
Dee C: Your best look ever.
Shelenne Anthony: So gorgeous
Luis Diaz: Can you wear it glueless?
Ms. Shabria Gxo:
Ms Belinda:
M'baffoué Ange: ❤❤❤❤❤
Everything is Lucy: Ready to learn
Emoretta Robinson: This install is flawless! I'm liking that companies have come out with natural looking edges. And I'm patiently waiting for you to announce your product launch dates. I just know your company is going to be a success. But I understand that you've been testing the products before releasing the brand.
Dee Luther: First Comment Gorgeous thumbNail Tho U DiD a Amazing Job You Looking Hella Beautiful Makeup Always Look good Have a Marvelous Week Too Stay Bless N Be Safe Always
Melanin Monroe: I love it!!! That texture is so pretty
DeeDeeLove: Yesss❤
WR: Make a video on how to curl your wig please.
clihminaj: You ate this look up! You should do a Nicki Minaj super freaky girl wig!
sleigh: so pretty